Google surprised Android enthusiasts by releasing the Android 16 Developer Preview months ahead of its typical schedule. This also signals a shift in the public release cadence, moving from Q3 to mid-year. This preview is specifically for developers, manufacturers, and enterprises working on mobile software, and it’s not recommended for everyday use. However, if you have a spare, compatible Pixel device and are eager to explore the latest Android iteration, this guide will walk you through the installation process. Be aware that you may encounter bugs and performance issues.
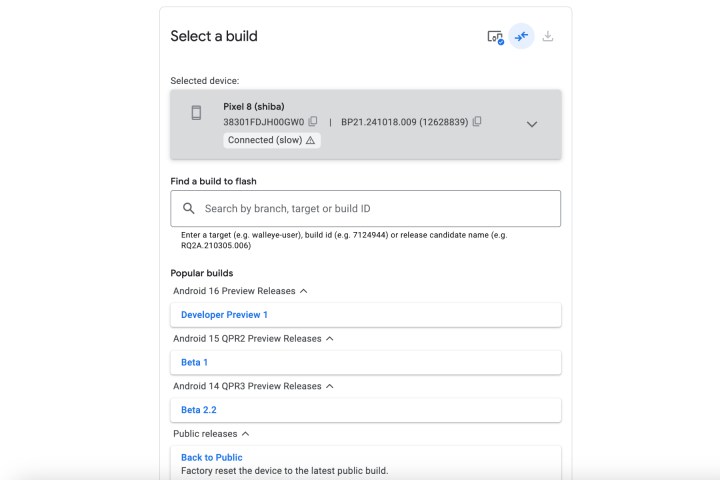 Using Android Flash Tool to install Android 16 on Google Pixel 8 Step 1.Selecting the appropriate Android 16 build within the Android Flash Tool. Nadeem Sarwar / MaagX
Compatible Pixel Devices
The Android 16 Developer Preview is currently compatible with the following Google Pixel devices:
- Pixel 6 and Pixel 6 Pro
- Pixel 6a
- Pixel 7 and Pixel 7 Pro
- Pixel 7a
- Pixel Fold
- Pixel Tablet
- Pixel 8 and Pixel 8 Pro
- Pixel 8a
- Pixel 9, Pixel 9 Pro, Pixel 9 Pro XL, and Pixel 9 Pro Fold
Preparing Your Phone
Before installing Android 16, you need to enable a few settings on your phone:
-
Enable Developer Mode: Go to Settings > About phone and tap “Build number” seven times.
-
Enable OEM Unlocking and USB Debugging: Go back to the main Settings menu, then System > Developer options. Enable both “OEM unlocking” and “USB debugging”.
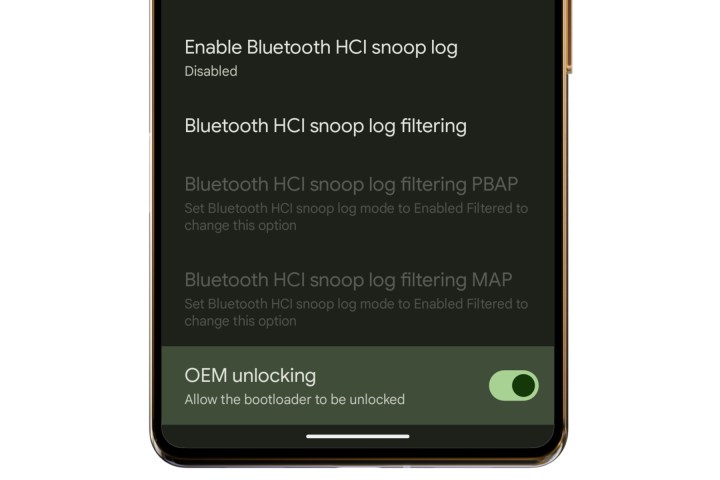 Enabling the OEM unlocking system on Android 16.Enabling OEM unlocking in Developer options. Nadeem Sarwar / MaagX
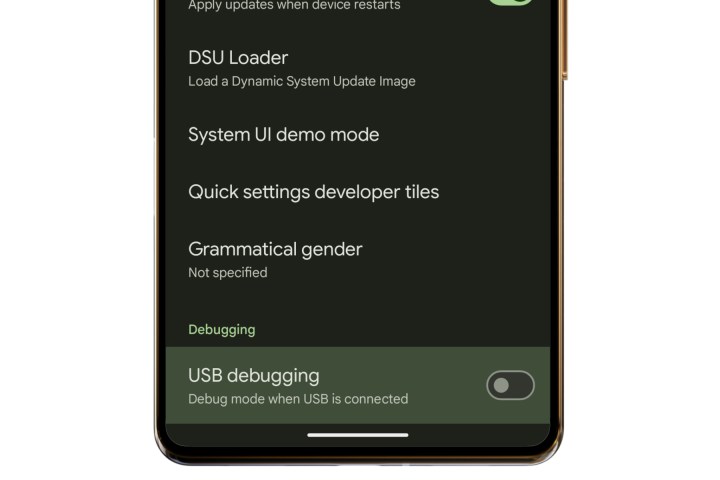 OEM debugging on an Android phone.Enabling USB debugging in Developer options. Nadeem Sarwar / MaagX
- Set USB Connection Mode: Connect your phone to your computer via USB. Swipe down from the top of your phone’s screen, expand the notification, and select “File transfer / Auto mode” under “USB used for”. You may need to authenticate this change.
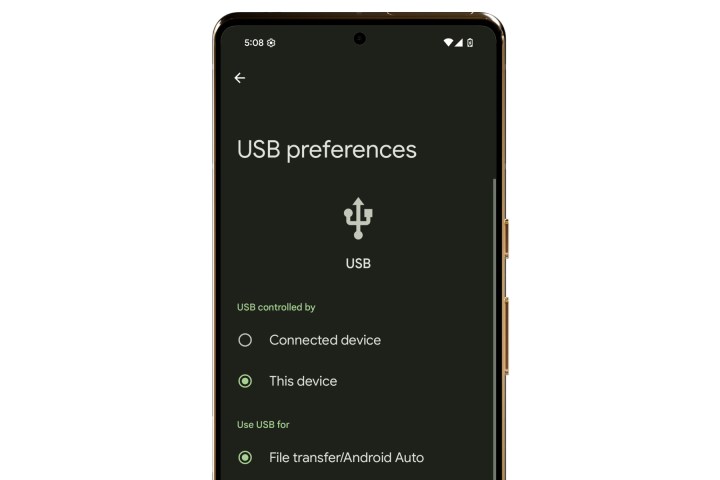 Setting up USB behavior on Android 16. Nadeem Sarwar / MaagX
Setting the USB connection to File Transfer mode. Nadeem Sarwar / MaagX
Installing Android 16 with the Android Flash Tool
The easiest way to install the Android 16 Developer Preview is using the web-based Android Flash Tool. You’ll need a computer with Chrome or Edge and a USB-C cable.
-
Connect Your Phone: Connect your phone to your computer.
-
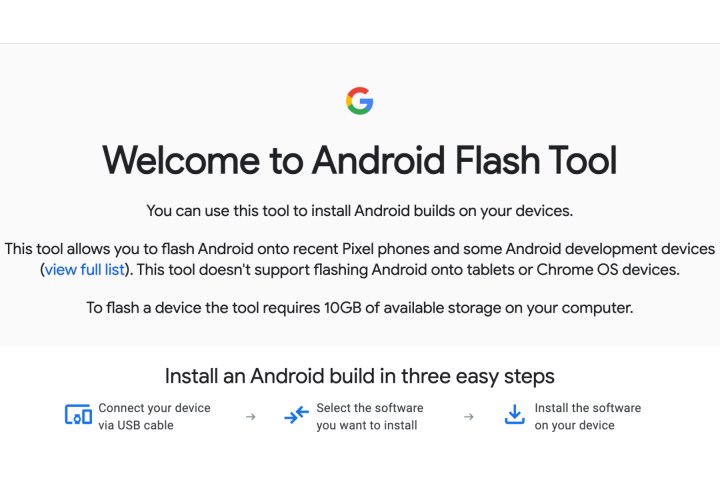
Open Android Flash Tool: Open Chrome or Edge and navigate to flash.android.com.
-
Grant Permissions: Select “Allow ADB access” and then “Add new device”.
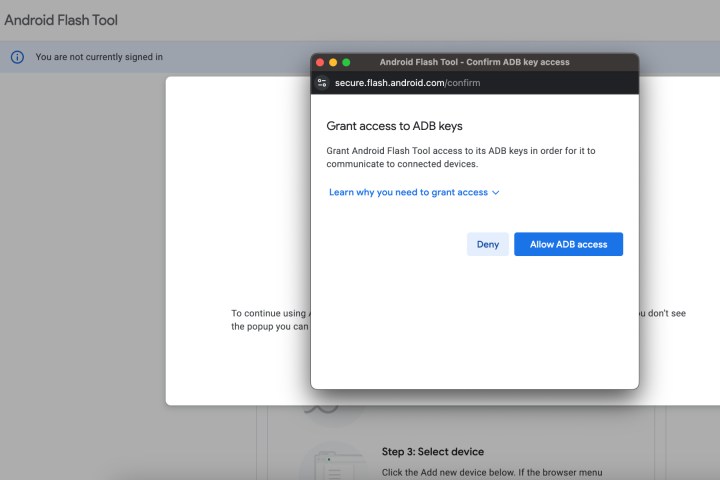 Using Android Flash Tool to install Android 16 on Google Pixel 8 Step 3.Granting ADB access within the Android Flash Tool. Nadeem Sarwar / MaagX
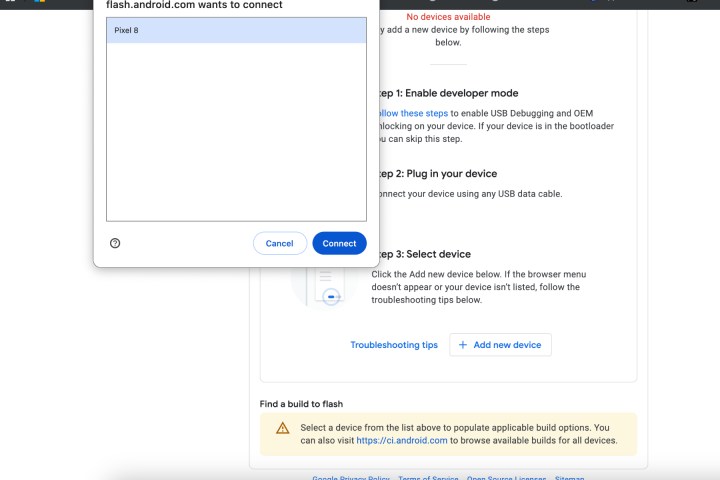
- Select Your Device: Choose your connected device and click “Connect”.
 Using Android Flash Tool to install Android 16 on Google Pixel 8 Step 4. Nadeem Sarwar / MaagX
Selecting the target device for installation. Nadeem Sarwar / MaagX
- Enable Debugging: Click “Always allow from this computer”.
 Using Android Flash Tool to install Android 16 on Google Pixel 8 Step 2. Nadeem Sarwar / MaagX
Connecting the device to the Android Flash Tool. Nadeem Sarwar / MaagX
-
Select the Correct Build: Choose the Android 16 build for your specific Pixel device.
-
Install the Build: Click “Install Build”. Your phone will reboot into Fastboot mode.
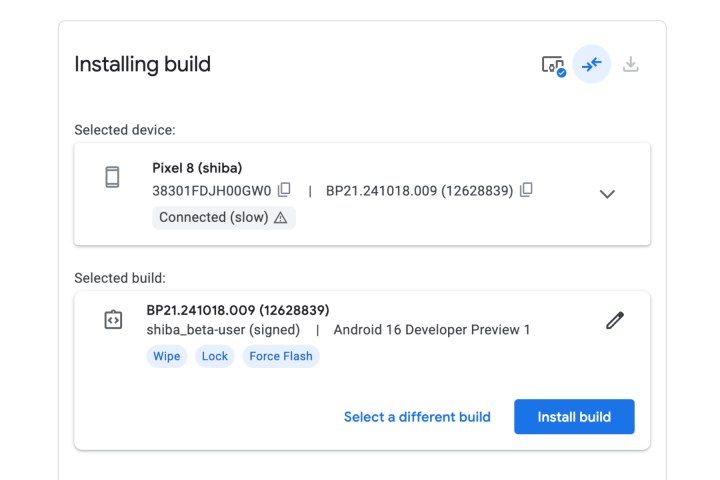 Using Android Flash Tool to install Android 16 on Google Pixel 8 Step 6. Nadeem Sarwar / MaagX
Initiating the Android 16 installation process. Nadeem Sarwar / MaagX
- Confirm Installation: Confirm you want to flash the build.
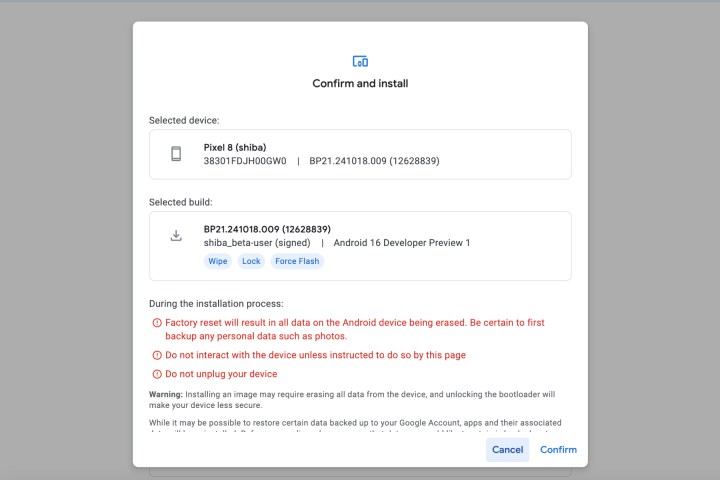 Using Android Flash Tool to install Android 16 on Google Pixel 8 Step 5. Nadeem Sarwar / MaagX
Confirmation step before flashing the Android 16 build. Nadeem Sarwar / MaagX
- Complete Installation: Once complete, disconnect your phone. You may be prompted to lock the bootloader again using the power and volume buttons.
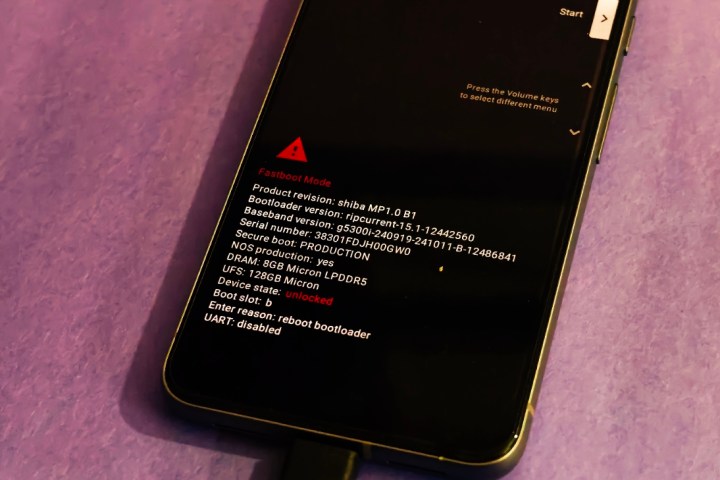 Installing Android 16 on a Google Pixel 8 Step 8. MaagX
A successful Android 16 installation message on the Android Flash Tool. MaagX
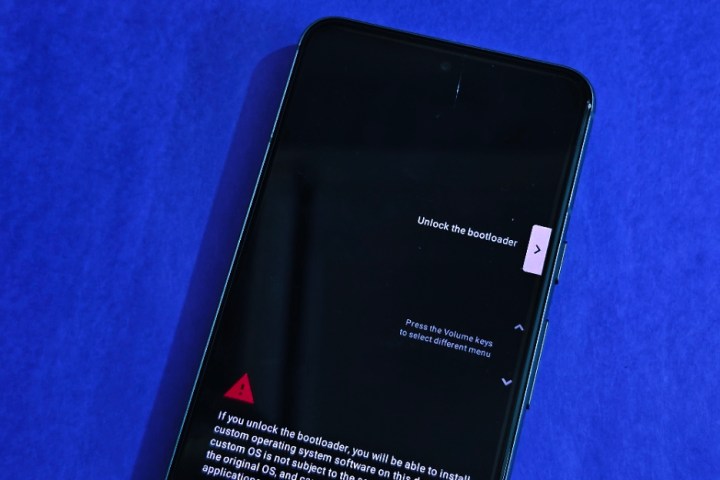 Installing Android 16 on a Google Pixel 8 Step 2. MaagX
The device reboots after a successful Android 16 installation. MaagX
Troubleshooting
Some carrier-locked phones may not allow bootloader unlocking. Using a USB hub or adapter instead of a direct connection can also cause issues. If your device fails to boot, you may need to manually enter Fastboot mode by turning it off, then holding the Volume Down button and the Power button. Once in Fastboot mode, relaunch the Android Flash Tool. After installing the Android 16 Developer Preview, you’ll receive OTA updates automatically.


