Taking a screenshot on your Windows laptop or PC is a simple yet essential skill. Whether you need to capture an error message, share a funny meme, or document your work, knowing the various screenshot methods available in Windows 10 and 11 can significantly boost your productivity. This guide explores all the built-in tools and techniques, from basic keyboard shortcuts to the versatile Snipping Tool.
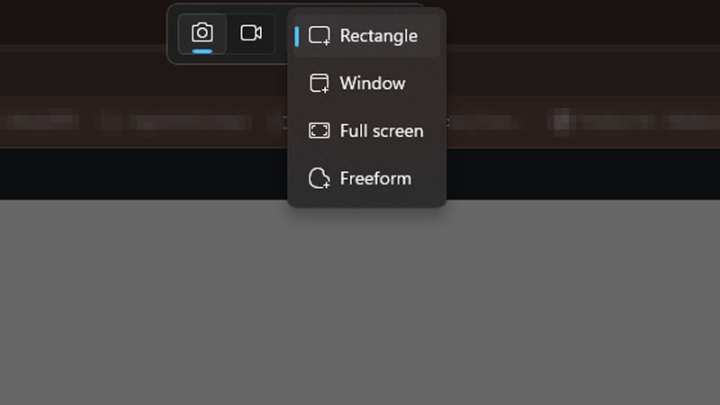 Snipping tools modes in Windows 11. DigitalTrends
Utilizing the Snipping Tool for Precise Captures
The Snipping Tool is arguably the most effective built-in method for capturing screenshots in Windows. While not as feature-rich as some third-party software, it offers excellent control over the captured area, making it ideal for precise screenshots.
Step 1: Press the Print Screen key on your keyboard to launch the Snipping Tool. Alternatively, search for “Snipping Tool” in the Windows search bar, or press Windows key + Shift + S. Then, select New.
Step 2: The screen will dim slightly, and the Snipping Tool menu will appear. The default mode is rectangular snip, allowing you to click and drag to select the desired area. The dropdown menu offers alternative modes: free-form snip, window snip, and full-screen snip.
Step 3: After capturing the screenshot, it appears in the Snipping Tool interface and is copied to the clipboard. You can select Mark-up and share for basic editing within the tool or open the image in your preferred image editing software. You can also directly paste it into other applications or continue capturing more screenshots.
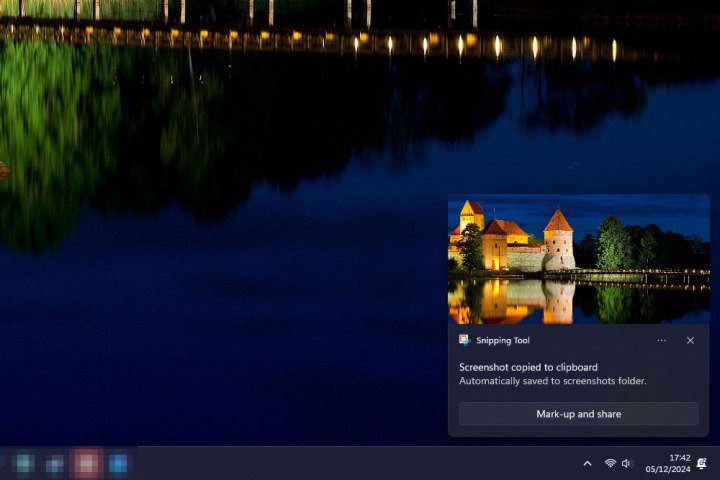 Snipping tool screenshot in Windows 11. DigitalTrends
The Quick and Easy Print Screen Method
For quick, full-screen captures without any extra steps, the classic Print Screen keyboard shortcut is the simplest solution in both Windows 10 and 11.
Step 1: Press Windows key + Print Screen. If your Print Screen key has secondary functions (common on laptops), you might need to press the FN key simultaneously.
Step 2: The screen will dim briefly, indicating a successful capture. The screenshot is automatically saved as a PNG file.
Step 3: Locate your screenshot in This PC > Pictures > Screenshots.
Capturing Screenshots with the Xbox Game Bar
While primarily designed for gamers, the Xbox Game Bar provides a handy screenshot function in Windows 11.
Step 1: Press Windows key + G to open the Xbox Game Bar.
Step 2: Click the Screenshot (camera) icon in the top-left corner of the Capture window. Alternatively, press Windows key + Alt + Print Screen.
Step 3: Find the captured image in This PC > Videos > Captures.
Using Snip & Sketch in Windows 10
While superseded by the Snipping Tool, Snip & Sketch remains functional in Windows 10, offering slightly different functionality.
Step 1: Launch Snip & Sketch from the Start menu or press Windows key + Shift + S. The screen will dim, and a toolbar will appear at the top with various snip options.
Step 2: A notification confirms that the screenshot is copied to the clipboard, providing an option to edit within Snip & Sketch. Clicking this notification opens the captured image in the app for cropping and marking up with pen, pencil, highlighter, or eraser tools.
Step 3: Alternatively, within the Snip & Sketch app, click the arrow next to New and select Snip now. Capture your screenshot, and it will automatically open in the app for editing.
Step 4: Save the image using the Disk-style button or open it in other image editors via the Three-dot menu and Open with option. (In Windows 11, you can directly edit in Microsoft Paint using the Edit in Paint button).
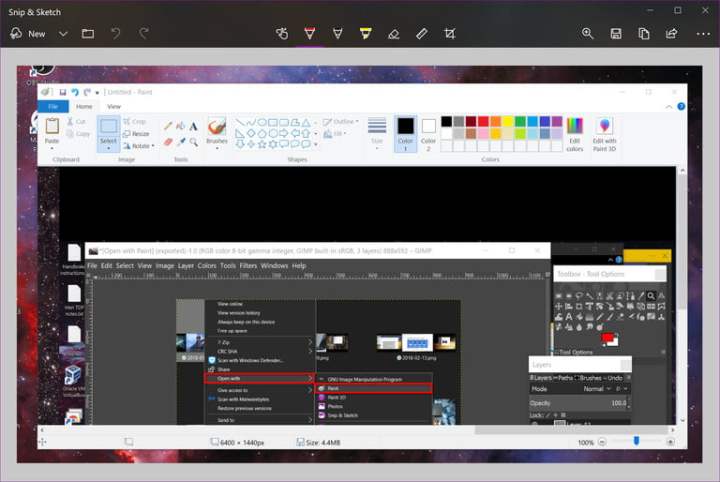 Using the Snip and Sketch app. Image used with permission by copyright holder
Saving Screenshots to OneDrive
For seamless access across devices, configure OneDrive to automatically save your screenshots.
Step 1: Click the Cloud icon near the system clock (or in the hidden icons menu). If it’s not visible, launch the OneDrive app and sign in.
Step 2: Click the Help & settings (gear) icon, then select Settings. Choose the Backup tab and check the Screenshots box. Click OK. (In Windows 11, navigate to Settings > Sync and backup and enable Save screenshots I capture to OneDrive).
Step 3: Now, using the Windows key + Print Screen method will automatically save screenshots to OneDrive. You’ll receive a notification instead of a screen flicker. Ensure the Screenshots folder is synced for local access.
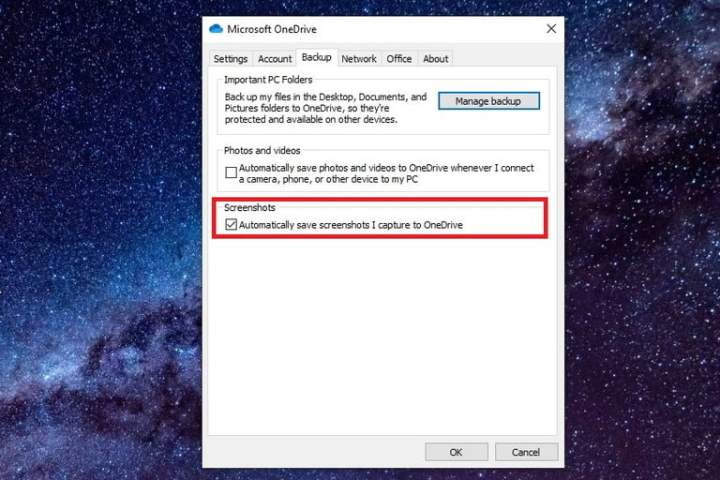 Screenshots backup setting in Microsoft OneDrive. Image used with permission by copyright holder
Screenshotting on Other Devices
For Mac users, taking screenshots is equally straightforward. Command + Shift + 3 captures the entire screen, while Command + Shift + 4 lets you select a specific area.
On Chromebooks, Control + Show Windows captures the full screen, and Control + Shift + Show Windows allows for area selection.


