Transferring small files between your Windows computers can be a hassle. Using a USB drive, cloud storage, or even setting up a local network often feels like overkill for just a few documents or images. Fortunately, Windows has a built-in solution that’s fast, easy, and perfect for this scenario: Nearby Sharing. This feature allows you to quickly and wirelessly send files between nearby Windows 10 and 11 PCs.
This guide will walk you through enabling and using Nearby Sharing to streamline your file transfers.
Enabling Nearby Sharing on Your Windows PCs
Before you can share files, you’ll need to enable Nearby Sharing on both the sending and receiving computers. The process is similar for both Windows 10 and 11.
-
Open Nearby Sharing Settings: Open the Start Menu or search bar and type “nearby sharing.” Select “Nearby Sharing settings” from the results.
-
Turn on Nearby Sharing: In the Shared Experiences settings, locate the “Nearby Sharing” section and toggle the switch to “On.”
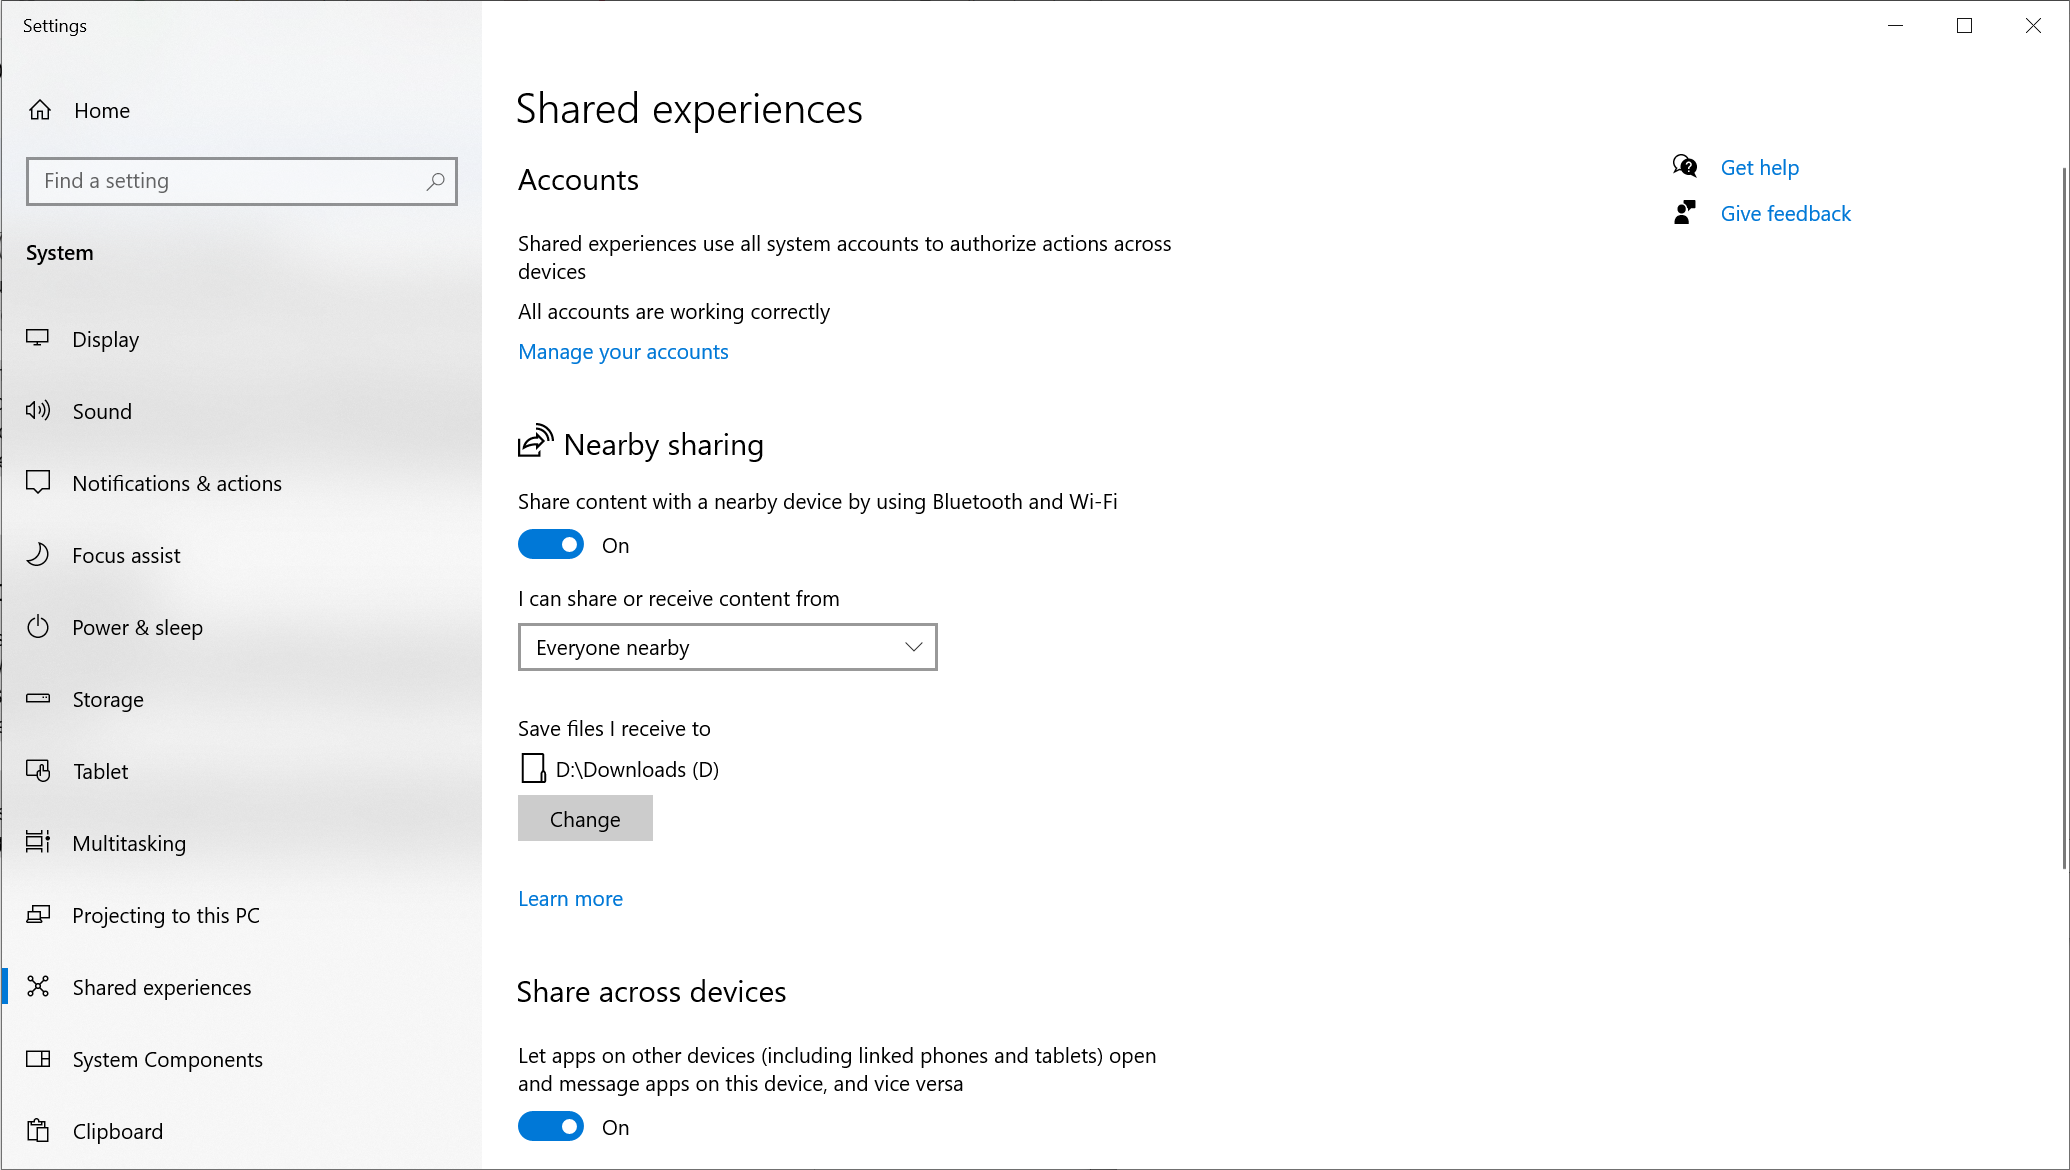 Nearby Sharing settings in Windows 10 (left) and Windows 11 (right).
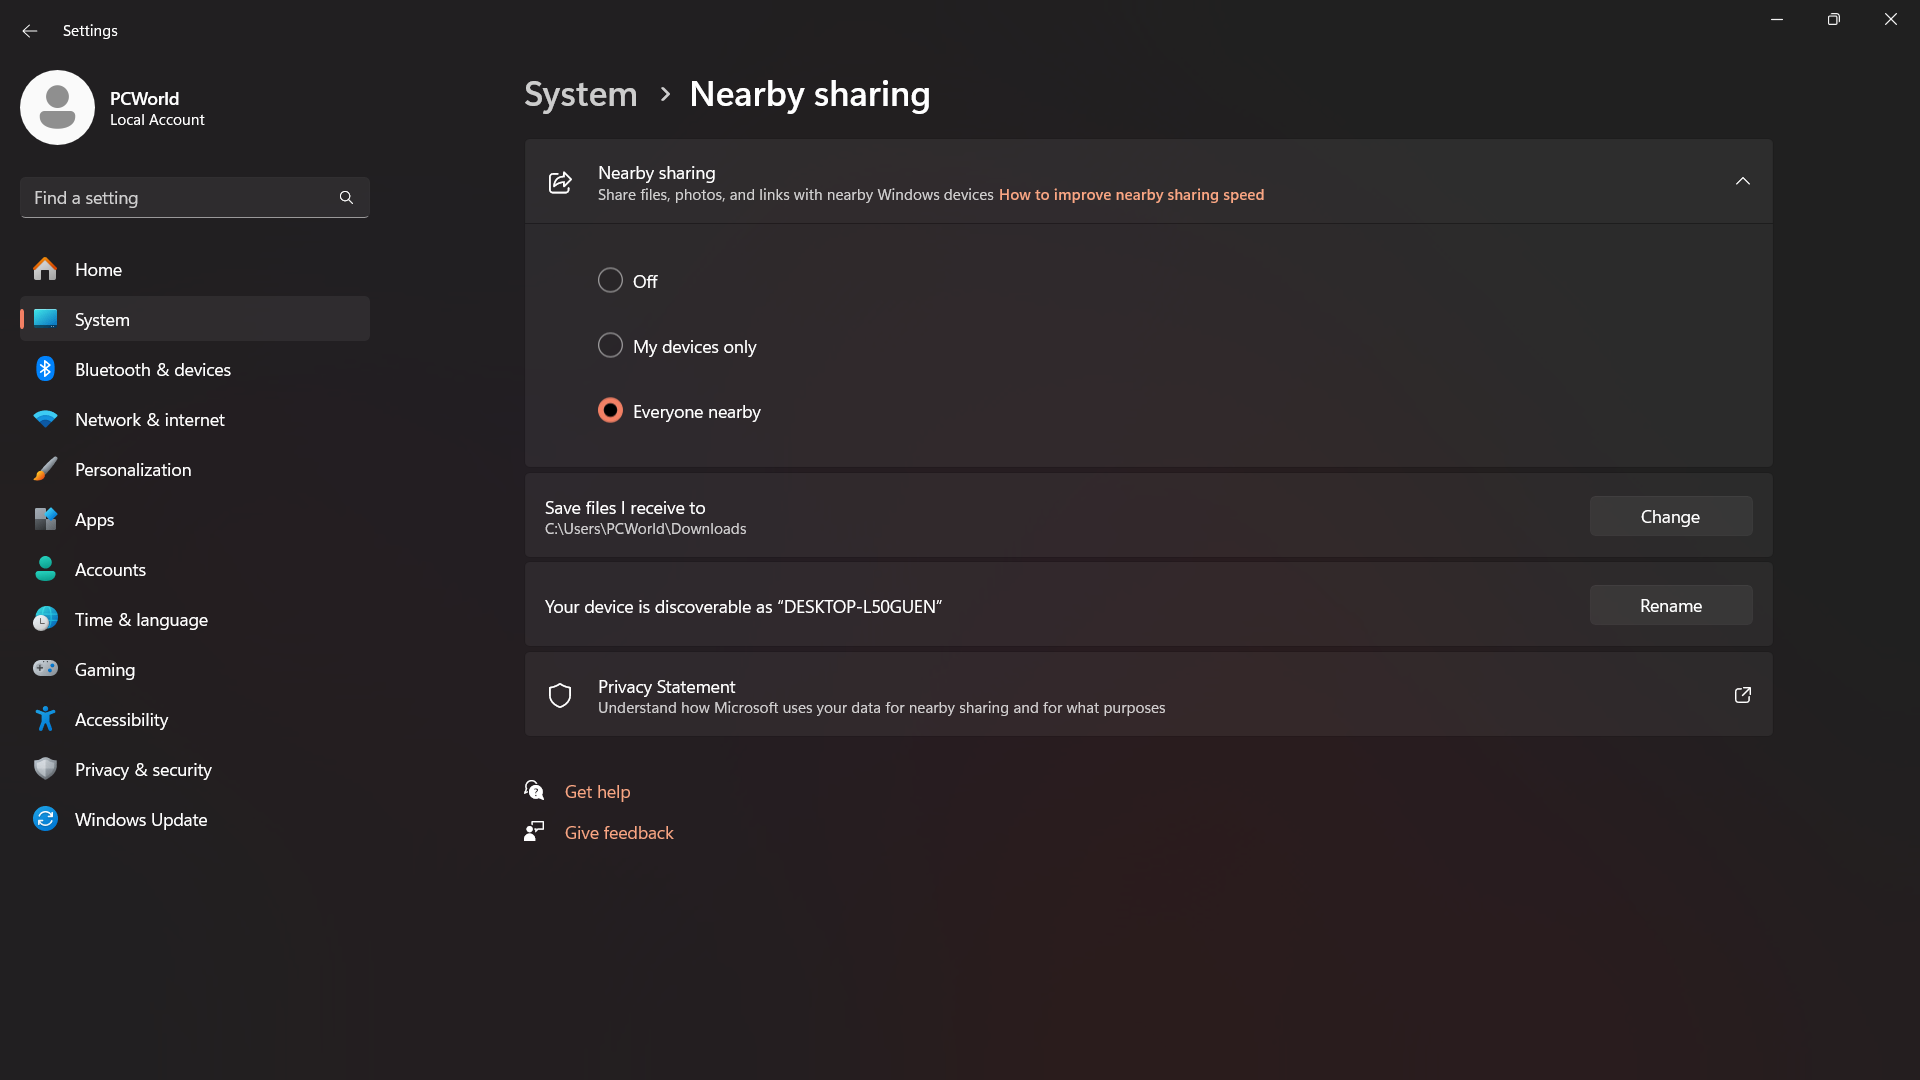 Nearby Sharing settings in Windows 11.
- Configure Sharing Options (Optional): You can choose to share with everyone nearby or limit sharing to only your own devices. You can also change the default download location for received files. The default is your Downloads folder.
Sharing Files with Nearby Sharing
Once Nearby Sharing is enabled on both PCs, you can start transferring files.
-
Select the File(s): Locate the file(s) you want to share in File Explorer.
-
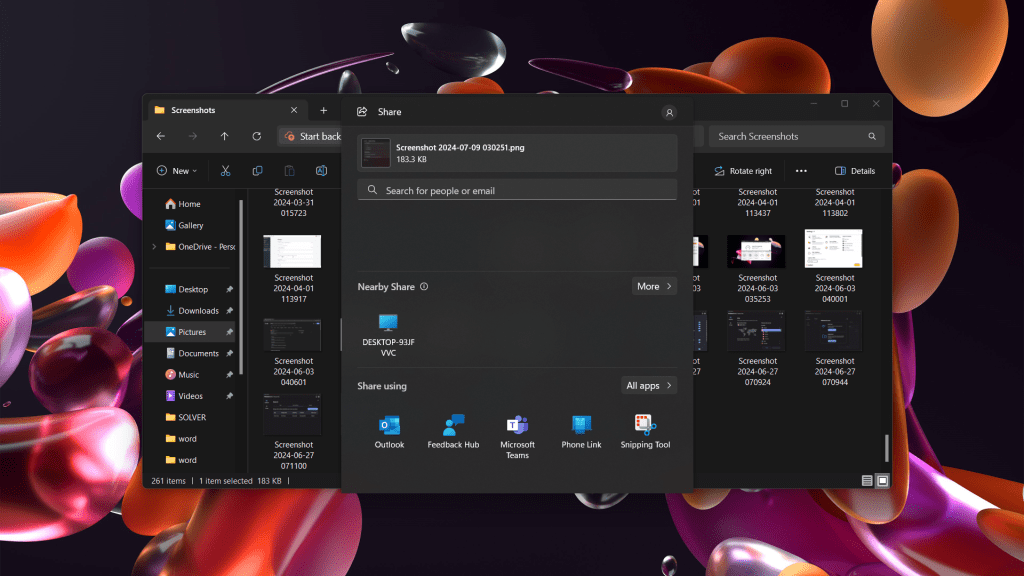
Initiate Sharing: Right-click on the selected file(s) and choose “Share” from the context menu. Alternatively, you can click the “Share” tab in the File Explorer ribbon and then click the “Share” button.
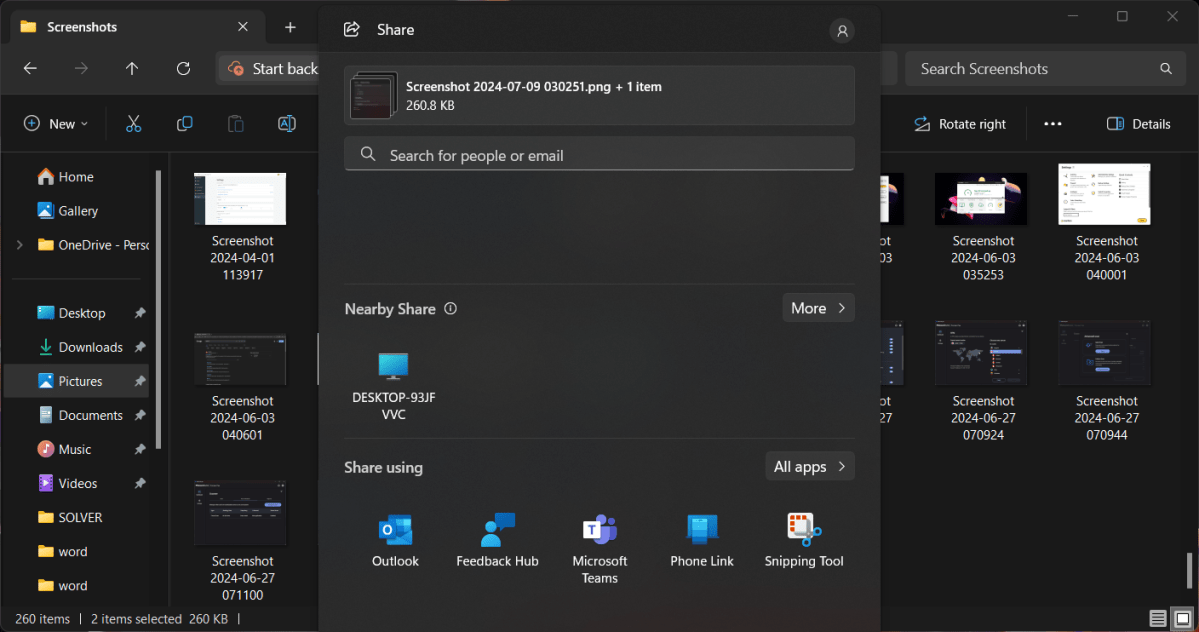 Sharing menu options in Windows 11.
-
Choose the Receiving PC: A window will appear displaying nearby devices available for sharing. Select the target PC.
-
Accept the Transfer: A notification will appear on the receiving PC. Click “Accept” to begin the transfer. Check the Action Center if you don’t see the notification immediately.
When is Nearby Sharing Most Effective?
Nearby Sharing excels at transferring small files quickly and securely. While it can handle larger files, other methods like USB drives or cloud storage might be faster for significant data transfers, especially if the Nearby Sharing connection defaults to Bluetooth instead of Wi-Fi. Nearby Sharing is ideal for scenarios like sharing photos, screenshots, or documents between PCs in close proximity. It offers a convenient alternative to cloud services, especially if privacy is a concern, as the files remain local to your devices.
Conclusion
Nearby Sharing provides a seamless way to transfer small files between Windows PCs, eliminating the need for intermediary devices or cloud services. Its ease of use and speed make it a valuable tool for quickly sharing files between your own devices, particularly for smaller file sizes. While it’s not the fastest option for large file transfers, its convenience and privacy benefits make it a worthwhile addition to your file-sharing toolkit.


