Experiencing graphical glitches or sudden black screens on your Windows 11 PC? Before you despair, consider troubleshooting your graphics drivers. Often, these issues stem from misbehaving drivers, and resetting them can be a simple fix. This guide provides step-by-step instructions for restarting and reinstalling your graphics drivers, covering integrated graphics and dedicated graphics cards from Intel, AMD, and Nvidia.
Quick Driver Restart for Temporary Glitches
If your Windows 11 PC is functioning but the display is frozen or black, a quick driver restart can often resolve the issue.
Step 1: Simultaneously press the Windows key + Ctrl + Shift + B.
Step 2: Your screen(s) will briefly flash black as the driver refreshes. This indicates the restart process.
If successful, your display should return to normal. If the problem persists, consider a full driver reinstallation.
Reinstalling Drivers for Integrated Graphics
For Windows 11 PCs with integrated Intel or AMD graphics, Windows can handle the reinstallation process automatically.
Step 1: Search for “Device Manager” in the Windows search bar and open the application.
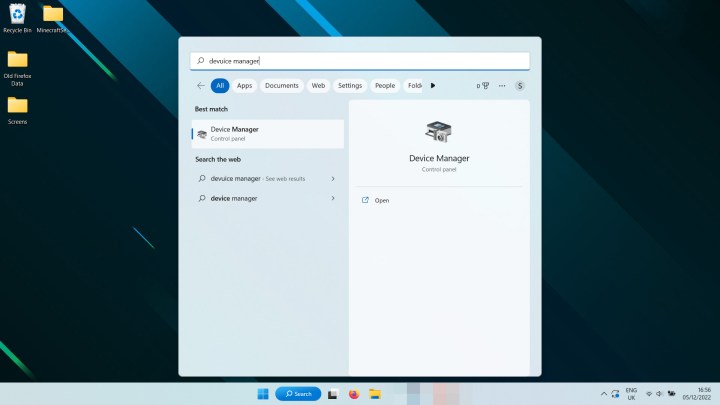 Searching for Device Manager in Windows 11.
Step 2: Expand the “Display Adapters” section. Locate your integrated graphics chip, listed as “AMD Radeon,” “Intel UHD,” or a similar variant.
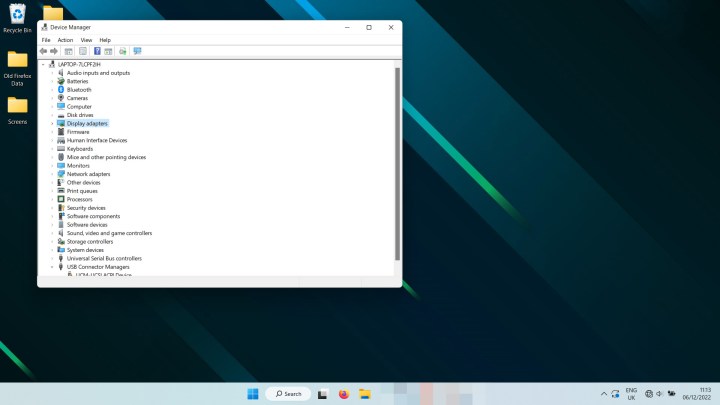 Finding the display adapter in Device Manager in Windows 11.
Step 3: Right-click on the entry and select “Uninstall device.” Your screen may flicker during this process. Once completed, restart your PC.
Upon restarting, Windows 11 will automatically reinstall the latest compatible driver for your integrated graphics, potentially resolving the underlying issue.
Reinstalling Drivers for Dedicated Graphics Cards (Nvidia, AMD, Intel)
For dedicated graphics cards, the reinstallation process involves a few more steps.
Step 1: Open the “Add or remove programs” settings by searching for it in the Windows 11 search bar.
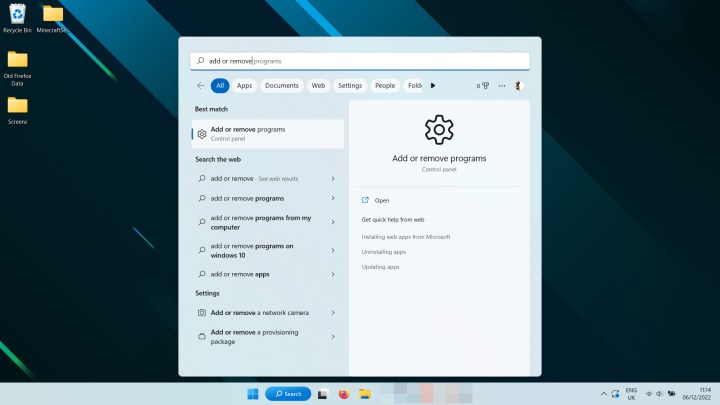 Searching for Add and Remove programs in Windows 11.
Step 2: Locate your graphics driver software (Nvidia, AMD, or Intel) in the list. Click the three-dot menu next to the entry and select “Uninstall.” Consider also uninstalling related applications like GeForce Experience, Nvidia Control Panel, or AMD Radeon Adrenaline.
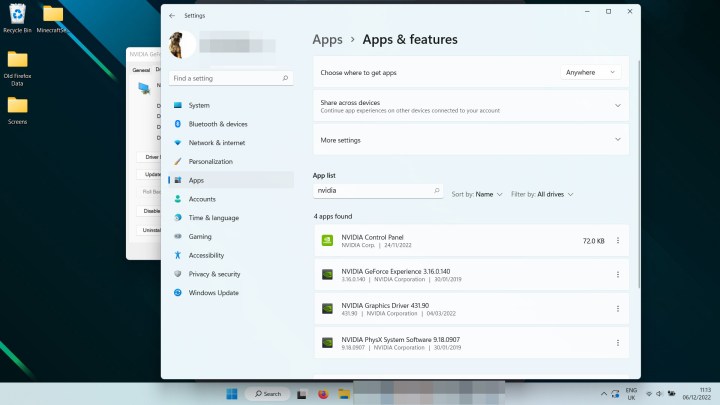 Finding the Nvidia drivers to uninstall them.
Step 3 (Optional): For a thorough driver removal, use Display Driver Uninstaller (DDU) from Wagnardsoft. Refer to their website for instructions (https://www.wagnardsoft.com/content/Display-Driver-Uninstaller-DDU-V18058-Released).
Step 4: Restart your computer.
Step 5: Download the latest driver for your specific graphics card from the manufacturer’s website:
- Nvidia: https://www.nvidia.com/download/index.aspx
- AMD: https://www.amd.com/en/support
- Intel: https://www.intel.co.uk/content/www/uk/en/download-center/home.html
Step 6: Run the downloaded driver installer and follow the on-screen instructions.
Conclusion
Resetting your graphics drivers in Windows 11 can effectively resolve various display issues. Whether it’s a quick restart or a full reinstallation, these steps can help optimize your graphical performance. Remember to download the latest drivers from the official manufacturer websites for best results.


