Maintaining peak graphics card performance requires keeping your GPU drivers up-to-date. Updated drivers unlock the latest features, optimize game performance, and fix bugs, potentially squeezing extra power from your card. This guide provides a straightforward, two-step process for installing and upgrading your GPU drivers in Windows 10 for both Nvidia and AMD graphics cards.
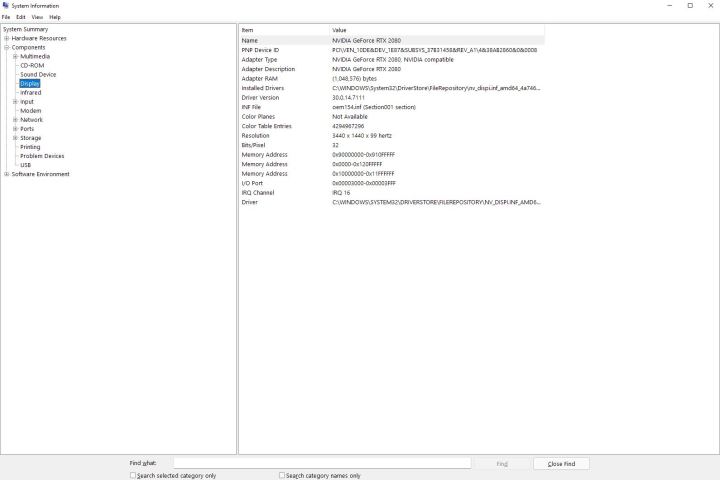 The system information window in Windows.Image used with permission by copyright holder. This image shows how to find system information in Windows.
Identifying Your GPU
Before installing or upgrading your GPU drivers, you need to identify your GPU model. If you know your graphics card model, skip ahead to the installation steps. If not, follow these simple instructions:
Press Windows Key + S and type “System Information.” Select the top result to open a window displaying your computer’s specifications. In the left-hand menu, expand “Components” and select “Display.” The main window will refresh, showing information about your display and graphics card. Your graphics card model is listed under “Name.” This window also displays your current GPU driver version.
Step 1: Install Graphics Driver Software
Both Nvidia and AMD offer dedicated software that automatically detects your graphics card and notifies you of driver updates. These applications are generally unobtrusive and streamline the update process. We recommend installing them for easy future driver upgrades.
Nvidia GeForce Experience
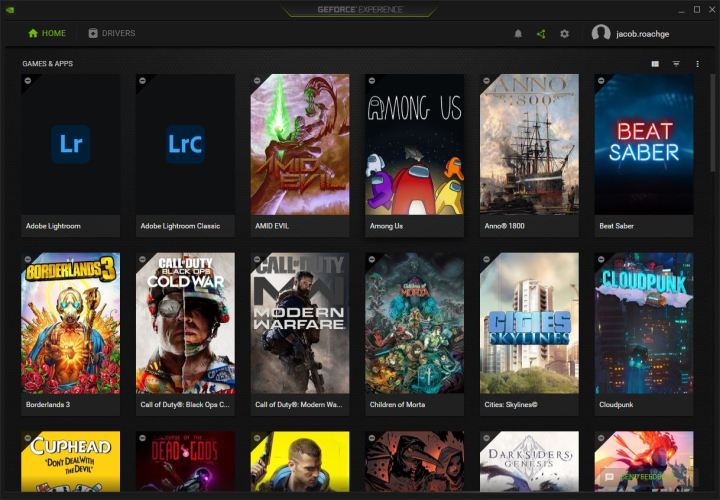 The home page in Nvidia GeForce Experience.Image used with permission by copyright holder. This image shows the Nvidia GeForce Experience home page.
Nvidia’s GeForce Experience software manages driver updates and offers features like ShadowPlay game capture and automatic game optimizations. Download GeForce Experience from the official Nvidia website and follow the installation instructions. After installation, GeForce Experience will launch and scan for installed games.
For those who prefer not to use GeForce Experience, manual driver updates are possible through Nvidia’s product search page. Locate your graphics card, ensuring “Download Type” is set to “Game Ready Driver (GRD)” and “Operating System” is set to “Windows 10.” Run the downloaded installer. You’ll be offered the option to install GeForce Experience during the driver installation, but it’s not mandatory.
AMD Radeon Software
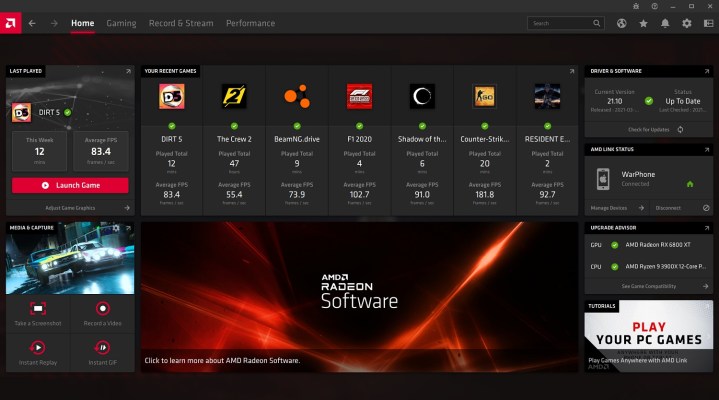 Home screen in AMD Radeon Software.Image used with permission by copyright holder. This image displays the AMD Radeon Software home screen.
AMD’s Radeon Software manages driver updates and provides features like performance monitoring, livestreaming setup, Radeon Chill, and Radeon Anti-Lag. Download the latest version from the official AMD website and follow the installation instructions.
Alternatively, use AMD’s product search tool to find your specific card, select “Graphics” as the category, then choose your product series and model. Under “Windows 10 – 64-bit Edition,” download the “Recommended” driver. While “Optional” drivers offer upcoming features, they might contain bugs.
Step 2: Update the GPU Driver
Once the appropriate software is installed, updating your GPU driver is simple. The software automatically detects your system and recommends the latest driver.
Nvidia GeForce Experience
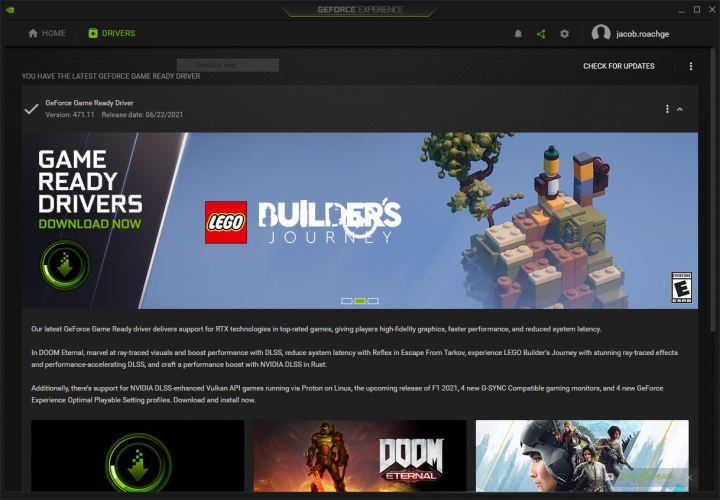 Game Ready Drive in Nvidia GeForce Experience.Image used with permission by copyright holder. This image highlights the Game Ready Driver option in Nvidia GeForce Experience.
Open GeForce Experience and navigate to the “Drivers” tab. The most recent driver should be displayed. To ensure you have the latest version, click the three dots in the upper right corner, select “Game Ready Driver,” then “Check for Updates.” (Nvidia also offers Studio Drivers optimized for creative applications; choose one driver type.) Download the latest driver. During the brief installation, your screen and audio will temporarily cut out. Restart your computer after installation. GeForce Experience will notify you of future updates.
AMD Radeon Software
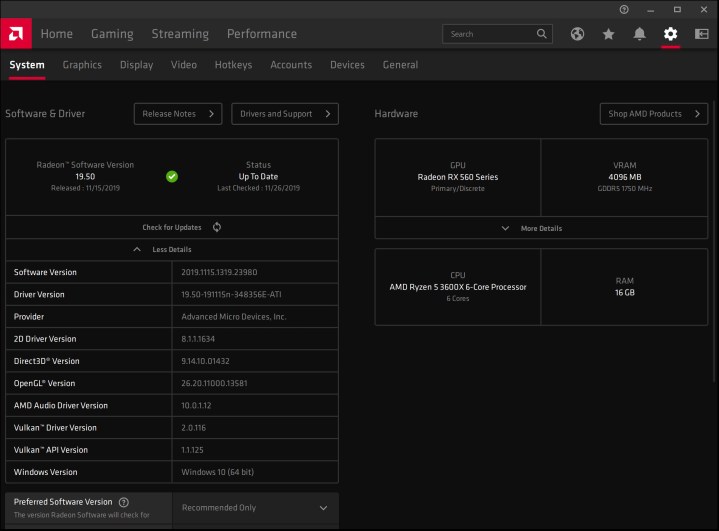 The driver update section in AMD Radeon Software.Image used with permission by copyright holder. This image shows the driver update section within AMD Radeon Software.
Open Radeon Software and click the “Settings” icon. On the “System” tab, under “Software & Driver,” select “Check for Updates.” If this is your first driver installation, Radeon Software will automatically detect your card and download the latest driver during setup. Enable automatic updates by toggling “Check for Updates” and “Download Drivers & Software.” Ensure “Preferred Software Version” is set to “Recommended.”
Using Intel Graphics?
This guide focuses on Nvidia and AMD GPUs. For Intel integrated graphics, visit the Intel software download page for the latest drivers.


