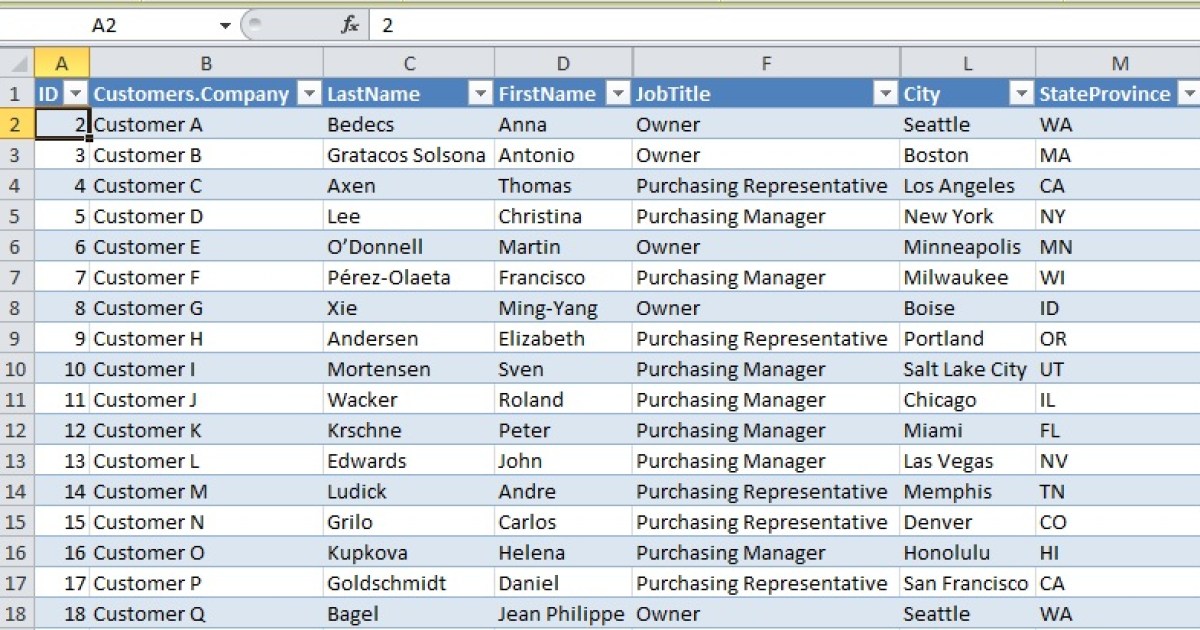
Locking cells in Microsoft Excel is a crucial skill for protecting your data and maintaining spreadsheet integrity. This feature prevents unauthorized modifications to specific cells or entire worksheets, ensuring accuracy and consistency. This guide provides a step-by-step approach to locking cells in Excel, covering both individual cells and entire spreadsheets.
Locking cells is particularly useful in scenarios where you want to preserve data integrity. For instance, if you’re creating a spreadsheet with drop-down lists for job applicants, locking certain cells can prevent them from altering crucial information like selection criteria or pre-filled data.
 The button to select all cells within a spreadsheet on Microsoft Excel. Image used with permission by copyright holder
Locking Specific Cells or Ranges in Excel
By default, all cells in an Excel spreadsheet are locked when sheet protection is enabled. Therefore, to lock specific cells, you first need to unlock all cells, then lock the desired ones.
Step 1: Unlock All Cells: Click the small triangle located at the intersection of the row and column headers (top-left corner of the spreadsheet) to select all cells.
Step 2: Access Format Cells: Right-click on any selected cell and choose “Format Cells” from the context menu.
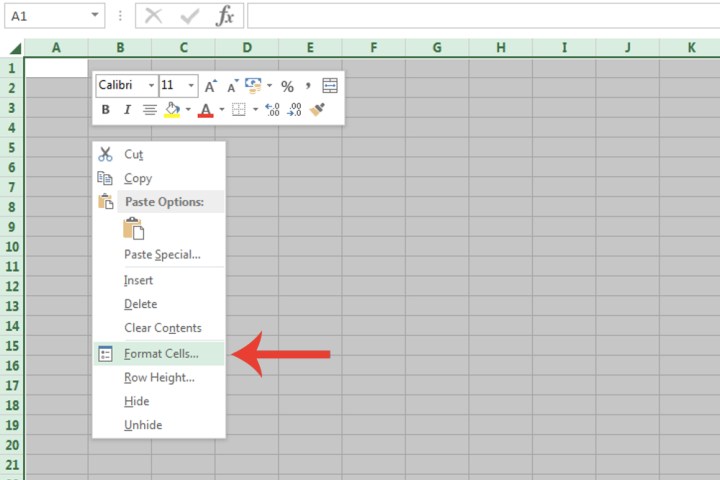 The Format Cells button in Microsoft Excel. Image used with permission by copyright holder
Step 3: Disable “Locked” Option: Navigate to the “Protection” tab and uncheck the “Locked” box. Click “OK”.
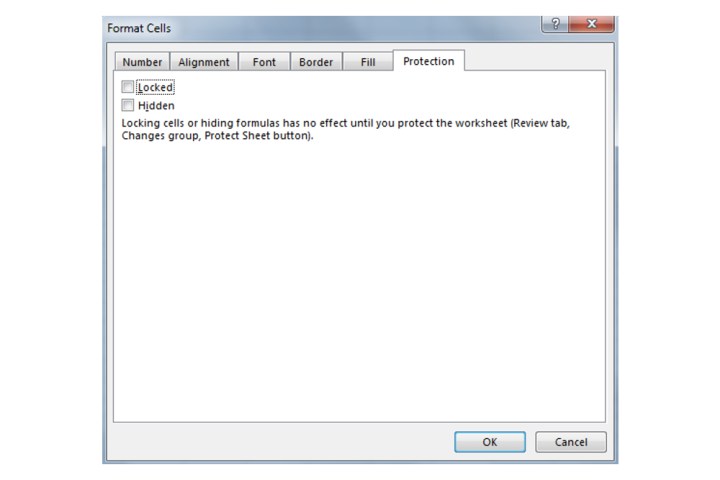 The Locked button found within the Protection tab in Microsoft Excel. Image used with permission by copyright holder
Step 4: Select Cells to Lock: Click and drag to select the individual cells, rows, columns, or ranges you want to lock.
Step 5: Re-apply “Locked” Option: Right-click on any selected cell within your chosen range and select “Format Cells”. Go to the “Protection” tab, check the “Locked” box, and click “OK.”
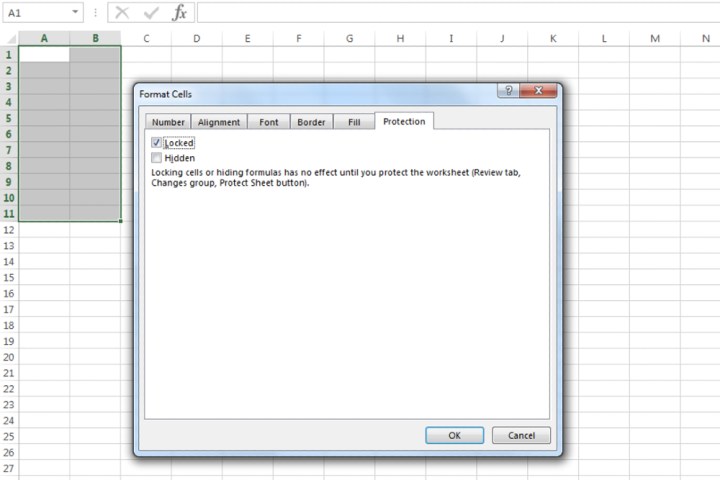 Locking specific cells in Microsoft Excel by using the Locked box. Image used with permission by copyright holder
Step 6: Protect the Worksheet: Go to the “Review” tab and click “Protect Sheet.”
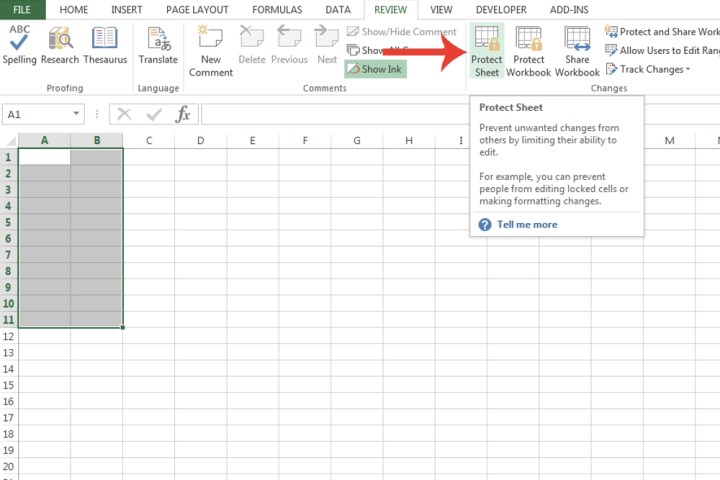 The Protect Sheet button in Microsoft Excel used for confirming the locking of cells. Image used with permission by copyright holder
Step 7: Configure Protection Options: Choose the actions you want to allow users to perform on the locked sheet. By default, “Select locked cells” and “Select unlocked cells” are checked. You can also set a password for enhanced security. Click “OK”.
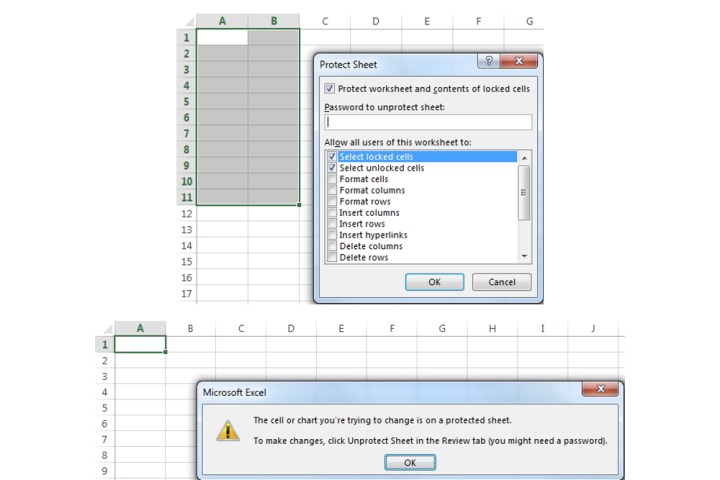 The Protect Sheet window where it lists all the configuration options connected to locking cells. Image used with permission by copyright holder
Locking an Entire Excel Spreadsheet
Locking an entire spreadsheet is simpler, as all cells are locked by default when sheet protection is activated.
Step 1: Access Protect Sheet: Right-click on the sheet tab at the bottom of the Excel window.
Step 2: Protect and Configure: Select “Protect Sheet.” Customize the allowed actions and optionally set a password. Click “OK.”
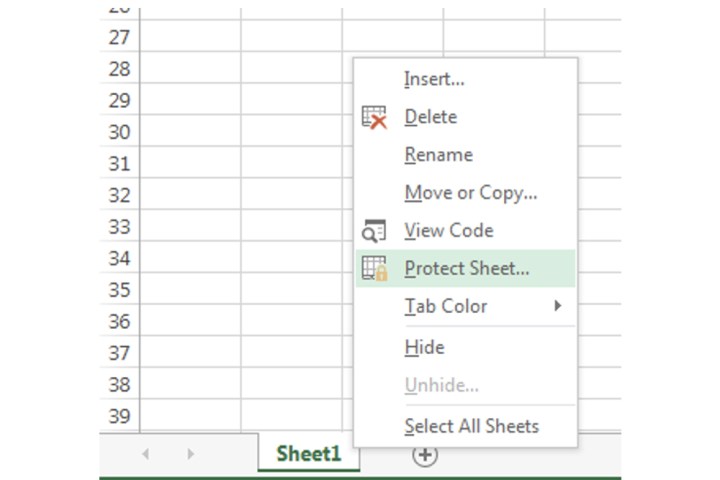 A shortcut to access the Protect Sheet option for locking an entire spreadsheet in Microsoft Excel. Image used with permission by copyright holder
Conclusion
Mastering the ability to lock cells in Excel empowers you to control data access and prevent unintended changes. Whether you need to secure specific cells or an entire spreadsheet, these straightforward steps ensure your data remains accurate and consistent. By understanding these techniques, you can leverage Excel’s flexibility while maintaining data integrity for various applications.


