Preserving those precious memories trapped on VHS tapes doesn’t have to be a daunting or expensive task. This guide provides a step-by-step approach to digitizing your old VHS tapes and camcorder footage using readily available and affordable equipment. We’ll explore a method leveraging a USB capture card, offering a versatile solution for various video capture needs.
Hardware Requirements
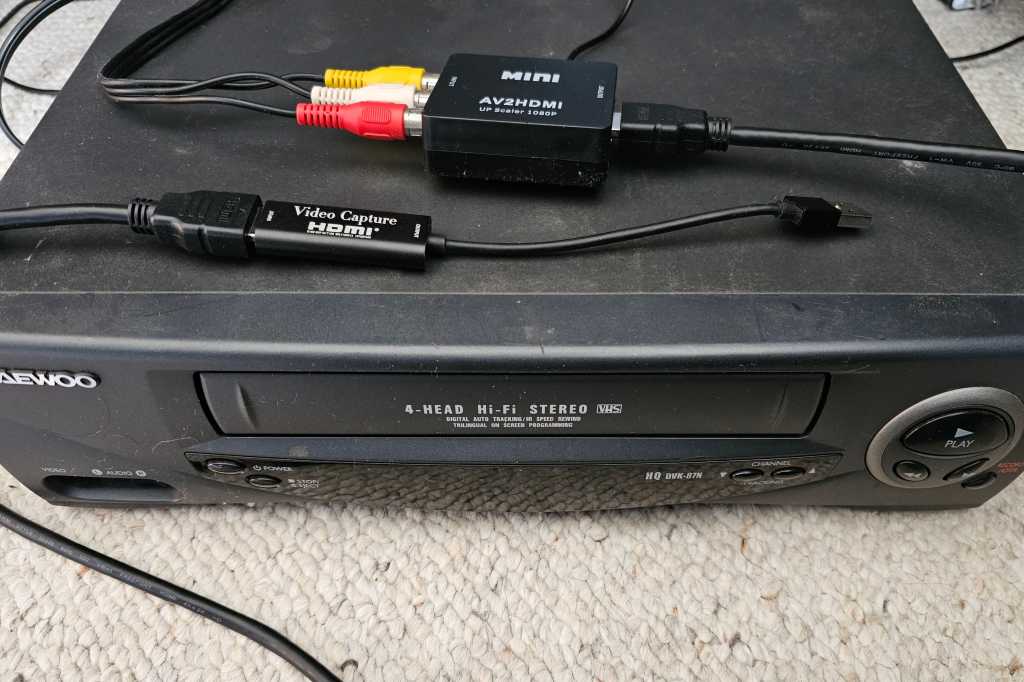
The core component of this setup is a USB capture card. This compact device, often smaller than a thumb drive, features an HDMI input and a USB connector. It bridges the gap between your analog VHS player and your digital computer.
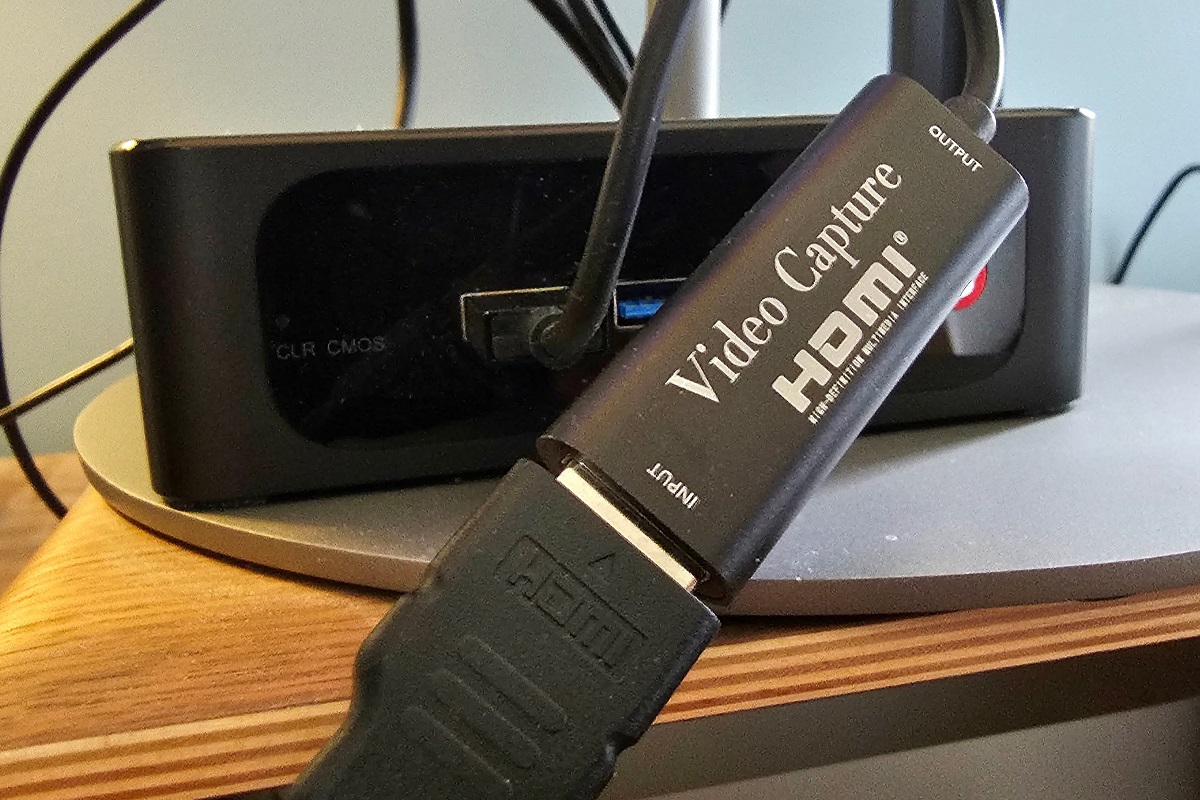
Numerous affordable capture cards are available online, often priced under $20. Look for one capable of capturing video at 1080p 30fps or 720p 60fps. USB-C connectivity is preferable, but ensure it includes a USB-A adapter for compatibility.
Next, you’ll need a VHS player (VCR). If you don’t have one readily available, check local thrift stores, online marketplaces, or auction sites.
Since most VHS players lack HDMI output, you’ll also require a composite-to-HDMI adapter. These are readily available online for around $10.
The complete setup connects as follows: VHS Player → Composite video out → Composite adapter → HDMI out → USB Capture Card → PC. This configuration works with Windows, Mac, Linux, and Chromebooks capable of running Linux apps.
Software Setup with OBS Studio
Open Broadcaster Software Studio (OBS) is a free, powerful, and versatile video recording and streaming software. While popular for game streaming, it’s perfectly suited for capturing video from any HDMI source, including our VHS setup.
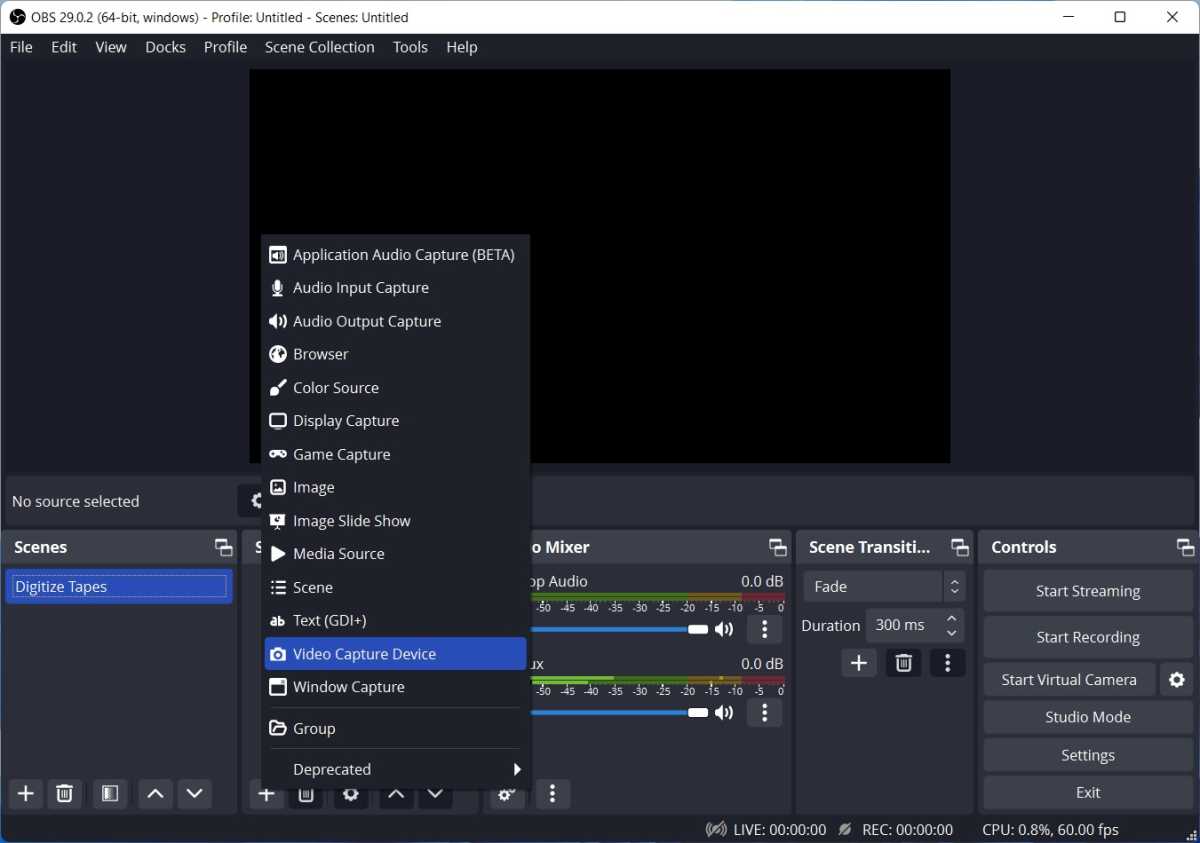
After installing OBS and connecting your capture card, follow these steps to record:
- Add Video Capture Device: In the “Sources” section, click the “+” button and select “Video Capture Device.”
- Name and Configure: Name the source (e.g., “Capture Card”) and click “OK.” Choose “USB 3.0 capture” (or your capture card’s name) under “Device.”
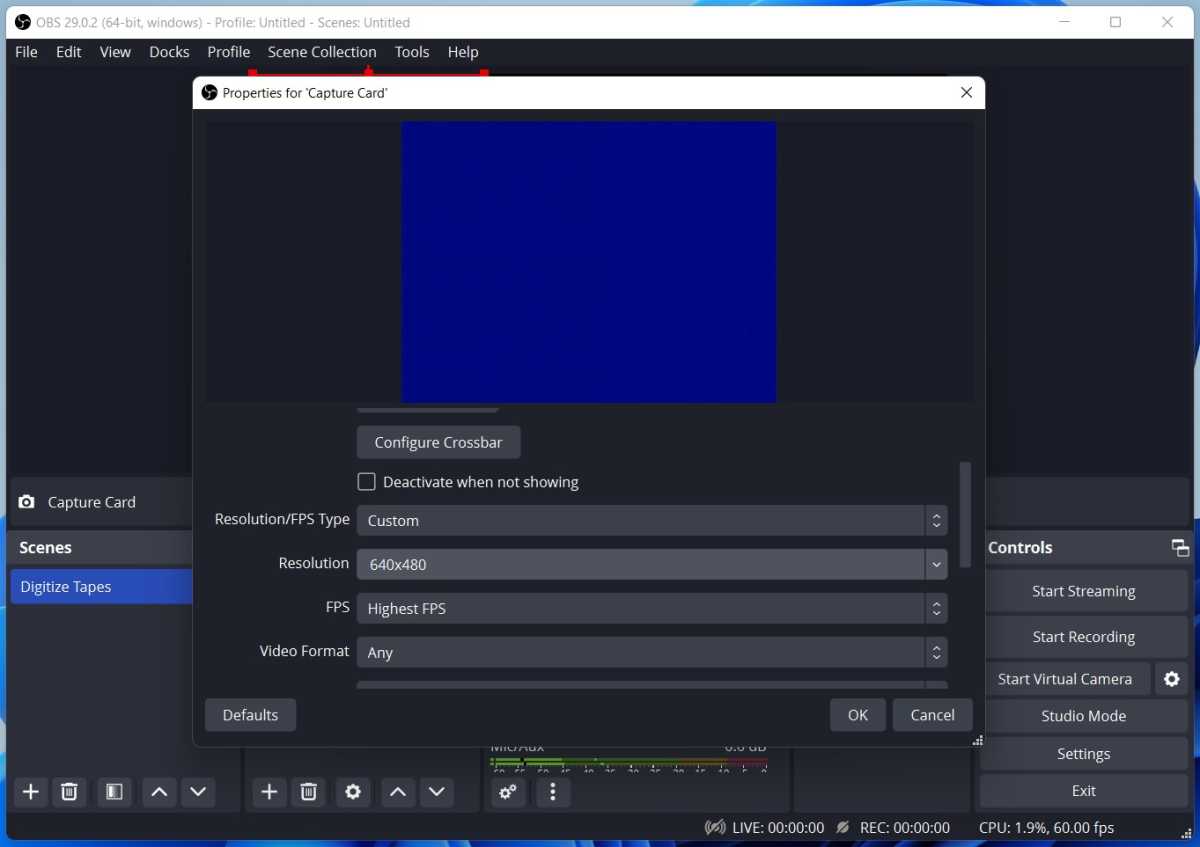
- Set Resolution: To maintain the original VHS aspect ratio, change “Resolution/FPS Type” to “Custom” and set the “Resolution” to 640×480. Click “OK.”
- Mute Audio Inputs: In the “Audio Mixer” section, ensure “Desktop Audio” and “Mic/Aux” are muted or set to zero to avoid recording unwanted sounds.
- Monitor Audio (Optional): To preview the audio before recording, click the three dots (⋮) under “Capture Card” in the “Audio Mixer,” select “Advanced Audio Properties,” and set “Audio Monitoring” to “Monitoring and Output” for the Capture Card.
Initially, the video preview might appear small. Resize it by dragging the corners to fill the preview window and center it.
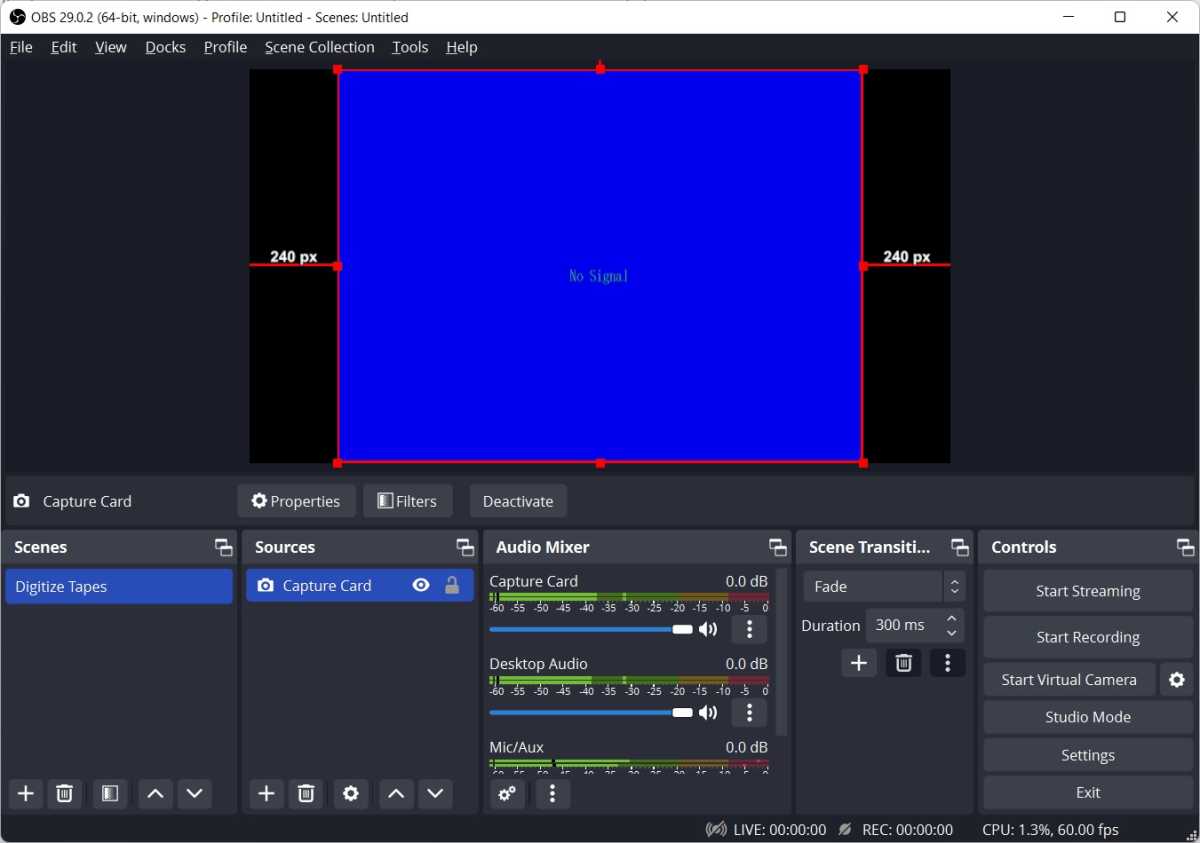
Now, press “Play” on your VHS player and “Start Recording” in OBS. Once the video finishes, click “Stop Recording.” OBS saves the recording in MKV format in your computer’s Videos folder by default. You can then edit the video using free software like Solveig AV1 Trimmer or create DVDs using programs like DVD Styler.
Expanding the Capabilities of OBS and Capture Cards
While dedicated VHS-to-DVD converters exist, the USB capture card and OBS combination offers greater flexibility and long-term value.
Here are some additional uses:
- Record Streaming Devices: Capture video from devices like Roku or Fire TV Stick by plugging them into the capture card. Right-click the preview window to take screenshots.
- Record Your Desktop: Capture your entire screen (“Display Capture”) or a specific application window (“Window Capture”) within OBS. Note that DRM-protected content (e.g., Netflix) cannot be captured this way.
- Record Yourself with Webcam: Add your webcam as a source to create picture-in-picture videos or record yourself providing commentary over other video sources.
OBS allows you to create different “Scenes” to save specific setups (e.g., one for VHS capture, another for streaming devices), allowing for quick switching between configurations.
Conclusion
Digitizing your VHS tapes is an achievable and affordable project with a USB capture card and OBS. Beyond VHS conversion, this setup unlocks various video capture possibilities, offering a versatile and valuable tool for preserving memories and creating new content.


