Think you’ve mastered Microsoft Word but still struggle with removing pesky page breaks? This guide provides simple, step-by-step instructions for eliminating both manual and automatic page breaks in your Word documents, for both Windows and macOS.
Microsoft Word automatically inserts page breaks to manage document layout. Sometimes, however, these automatic breaks, or even manually inserted ones, disrupt the flow of your text. Fortunately, you have options for controlling these breaks, ensuring your document appears exactly as intended.
Understanding Manual vs. Automatic Page Breaks
Before diving in, it’s important to distinguish between the two types of page breaks:
- Manual Page Breaks: These are intentionally added by the user to force a new page. They can be easily deleted.
- Automatic Page Breaks: Word automatically generates these based on page size, margins, and document content. They cannot be directly removed, but their behavior can be modified.
Removing Manual Page Breaks in Windows
-
Reveal Formatting Marks: In the Home tab, within the Paragraph section, click the Show/Hide icon (¶). This reveals hidden formatting marks, including manual page breaks.
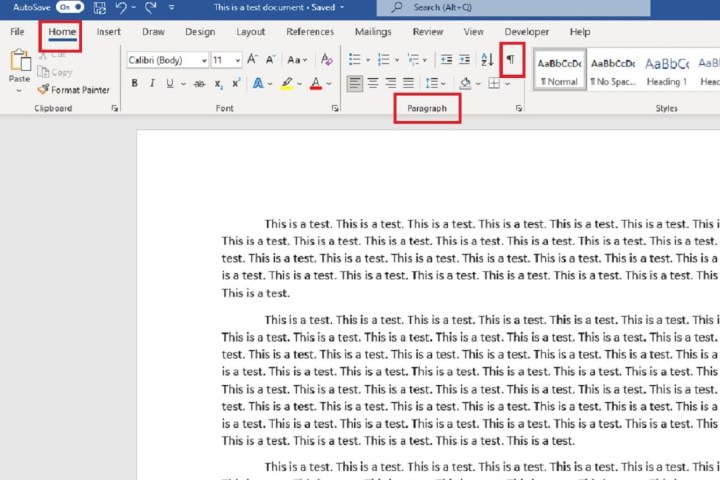 how to remove page break in word ms home tab paragraph section show hide button screenshot
 -
Delete the Page Break: Locate the manual page break, represented by a dotted line with the words “Page Break.” Double-click the space immediately after the page break marker and press the Delete key.
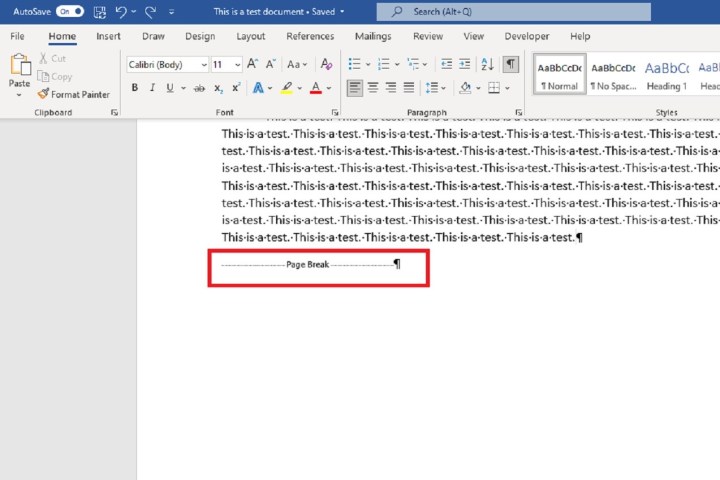 how to remove page break in word ms icon document screenshot
Removing Manual Page Breaks in macOS
-
Show Paragraph Marks: In the Home tab, click the Paragraph icon to display paragraph marks and other hidden formatting.
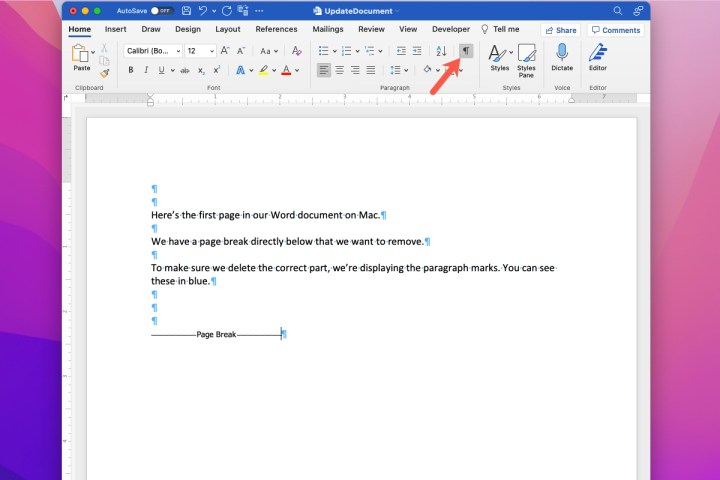 how to remove page break in word mac show paragraph marks
 -
Delete the Break: Place your cursor immediately to the right of the visible page break marker and press the Delete key.
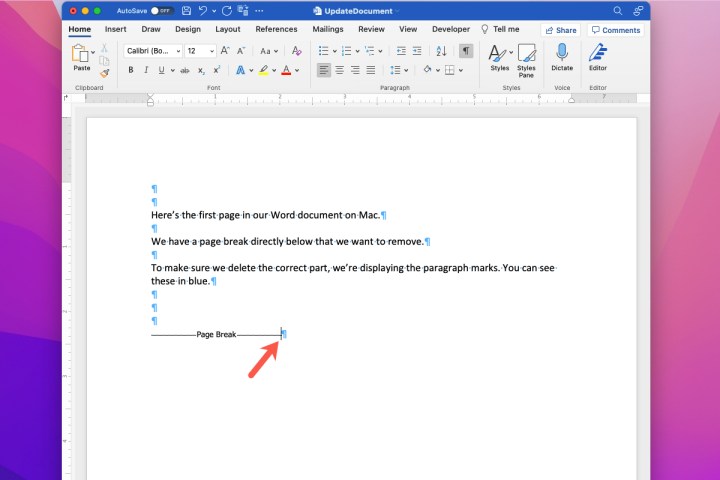 how to remove page break in word mac cursor
Managing Automatic Page Breaks in Windows
-
Select the Text: Highlight the paragraph(s) affected by the unwanted automatic page break.
-
Open Paragraph Settings: Go to the Layout tab and click the small arrow in the bottom right corner of the Paragraph section.
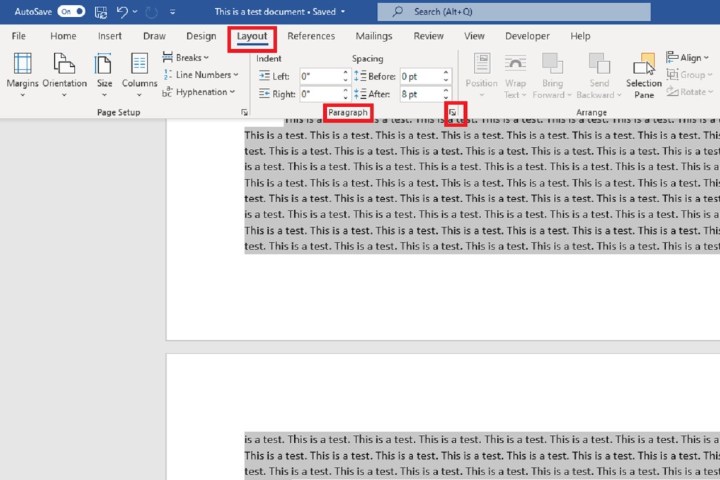 how to remove page break in word ms layout tab paragraph settings adjust automatic screenshot
 -
Configure Page Break Options: In the Paragraph dialog box, select the Line and Page Breaks tab. Here, you can choose from several options:
- Widow/Orphan Control: Prevents single lines of a paragraph from appearing at the top or bottom of a page.
- Keep With Next: Keeps selected paragraphs together on the same page. Useful for headings and subsequent text.
- Keep Lines Together: Prevents a single paragraph from being split across two pages.
- Page Break Before: Forces a page break before the selected paragraph.
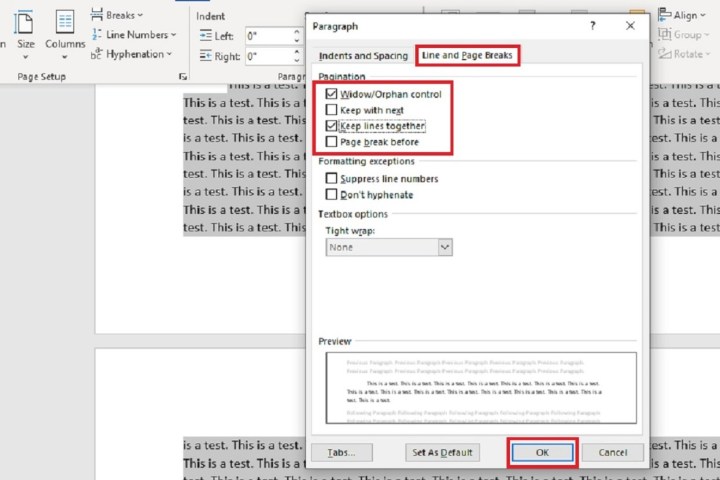 how to remove page break in word ms paragraph dialog box for adjust screenshot
 -
Apply Changes: Click OK to save your settings.
Managing Automatic Page Breaks in macOS
-
Access Paragraph Options: Go to Format > Paragraph in the menu bar.
-
Adjust Pagination Settings: In the Paragraph dialog box, select the Pagination options. You’ll find the same options as in Windows: Widow/Orphan Control, Keep With Next, Keep Lines Together, and Page Break Before.
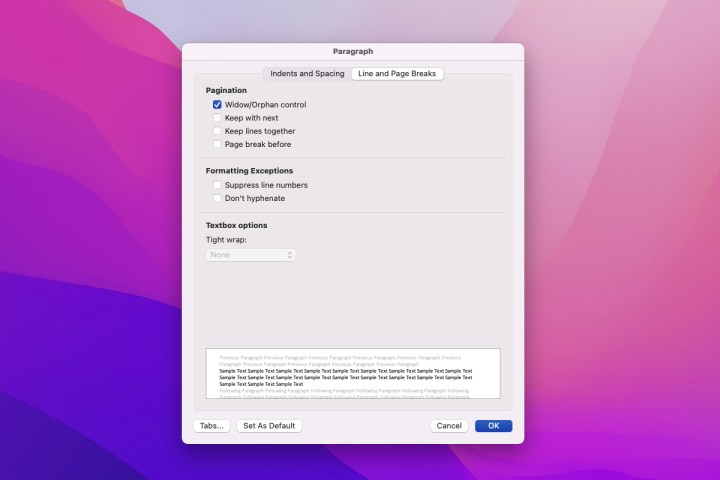 how to remove page break in word mac paragraph pagination
 -
Apply Changes: Click OK.
By understanding the difference between manual and automatic page breaks, and using these techniques, you can easily control the pagination of your Word documents, ensuring a polished and professional final product.


