Losing a Word document due to a system crash, power outage, or dead battery can be incredibly frustrating. Whether it’s a crucial term paper or an important report, retrieving your unsaved work is essential. This guide provides various methods to recover unsaved Word documents, ensuring you can get your work back quickly and efficiently.
 alt text: Screenshot of Microsoft Word's Document Recovery pane showing recovered files.
Utilizing Word’s Built-in Recovery Features
The simplest way to recover an unsaved Word document is often through Word itself. Upon restarting Microsoft Word, the application automatically attempts to recover unsaved files.
For standard Word versions, a “Document Recovery” pane appears on the left side, displaying recoverable files with timestamps. Select the dropdown menu beside the desired file and choose “Save As” to store it securely.
Microsoft 365 subscribers typically experience a slightly different process. Restarting Word usually opens the recovered file directly, presenting a “Save” button. If multiple recovered files exist, the most recently edited one opens, while others reside in the “Document Recovery” section.
Recovering with the “Recover Unsaved Documents” Tool
If the initial automatic recovery fails, Word offers a dedicated tool: “Recover Unsaved Documents.”
- Open a new, blank document in Word.
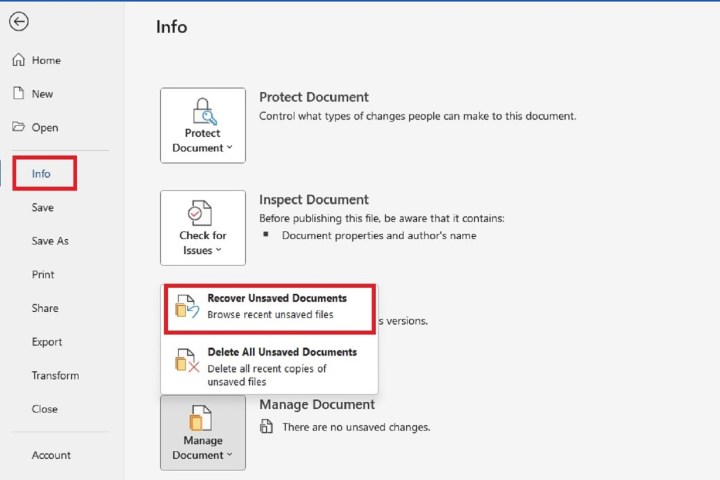
- Select the “File” tab and then “Info.”
- Click “Manage Document” and choose “Recover Unsaved Documents.”
 alt text: Screenshot of the 'Manage Document' menu in Microsoft Word, highlighting 'Recover Unsaved Documents'.
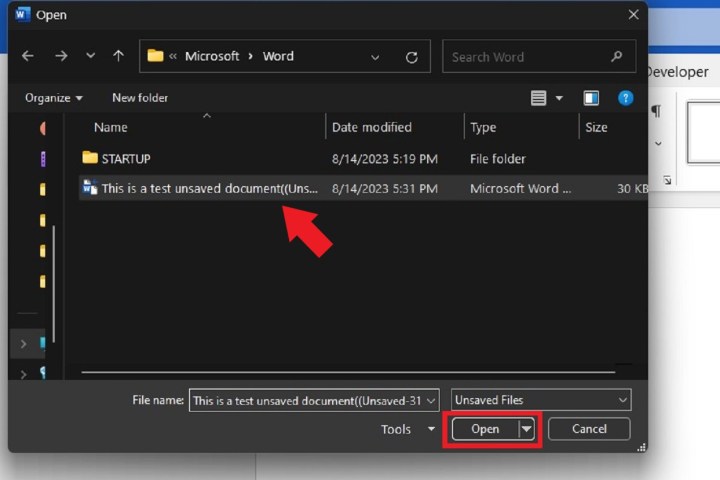
- An “Open” window appears, listing unsaved documents. Select your file and click “Open.”
- A message at the top confirms you’re accessing a recovered file. Click “Save As” and save the document.
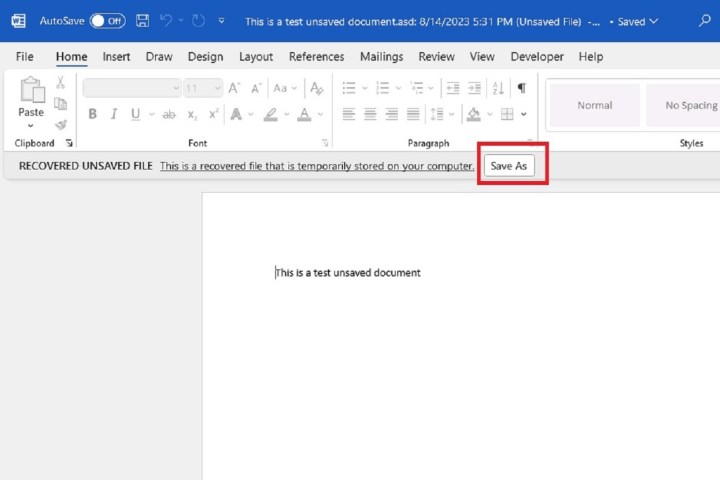 alt text: Screenshot of a recovered document in Microsoft Word, with the 'Save As' button highlighted.
Manual Recovery through AutoRecover Files
If the above methods are unsuccessful, manually searching for AutoRecover files might help.
- Search for “*.asd” files in Windows Start menu. Note their location. Alternatively, in Word, go to File > More > Options > Save and copy the “AutoRecover file location.”
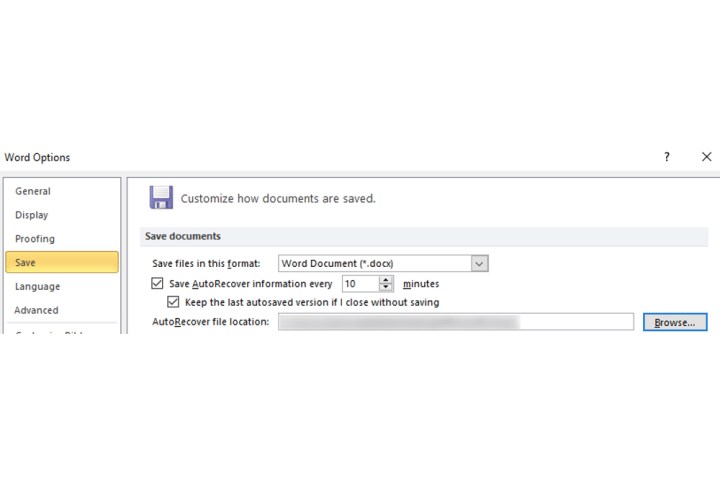 alt text: Screenshot of the 'Save' options in Microsoft Word, showing the 'AutoRecover file location' field.
- In Word, go to File > Open > Browse.
- In the file type dropdown, select “All Files” to display *.asd files.
- Select the relevant *.asd file and click “Open.”
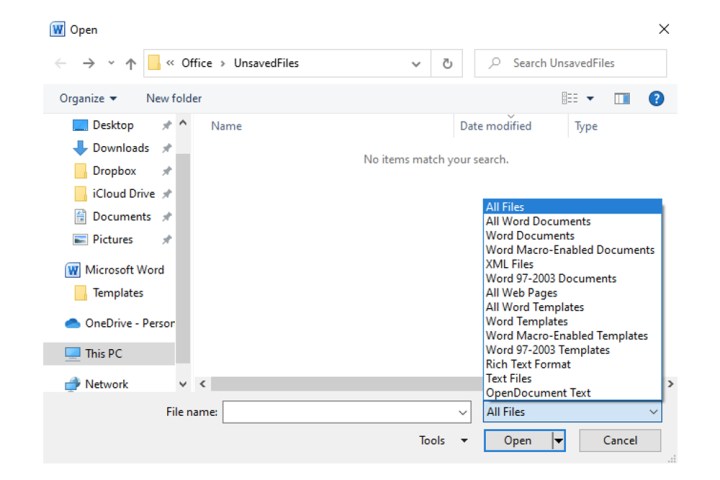 alt text: Screenshot of the file type dropdown menu in Microsoft Word's Open dialog, with 'All Files' selected.
Searching Temporary Files
If .asd files aren’t found, search for temporary (.tmp) files. Many .tmp files are located in the Documents folder (C:Users[yourusername]Documents). Follow the same steps as with .asd files, but search for “*.tmp” and open in Word.
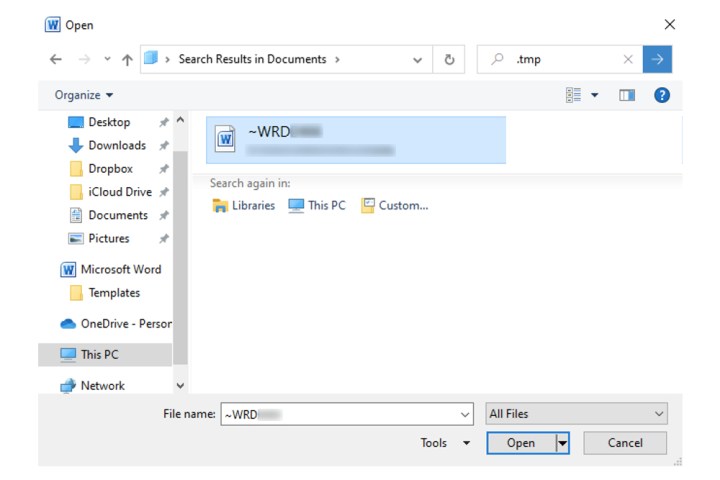 alt text: Screenshot of File Explorer showing a .tmp file in the Documents folder.
Utilizing Backup Files
Word can create backup (*.wbk) files if the option is enabled.
- Enable “Always create backup copy” in File > More > Options > Advanced > Save.
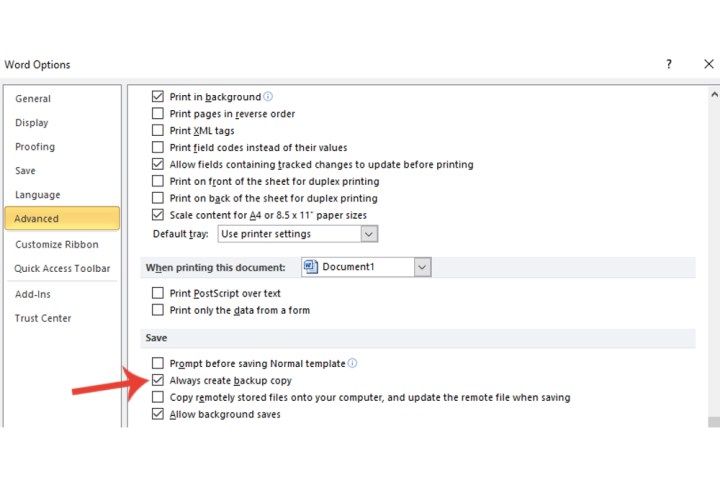 alt text: Screenshot of Word Options, Advanced tab, showing the 'Always create backup copy' option checked.
- Search for “*.wbk” files in File Explorer. Backup files are named “Backup of [original filename]”. Double-click to open.
Microsoft 365 users might find backup files in different locations. Try searching C:Users[yourusernamehere]AppDataRoamingMicrosoftWord or C:Users[yourusernamehere]AppDataLocalMicrosoftOfficeUnsavedFiles. Replace “[yourusernamehere]” with your actual username.
Implementing Preventive Measures
To minimize future data loss, configure Word’s AutoSave feature.
- In Word, go to File > More > Options > Save.
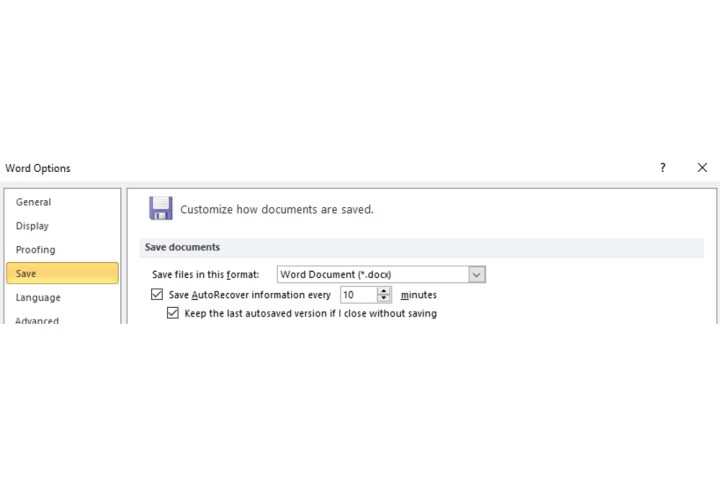 alt text: Screenshot of the Save options in Microsoft Word, allowing customization of AutoRecover settings.
- Adjust the autosave frequency and ensure the “Always create backup copy” option is enabled.
While these methods can effectively recover unsaved work, consistently saving your documents remains the best practice. Consider these recovery options when comparing Microsoft Word with alternatives like Google Docs, which offer real-time saving.


