PowerPoint offers extensive customization options, including the ability to transform your presentation backgrounds with images, colors, gradients, and even videos. This guide provides a step-by-step walkthrough on how to achieve these effects, enhancing your presentations’ visual appeal and engagement.
PowerPoint offers extensive customization options, including the ability to transform your presentation backgrounds with images, colors, gradients, and even videos. This guide provides a step-by-step walkthrough on how to achieve these effects, enhancing your presentations’ visual appeal and engagement.
Customizing Backgrounds with Colors and Gradients
A simple yet effective way to enhance your slides is by using solid colors or gradients as backgrounds. Here’s how:
-
Select Your Slide: In the left-hand pane, choose the slide you wish to modify.
-
Access Format Background: Navigate to the “Design” tab in the top menu and select “Format Background” on the right.
-
Choose Fill Type: In the Format Background pane, select either “Solid fill” for a single color or “Gradient fill” for a blended color effect.
 Accessing the Format Background option in PowerPoint.
- Customize Solid Fill: If you chose “Solid fill,” click the paint can icon and select your desired color. You can choose from pre-selected colors, explore “More colors,” or use the “Eyedropper” tool to sample a color from your presentation. Adjust the transparency slider for a faded effect.
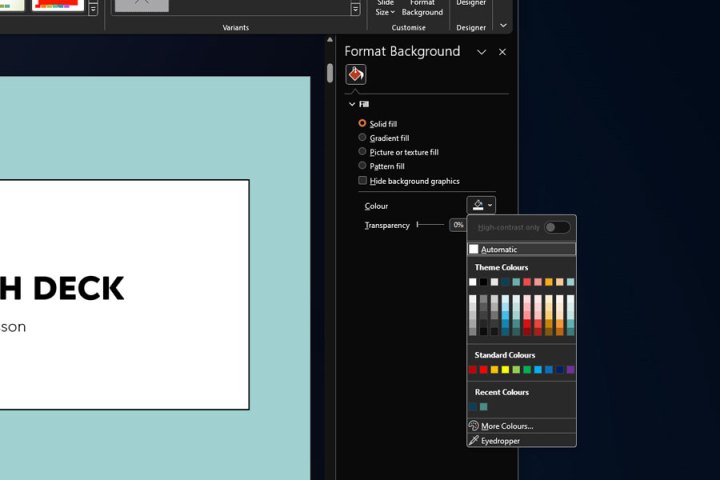 Selecting a solid fill color for the PowerPoint background.
- Customize Gradient Fill: For gradients, choose a “Preset gradient” or fine-tune it using “Gradient stops” to control color transitions. Adjust the position, transparency, direction, and brightness of each color within the gradient.
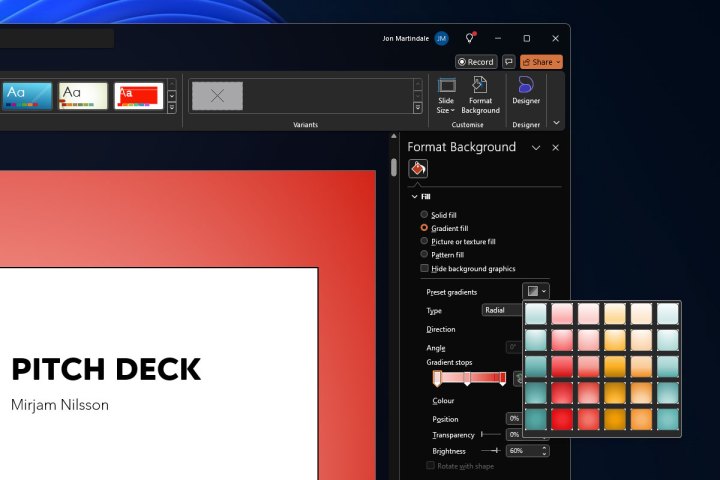 Customizing a gradient fill for the PowerPoint background.
- Finalize and Apply: Use the “Reset background” button to start over if needed. Click the “X” to close the Format Background pane or “Apply to all” to apply the changes to every slide.
Using Pictures as Backgrounds
Images can make compelling backgrounds. Follow these steps:
-
Select Slide and Access Format Background: Choose the slide and navigate to “Format Background” as described in the previous section.
-
Choose Picture or Texture Fill: Select the “Picture or texture fill” option.
-
Select Texture (Optional): For textures, check the “Texture” box and choose from the available options.
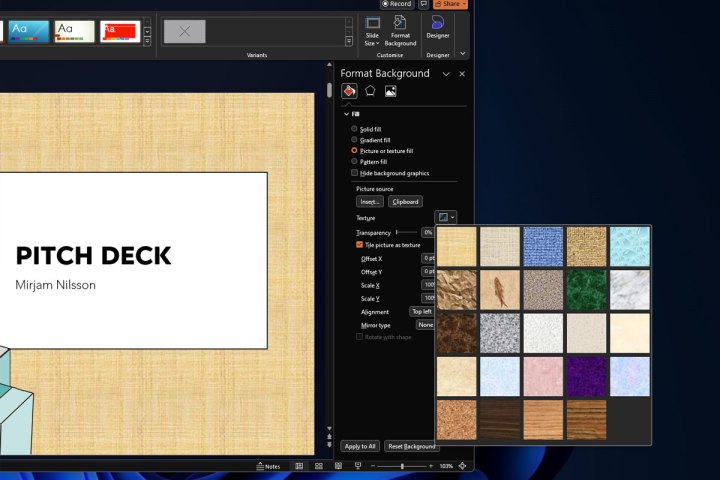 Choosing a texture fill for the PowerPoint background.
- Insert Picture: To use an image, click the “Insert” button under “Picture source.” Choose your image source (from a file, online, stock images, etc.).
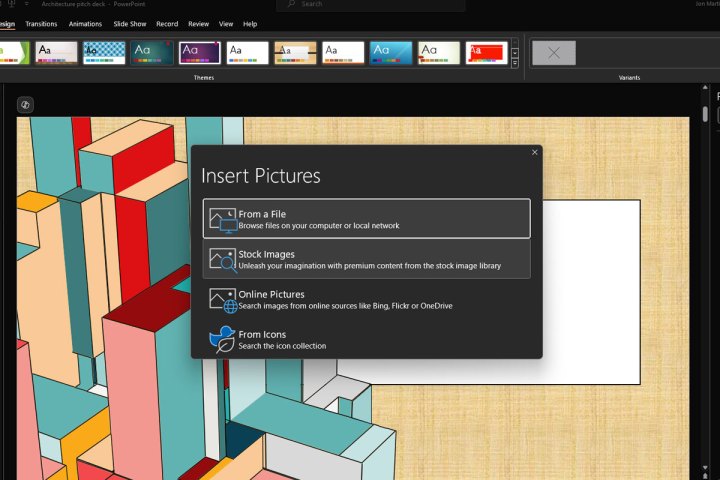 Inserting a picture as the PowerPoint background.
- Apply to All (Optional): Click “Apply to all slides” to use the image on every slide.
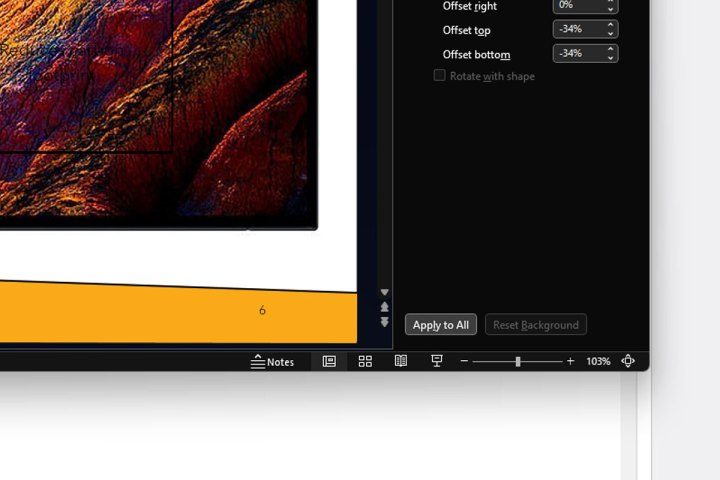 Applying the background image to all slides in PowerPoint.
Integrating Videos as Backgrounds
Dynamic video backgrounds can add significant impact. Here’s how:
- Insert Video: Go to “Insert” and then “Video.” Choose your video source (from file or online).
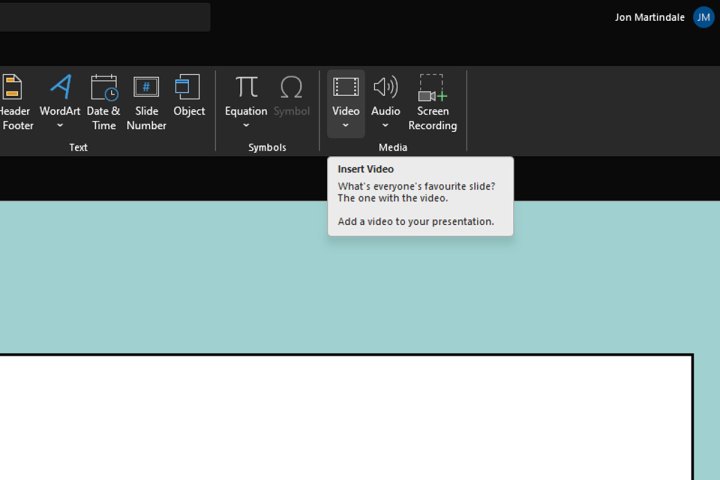 Inserting a video into the PowerPoint slide.
-
Position and Resize: Drag and resize the video to cover the desired area of the slide.
-
Send to Back: Right-click the video and select “Send to back.”
-
Customize Video Options: Use the right-click menu to trim the video, set the start time (automatic or on click), and adjust the video style.
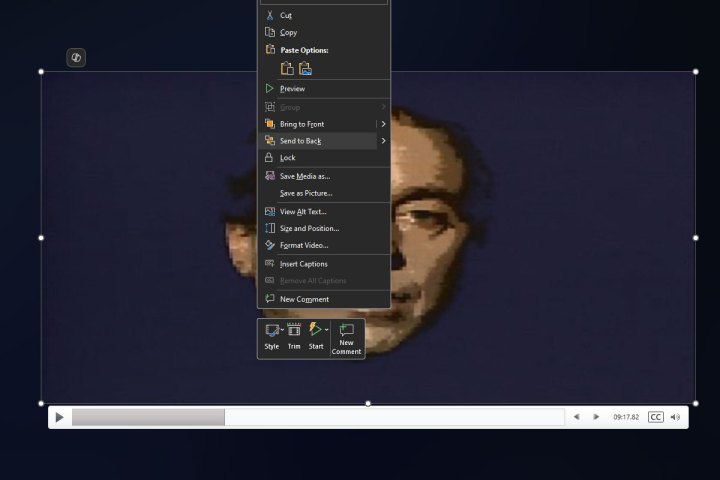 Customizing video playback options in PowerPoint.
- Preview: Go to “Slideshow” and select “From beginning” or “From current slide” to preview the video background.
Conclusion
By mastering these techniques, you can elevate your PowerPoint presentations with visually captivating backgrounds, leaving a lasting impression on your audience. Experiment with different options to find the perfect background to complement your content and message.


