Microsoft Word is more than just a word processor; it’s a versatile tool with functionalities extending beyond simple text editing. One such feature is the ability to create and print mailing labels, saving you time and effort compared to handwriting addresses. This guide provides a step-by-step walkthrough for printing labels in Word, whether it’s a single label for an envelope or a full page for bulk mailings.
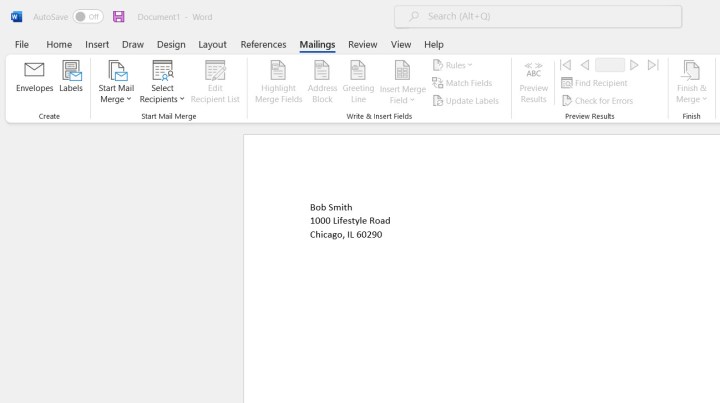 A screenshot of a Word document with a recipient's address typed in. Alt: Typing a recipient's address into a Word document for label printing.
Printing Individual Address Labels
Follow these steps to print a single address label:
-
Enter the Address: Open a blank Word document or start with an existing one. Type the recipient’s address anywhere on the page.
-
Navigate to Mailings: Select the recipient’s address. In the Word ribbon, go to the “Mailings” tab and click “Envelopes.”
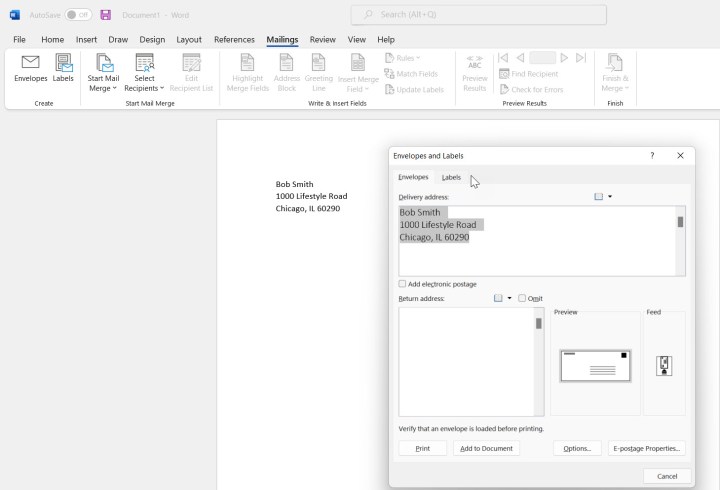 A screenshot of the Mailings tab in Word with the Envelopes option highlighted. Alt: Navigating to the Envelopes option within the Mailings tab in Microsoft Word.
- Add Return Address: Enter your return address in the designated field. You can also choose to omit the return address. If you have electronic postage software integrated, Word can add a postage-paid barcode.
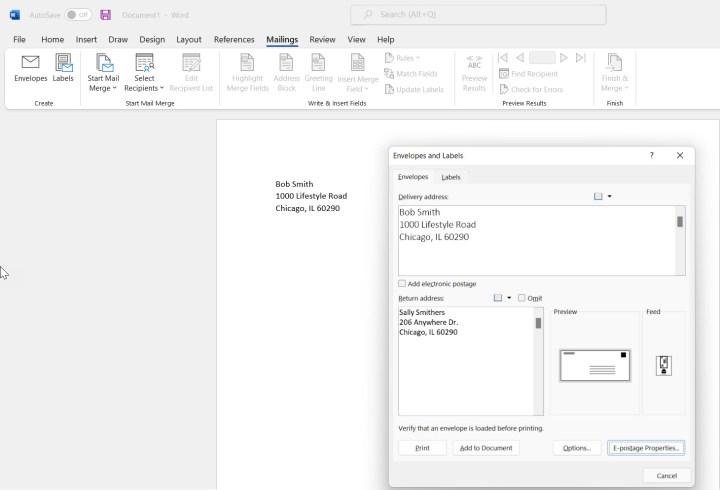 A screenshot of the Envelopes and Labels dialog box in Word. Alt: Adding a return address in the Envelopes and Labels dialog box.
- Configure Options: Click “Options…” to customize settings such as envelope size and font for both delivery and return addresses.
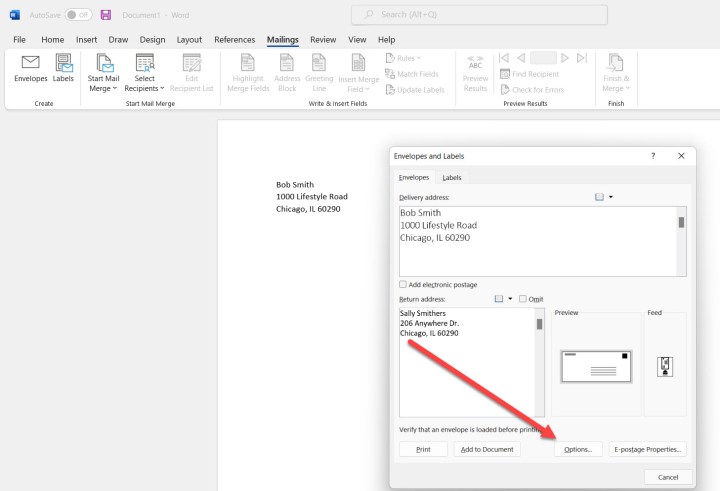 A screenshot of the Envelopes and Labels dialog box with the Options button highlighted. Alt: Accessing envelope and label options in Microsoft Word.
- Finalize Settings: Select the appropriate envelope size and fonts.
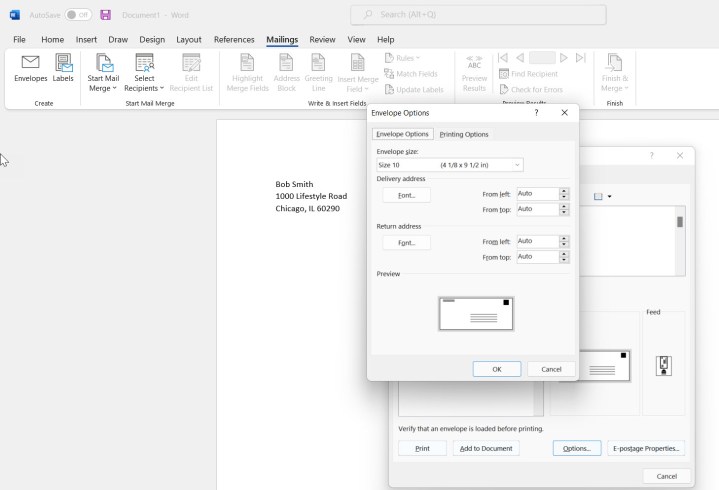 A screenshot of the Envelope Options dialog box in Word. Alt: Selecting envelope size and font options in Word.
- Print: Click “Print.” Ensure your printer is loaded with an envelope and configured with the correct settings for your chosen envelope size.
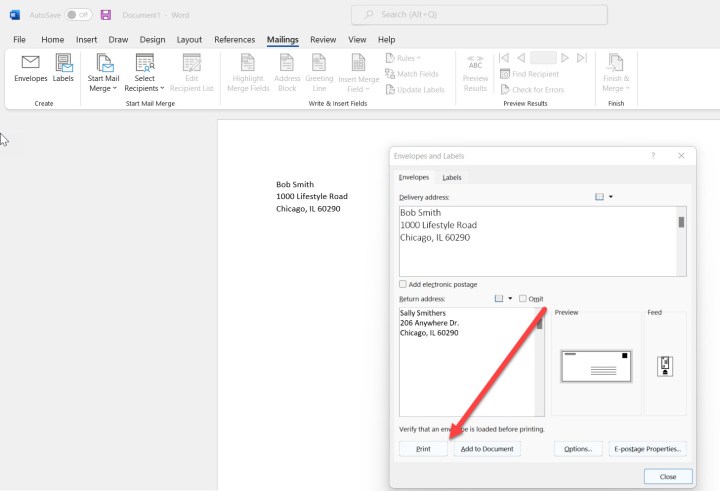 A printed envelope with a delivery and return address. Alt: Example of a printed envelope with address labels.
Printing Multiple Labels on One Sheet
- Access Labels Option: Select the recipient’s address and click “Labels” in the “Mailings” tab.
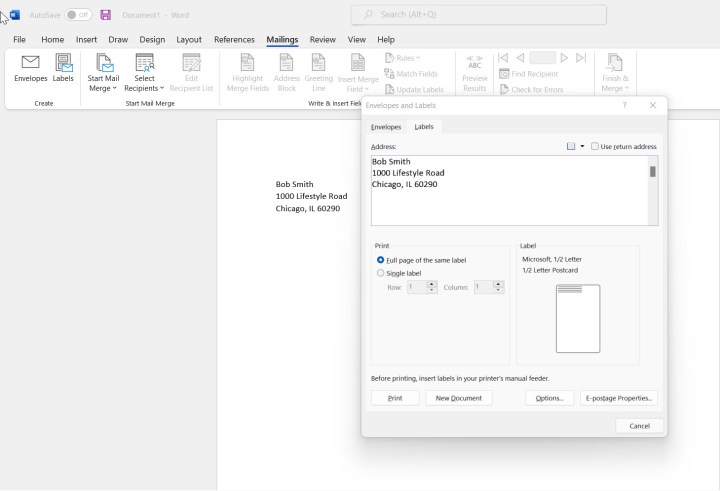 A screenshot of the Mailings tab with the Labels option selected. Alt: Accessing the Labels option in Microsoft Word.
- Configure Label Options: Click “Options…” to specify the label product being used. Ensure the printer and label vendor/product number are correctly selected. Clicking “Details…” allows further customization.
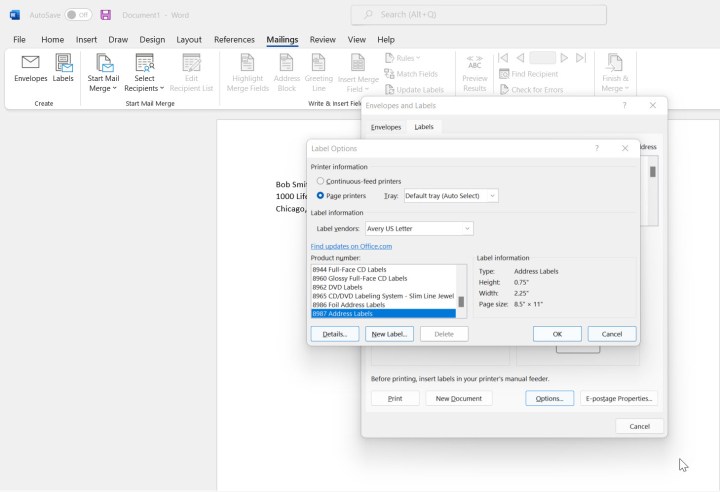 A screenshot of the Label Options dialog box in Word. Alt: Configuring label options in Word, including label vendor and product number.
Using Mail Merge for Multiple Recipients
For printing labels for multiple recipients, utilize Word’s Mail Merge feature:
- Select Recipients: Under “Mailings” > “Start Mail Merge,” click the down arrow next to “Select Recipients.” Choose either “Type a New List…” or “Use an Existing List…”
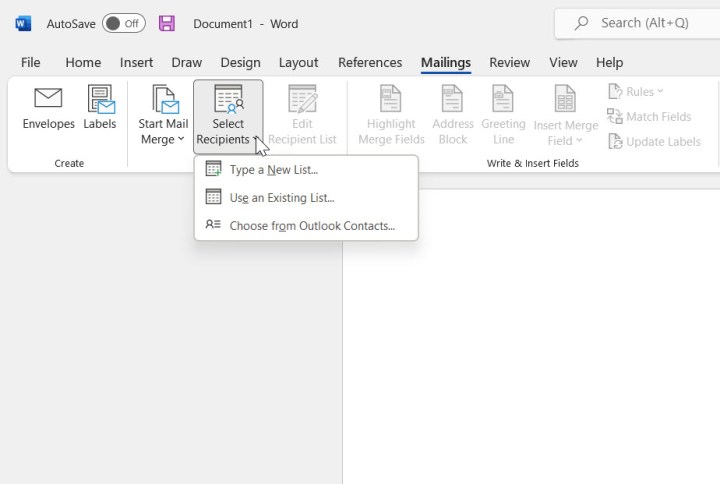 A screenshot of the Start Mail Merge options in Word. Alt: Selecting recipients for mail merge in Word.
- Create or Open a List: If creating a new list, enter recipient information in the provided table. Use “New Entry” for each recipient. If using an existing list, navigate to its location and select it.
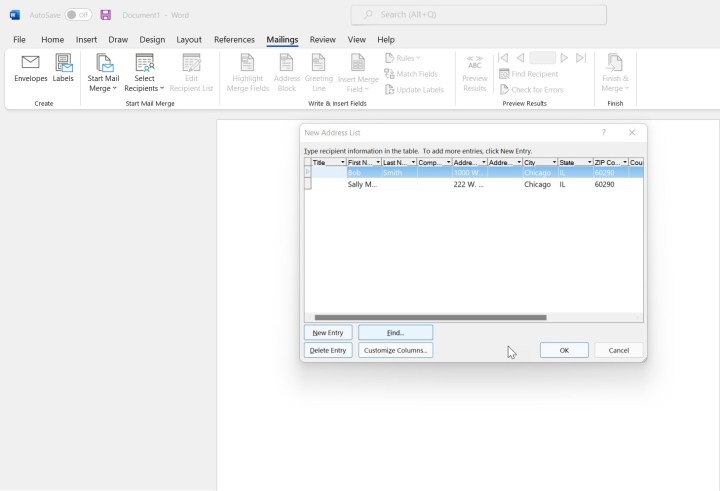 A screenshot of the New Address List dialog box in Word. Alt: Creating a new address list for mail merge.
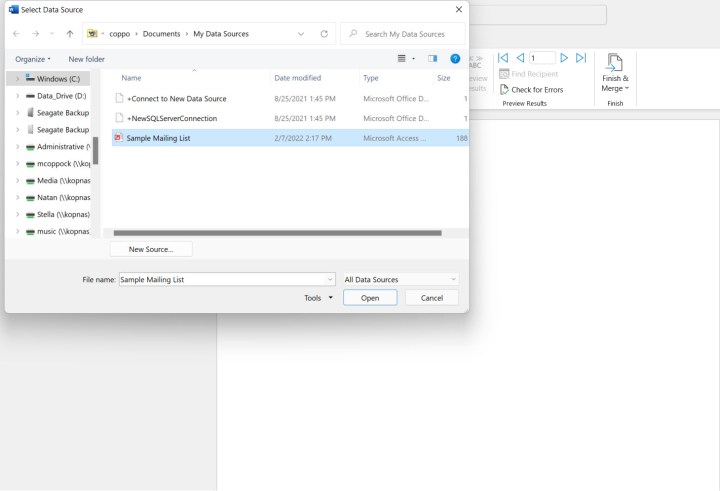 A screenshot of the Open Data Source dialog box in Word. Alt: Opening an existing data source for mail merge in Word.
- Edit Recipient List (Optional): Click “Edit Recipient List” to refine the list, including selecting specific recipients.
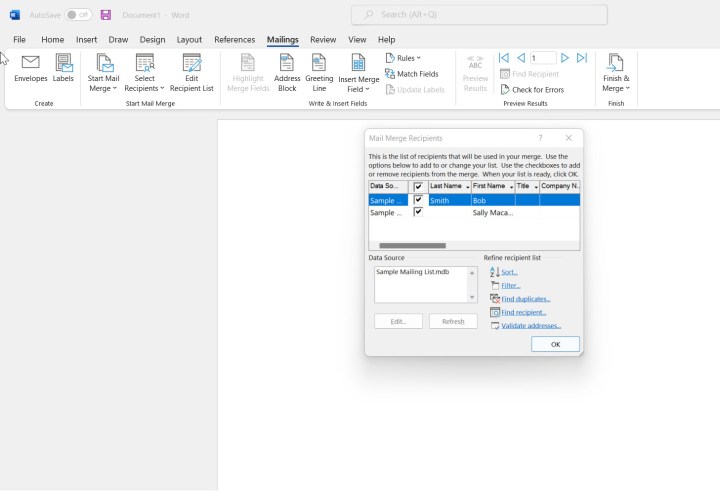 A screenshot of the Mail Merge Recipients dialog box in Word. Alt: Editing the recipient list for a mail merge.
- Start Mail Merge: Under “Start Mail Merge,” select “Labels.”
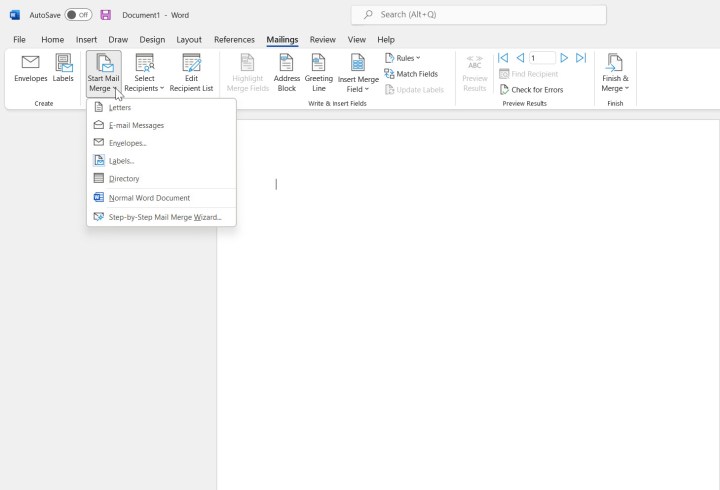 The Start Mail Merge dropdown menu in Word. Alt: Starting the mail merge process for labels in Word.
- Finalize and Print: Ensure the correct label and printer settings are selected.
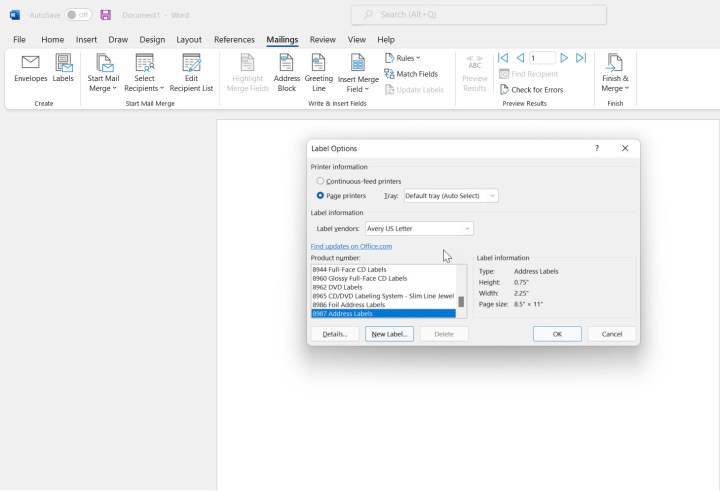 A screenshot of the Label Options dialog box during a mail merge. Alt: Configuring label options for a mail merge in Word.


