Watermarks are subtle background images or text that convey important information about your document, such as its confidentiality, status, or copyright. They allow your audience to read the content without distraction while still being aware of the watermark’s message. This guide provides a comprehensive walkthrough on how to add and remove watermarks in Microsoft Word.
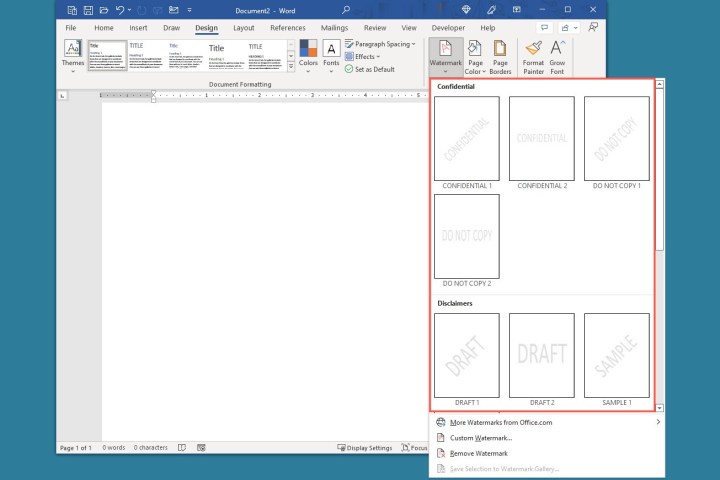 Watermark drop-down menu in Word.Image used with permission by copyright holder
Quickly Adding Preset Text Watermarks
Adding a watermark in Word is simple and can be done before, during, or after creating your document. Word offers several preset text watermarks for quick application.
- Open your Word document and navigate to the Design tab.
- In the Page Background section, click the Watermark drop-down arrow.
- Choose a watermark from the available categories, including “Confidential,” “Disclaimers,” and “Urgent.” Each category offers different font styles and placements.
The selected watermark will then appear on every page of your document.
Creating Custom Text Watermarks
For personalized watermarks, you can create a custom text watermark with your desired text, font, color, and placement.
- Go to the Design tab, click the Watermark drop-down arrow, and select Custom Watermark.
- Select the Text watermark option.
- Customize your watermark using the following options:
- Language: Choose the desired language.
- Text: Enter your custom text or select a preset option.
- Font: Select a font style.
- Size: Choose Auto or a specific font size.
- Color: Select a color and check the Semitransparent box for a faded effect.
- Layout: Choose Diagonal or Horizontal placement.
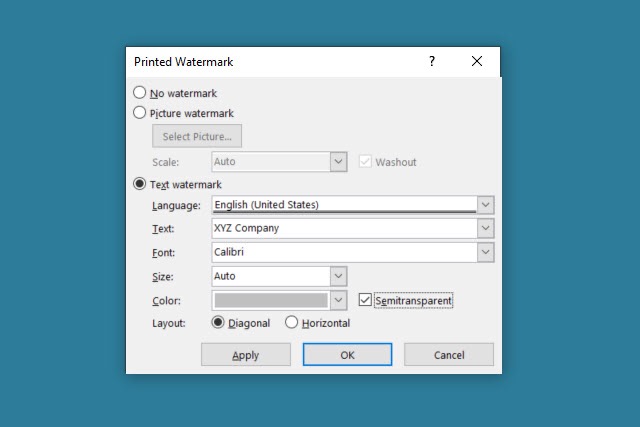 Text watermark settings in Word.Image used with permission by copyright holder
- Click Apply or OK to add the watermark and Close to exit the window.
 Custom text watermark in Word.Image used with permission by copyright holder
Inserting Custom Image Watermarks
You can also use an image as your watermark.
- Go to the Design tab, click the Watermark drop-down, and choose Custom Watermark.
- Select the Picture watermark option.
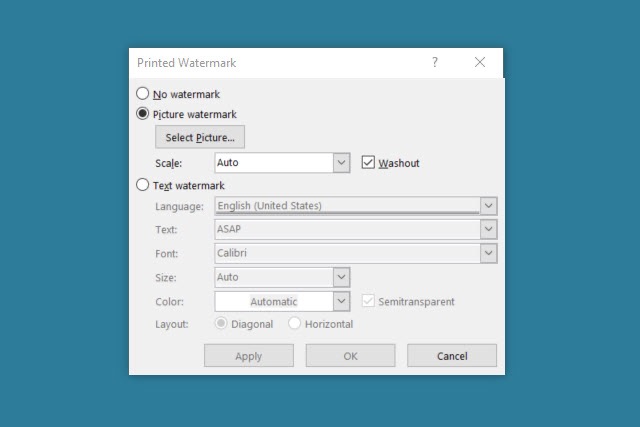 Picture watermark option in Word.Image used with permission by copyright holder
- Click Select Picture to choose an image from your computer, Bing image search, or OneDrive.
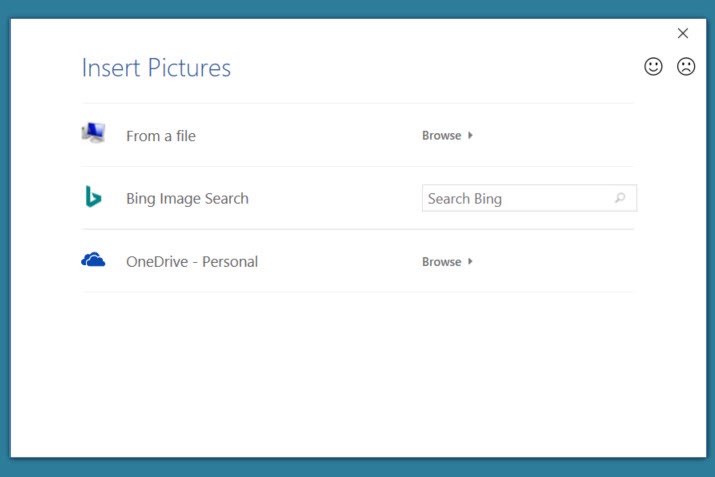 Options to locate an image watermark in Word.Image used with permission by copyright holder
- Scale the image using the Scale drop-down menu. Check the Washout box to fade the image.
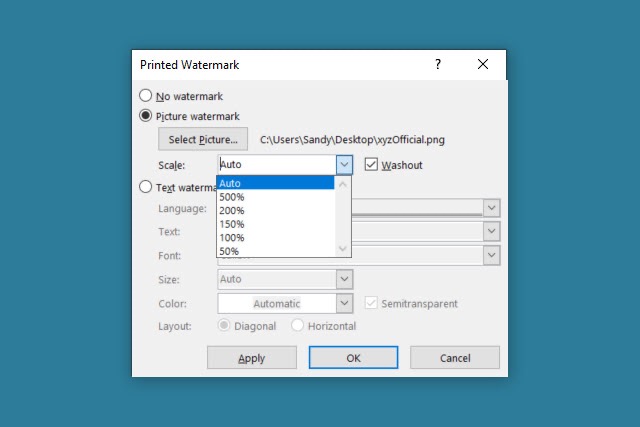 Scale settings for an image watermark.Image used with permission by copyright holder
- Click Apply or OK to add the watermark and Close to exit.
 Custom picture watermark in Word.Image used with permission by copyright holder
Removing Watermarks
Removing a watermark is just as easy.
- Go to the Design tab.
- Click the Watermark drop-down arrow.
- Select Remove Watermark.
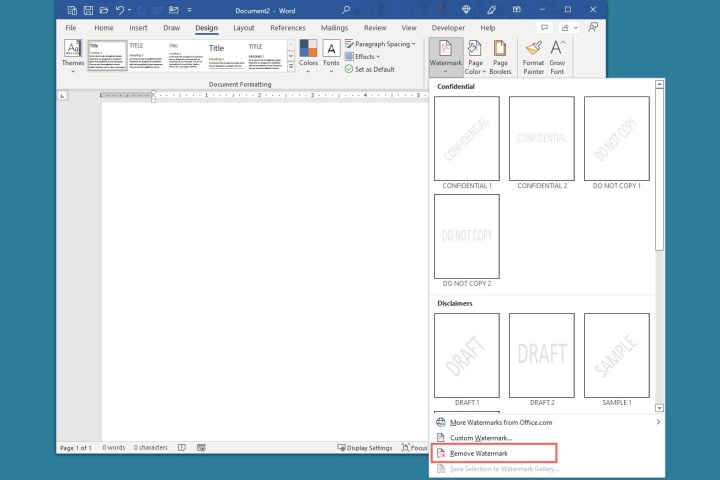 Remove Watermark in the Watermark menu in Word.Image used with permission by copyright holder
Conclusion
Watermarks are a valuable tool for communicating important information about your documents. Whether you need to mark a document as confidential, a draft, or simply add your logo, Microsoft Word provides an easy and efficient way to add and manage watermarks. This allows you to clearly communicate the status or ownership of your documents without impacting readability.


