Microsoft Word, a cornerstone of document creation, is synonymous with word processing itself. Its extensive features empower users to craft professional documents, but navigating its complexities can sometimes be challenging. This guide provides a clear, step-by-step approach to mastering hanging indents in Microsoft Word across different operating systems, ensuring your documents are perfectly formatted.
Microsoft Word is a powerful document creation and desktop publishing tool, offering a wide array of features to enhance the layout and formatting of your documents. From adding double spacing and page numbers to printing labels, the possibilities are endless. Mastering features like hanging indents allows for greater control over the visual presentation of your work.
Hanging Indents in Microsoft Word for Windows
These instructions apply to Word for Microsoft 365, Word 2021, Word 2019, Word 2016, and Word 2013.
Step 1: Selecting the Text
Open your Word document and highlight the paragraphs where you want to apply the hanging indent.
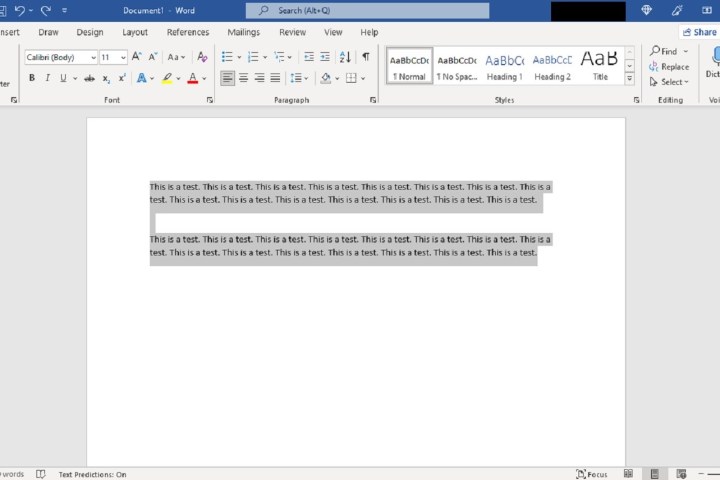 Highlighted paragraphs in Microsoft Word for adding hanging indents.
Step 2: Accessing Paragraph Settings
Go to the Home tab, locate the Paragraph section, and click the dialog box launcher in the bottom right corner.
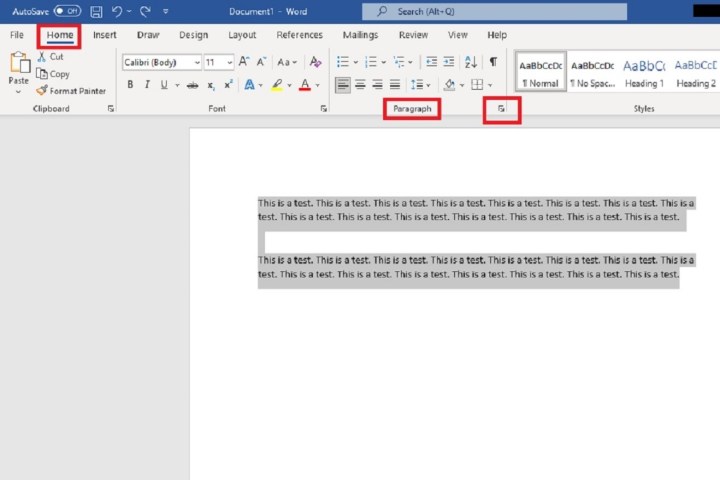 The Paragraph dialog box launcher in Microsoft Word's Home tab.
Step 3: Applying the Hanging Indent
In the Paragraph dialog box, ensure the Indents and Spacing tab is selected. Under Indentation, find the Special dropdown menu. Select Hanging from the list.
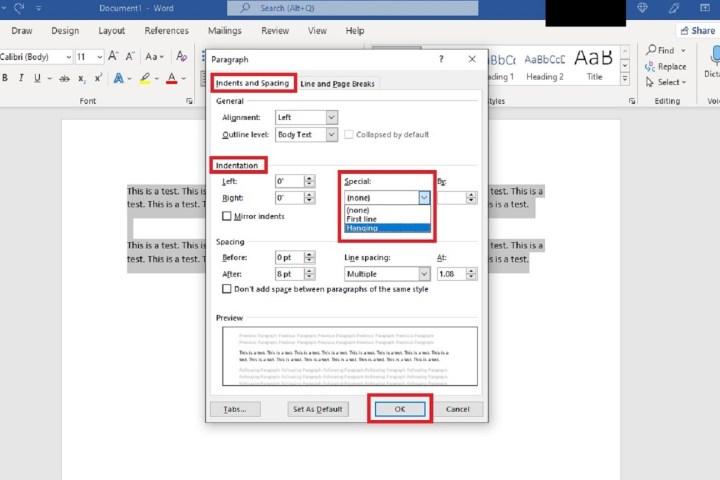 The Paragraph dialog box in Microsoft Word showing Indentation settings.
Click OK to apply the hanging indent.
Hanging Indents in Microsoft Word for macOS
While the interface differs slightly, creating hanging indents in the macOS version of Word is straightforward.
Step 1: Highlighting the Text
Select the paragraph or list you want to format.
Step 2: Opening the Paragraph Menu
Right-click on the highlighted text and choose Paragraph….
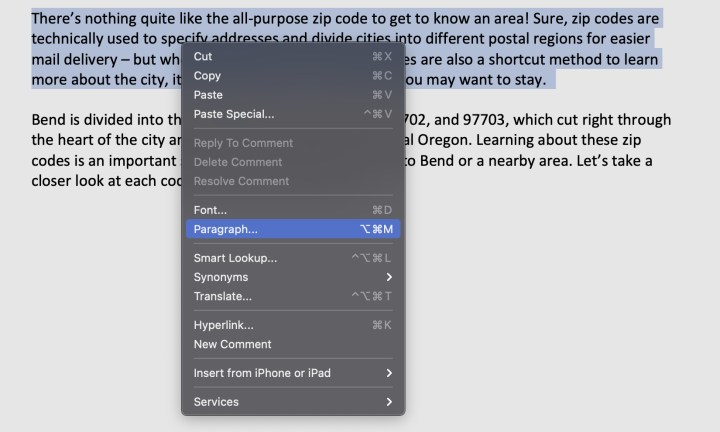 Right-click menu in Word for macOS showing the Paragraph option.
Steps 3-5: Applying and Customizing the Indent
In the Paragraph menu, locate the Indentation section. Under Special, choose Hanging. Adjust the indent depth as needed. Click OK to confirm.
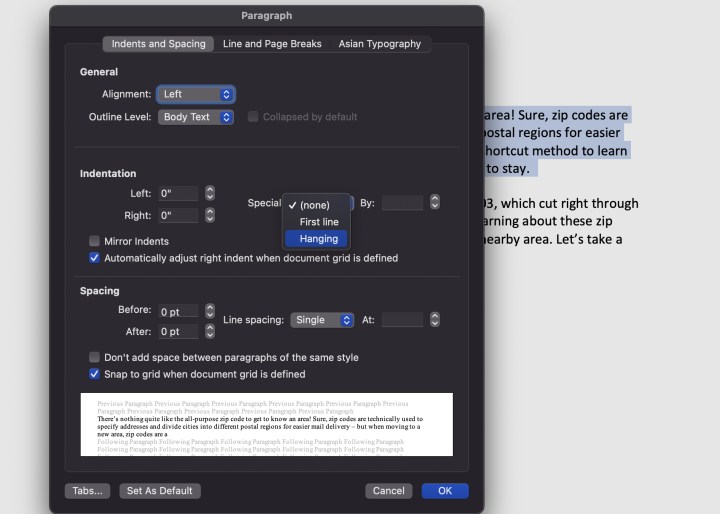 Hanging Indent settings in Word for macOS.
Step 6: Setting as Default (Optional)
For documents requiring hanging indents throughout, choose Set as Default.
 Example of a hanging indent in Word for macOS.
Hanging Indents in Microsoft Word for Chrome OS
For Chromebook users, the Microsoft Word web app offers a lightweight solution. Access it via your Microsoft account (link).
Step 1: Selecting the Text
Highlight the text you want to modify.
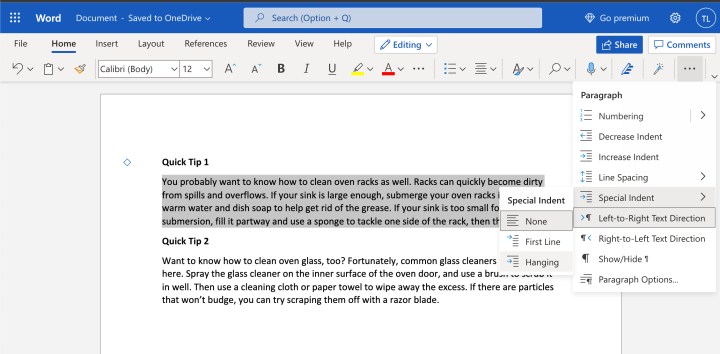 Highlighted text in the web version of Microsoft Word.
Steps 2-3: Applying the Indent
Click the three-dot icon for more settings in the upper right corner. Choose Special Indent and then Hanging.
Step 4: Saving to OneDrive
Documents created in the web app are saved to OneDrive, ensuring accessibility from other devices.
Conclusion
This guide has provided a comprehensive overview of how to create hanging indents in Microsoft Word across various platforms. By following these simple steps, you can enhance the visual structure and professionalism of your documents. Whether you’re working on Windows, macOS, or Chrome OS, achieving perfectly formatted text is now within easy reach.


