Adding shadows in Photoshop is a fundamental technique for enhancing depth and realism in images, whether you’re editing product photos, creating digital art, or simply adding a touch of dimension to text. This guide provides a step-by-step walkthrough on how to create both drop shadows and inner shadows in Photoshop.
Creating Realistic Drop Shadows
Drop shadows mimic the natural effect of light casting a shadow behind an object. This effect is widely used in graphic design and photo editing to give elements a sense of being lifted off the background.
- Prepare the Layer: Select the layer containing the object you want to apply the drop shadow to. Ensure the layer is unlocked in the Layers panel, indicated by a lock icon.
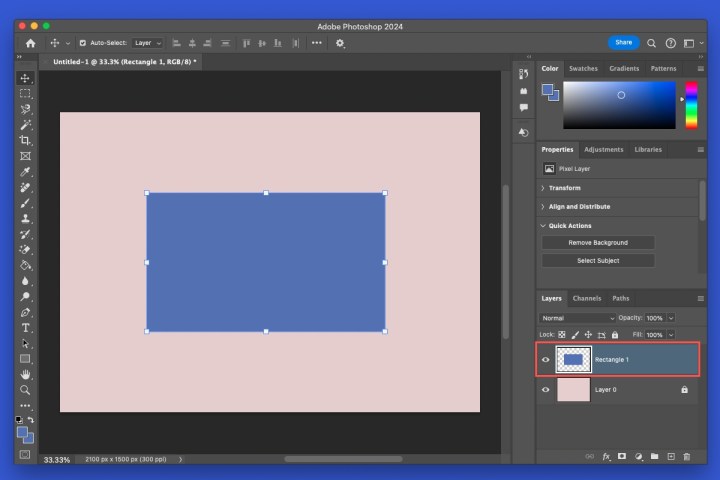 Rectangle layer unlocked in Photoshop. Alt: Screenshot of the Layers panel in Photoshop, highlighting an unlocked rectangle layer.
- Access Drop Shadow Settings: At the bottom of the Layers panel, click the Add layer style icon (fx) and select Drop Shadow from the menu.
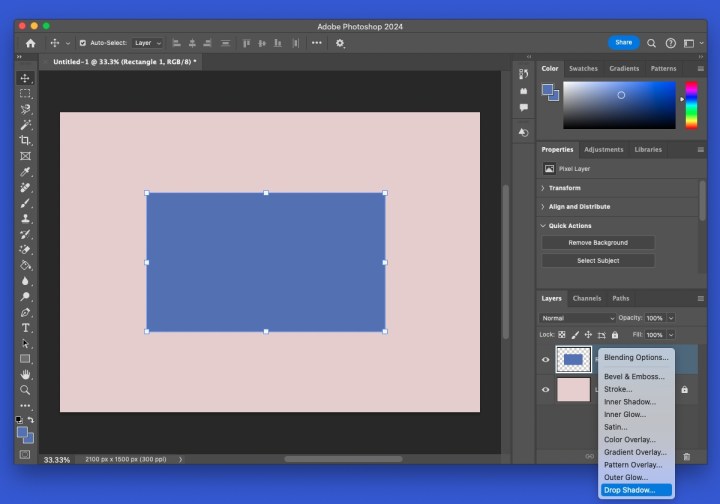 Drop Shadow in the Photoshop Effects menu. Alt: Screenshot of the Layer Style menu in Photoshop with the Drop Shadow option highlighted.
-
Customize the Shadow: A dialog box will appear with various options to customize the drop shadow. Experiment with these settings while observing the live preview on your image:
- Blend Mode: Controls how the shadow interacts with the underlying layers. Multiply and Linear Burn are popular choices for realistic shadows.
- Opacity: Adjusts the shadow’s transparency.
- Angle: Sets the direction of the light source.
- Distance: Controls the offset between the object and the shadow.
- Spread: Determines the shadow’s diffusion or softness.
- Size: Controls the overall size of the shadow.
The Quality section allows further refinement with Contour and Noise, although the default settings often suffice.
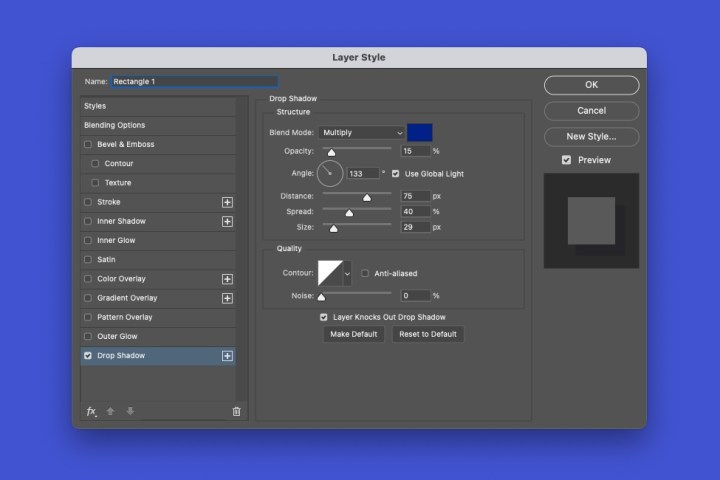 Drop Shadow settings in Photoshop. Alt: Screenshot of the Drop Shadow settings dialog box in Photoshop.
- Apply the Effect: Click OK to apply the drop shadow. Double-click the Drop Shadow effect in the Layers panel to reopen the settings and make further adjustments at any time.
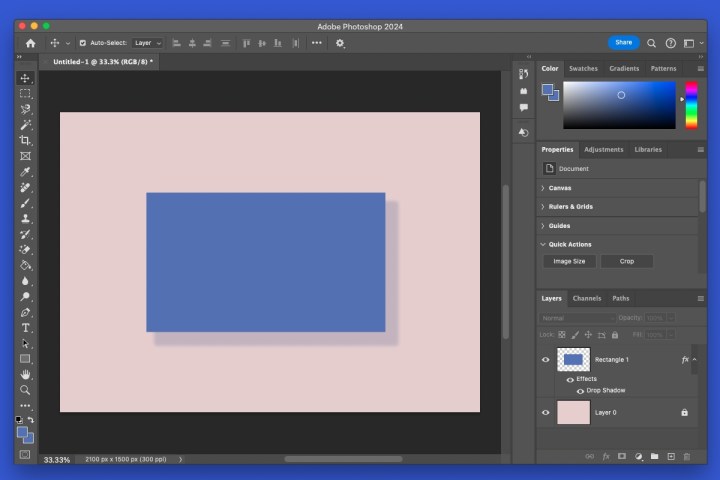 Rectangle with a drop shadow in Photoshop. Alt: Screenshot of a rectangle with a drop shadow applied in Photoshop.
Implementing Inner Shadows
Inner shadows create the illusion of depth by simulating a light source casting a shadow inwards, giving objects a recessed or engraved appearance.
-
Layer Preparation: As with drop shadows, select the unlocked layer of the object you’re working with.
-
Apply Inner Shadow: Click the Add layer style icon (fx) and choose Inner Shadow.
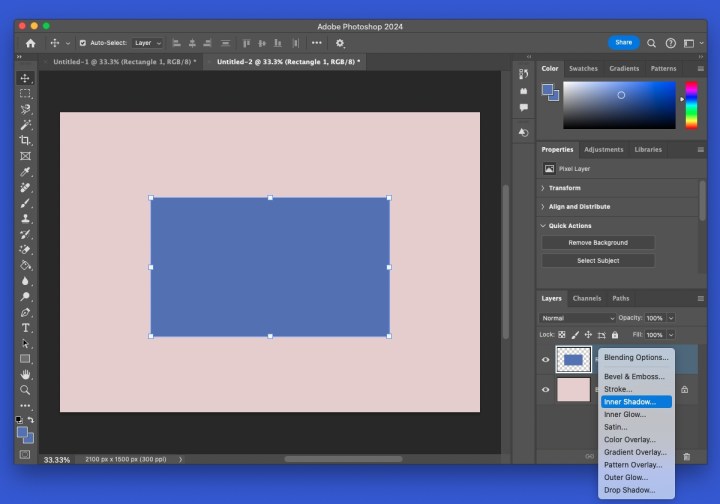 Inner Shadow in the Photoshop Effects menu. Alt: Screenshot of the Layer Style menu in Photoshop with Inner Shadow highlighted.
- Configure Settings: Adjust the parameters in the Structure and Quality sections, similar to the drop shadow settings. Note that instead of Spread, the setting is called Choke, which controls the shadow’s contraction.
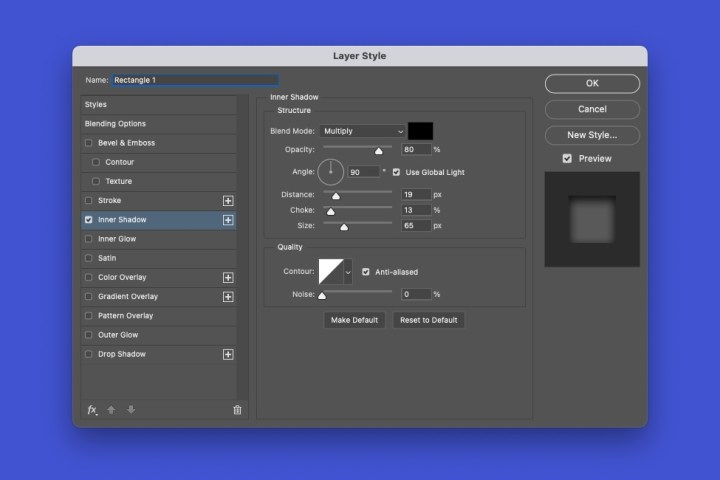 Inner Shadow settings in Photoshop. Alt: Screenshot of the Inner Shadow settings dialog box in Photoshop.
- Finalize the Effect: Click OK to apply the inner shadow. Edit the settings at any time by double-clicking the Inner Shadow effect in the Layers panel.
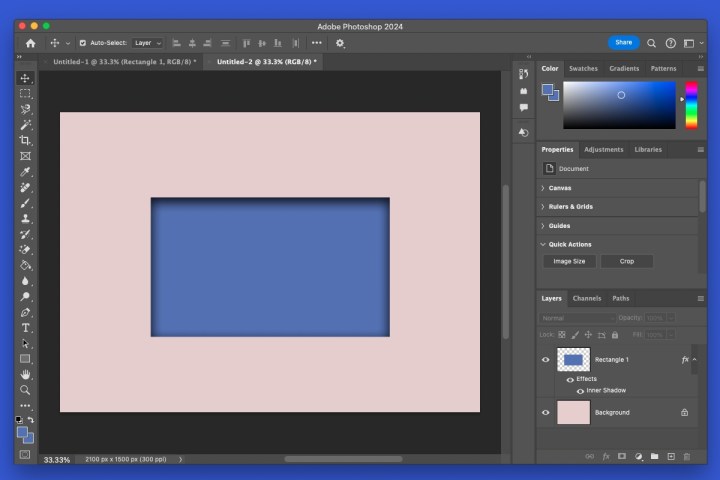 Rectangle with an inner shadow in Photoshop. Alt: Screenshot of a rectangle with an inner shadow applied in Photoshop.
Conclusion
Mastering shadow effects is crucial for enhancing the visual appeal and realism of your designs in Photoshop. By understanding the nuanced control offered by drop shadows and inner shadows, you can add depth, dimension, and a touch of professionalism to your images.


