Adding an SSD or HDD to your PC requires more than just physically installing the drive. You need to initialize the storage and create partitions to access it. This guide provides a comprehensive, step-by-step walkthrough using Windows’ built-in Disk Management tool. This process also works for preparing USB drives for use with Windows.
Using Windows Disk Management
-
Accessing Disk Management: Open Disk Management by pressing Windows+X and selecting “Disk Management” from the menu. Alternatively, press Windows+R, type
diskmgmt.msc, and press Enter. -
Understanding the Interface: The upper section of Disk Management displays existing partitions with assigned drive letters. Key information shown includes the file system (e.g., NTFS), total capacity, and free space. The lower section shows the physical drives connected to your system.
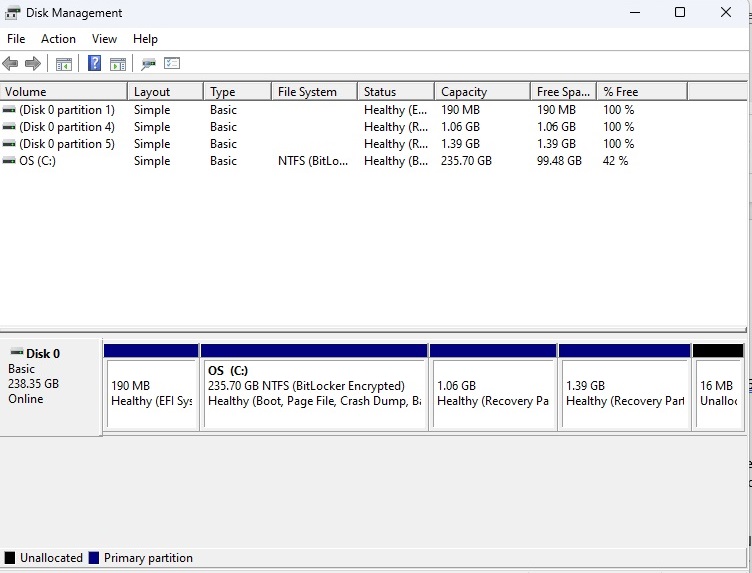 windows disk management
- Creating a New Simple Volume: Right-click on the unallocated space (black bar) of your new drive and select “New Simple Volume…”. Click “Next”. Windows will suggest the maximum available size. Accept this if you want a single partition, or specify a smaller size in MB if you plan to create multiple partitions. Click “Next,” choose a drive letter, select “NTFS” as the file system, and click “Finish.” Your new partition will now be accessible in File Explorer.
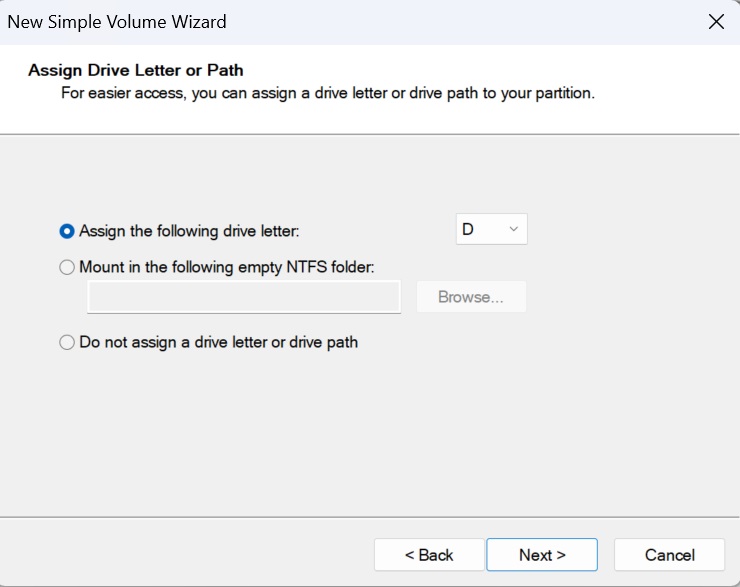 simple volume wizard
Managing Partitions
- Hiding a Partition: To hide a partition, open Disk Management, right-click on the target partition, and select “Change Drive Letter and Paths…”. Click “Remove”, and confirm the warning. The drive will no longer be visible in File Explorer.
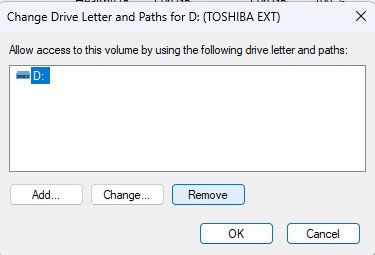 hide disk partition
To restore visibility, repeat the process and click “Add” to assign a drive letter.
- Changing Drive Letters: To change a drive letter, open Disk Management, right-click on the target partition, select “Change Drive Letter and Paths…”, and then click “Change…”. Choose an available drive letter and confirm.
Formatting External Drives
- Formatting a USB Drive: Connect the USB drive to your PC and open Disk Management (ignore any automatic Windows prompts). The drive will appear in the lower section. Right-click on the unallocated space (black bar) and select “New Simple Volume…”. Follow the wizard, accepting the default settings (including NTFS), and assign a name to the drive. Click “Finish” to format.
Advanced Partition Management
- Third-Party Tools: While Windows Disk Management handles basic tasks, third-party tools like Minitool Partition Wizard Free Edition offer advanced functionalities, such as moving partitions or deleting Linux partitions, for more complex operations.
Conclusion
Setting up a new SSD or HDD in Windows is a straightforward process using the built-in Disk Management tool. From creating new volumes to managing existing partitions and formatting external drives, these steps ensure your new storage is ready for use. For advanced partitioning tasks, consider using a third-party tool for greater flexibility.


