Protecting your valuable data on a Linux system is crucial, and the best way to do this is through regular backups. The type of backup you need depends on your PC usage. Generally, a regular backup of your home directory suffices, safeguarding against accidental deletions and data loss. However, if you have numerous programs or server services installed, a full hard disk backup is periodically recommended. This article explores several effective Linux backup tools, enabling you to create disk images and restore them to a new hard drive when needed.
Duplicati: Versatile Data Backup Solution
Duplicati is an excellent tool for backing up personal files, supporting local drives, FTP, SFTP, Google Drive, Dropbox, Microsoft OneDrive, and other cloud services. Backups are incremental, meaning only changes since the last backup are saved, optimizing storage space and efficiency.
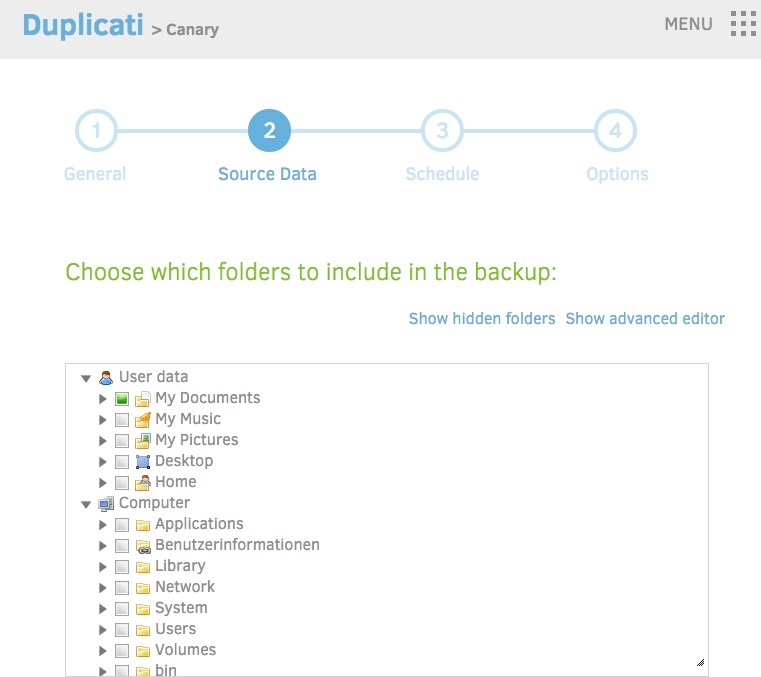 Duplicati screenshot Duplicati user interface.
Ubuntu and Linux Mint users can find a DEB package on the official Duplicati website (duplicati.com/download), installable through the distribution’s package manager. Open your terminal in the download directory and execute:
sudo apt install ./duplicati_2.0.6.3-1_all.debRemember to adjust the filename for newer versions.
Launching Duplicati from the desktop runs it with user permissions. Scheduled backups require you to be logged in and Duplicati running. Access the web interface through your browser. For backing up folders requiring root access, run Duplicati as a system service. This enables automated background backups. Activate and start the service with these commands (Ubuntu/Linux Mint):
sudo systemctl enable duplicati
sudo systemctl start duplicati
Configuring Backups: Duplicati automatically assigns web server ports. The first instance started as a system service typically uses port 8200. Manually launched instances will use different ports, like 8300. The “Add backup” button initiates a wizard to configure your backup tasks.
Restoring Backups: The “Restore” button allows you to select the desired backup and the files to restore. You can restore to the original location or choose a new directory. After a fresh Linux installation, select “Direct restore from backup files.”
For a simple home directory backup to a USB drive, this command often suffices:
rsync -avP $HOME /media/$USER/[Drive-ID]/backupReplace “[Drive-ID]” with your drive’s identifier as mounted by Linux.
Timeshift: Efficient Incremental System Backups
Timeshift creates file system snapshots, allowing you to revert to previous system states. Ideally, use a separate hard drive for the target to protect against system disk failures. Timeshift is pre-installed in Linux Mint. Ubuntu users can install it with:
sudo add-apt-repository -y ppa:teejee2008/ppa
sudo apt update
sudo apt install timeshift
On initial setup, choose “rsync” as the snapshot type, specify the target drive, and set a schedule. Home directories are excluded by default to prevent data overwrites during restoration. Use Duplicati for backing up personal files. You can browse and copy files from Timeshift backups using the “Browse” option, while “Restore” reverts the entire system to the chosen snapshot.
Aptik: Streamlining New Installations
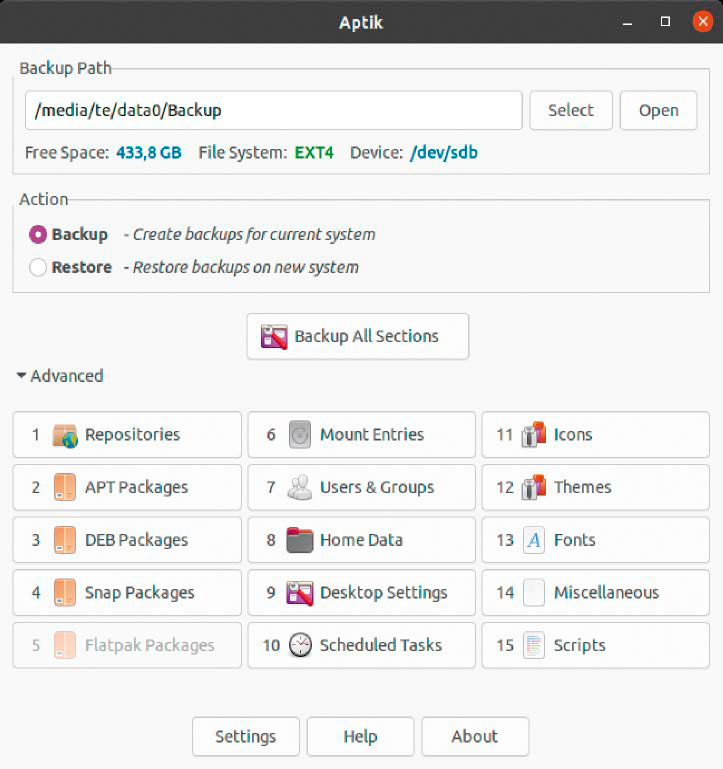 Saving Settings with Aptik Aptik simplifies the process of saving and restoring system settings and installed packages.
If you have a large number of installed applications, Aptik can significantly simplify new installations or setting up a second computer. By backing up your installed packages, repositories, snap and flatpack packages, fonts, themes, icons, and custom /etc/fstab entries, you can quickly restore your previous setup. While Aptik is a paid application, older free command-line versions are available, although compatibility with current distributions isn’t guaranteed.
For a simple list of manually installed packages (Ubuntu/Linux Mint):
comm -23 <(apt-mark showmanual | sort -u) <(gzip -dc /var/log/installer/initial-status.gz | sed -n 's/^Package: //p' | sort -u) > pkglist.txtAfter a new installation, use this to reinstall the packages:
sudo apt-get install $(cat pkglist.txt)Rescuezilla: Comprehensive Hard Disk Imaging
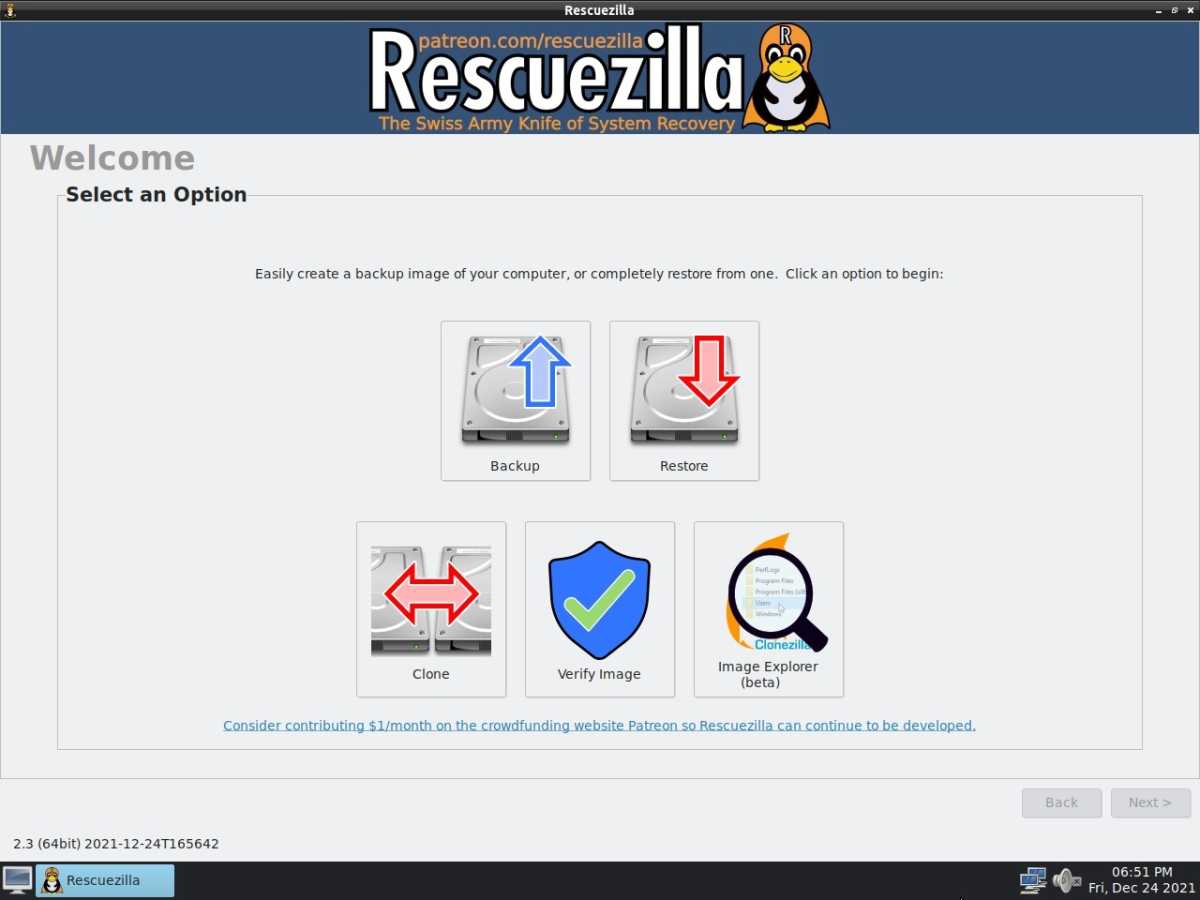 Rescuezilla screenshot Rescuezilla interface.
A full disk image backup provides the most comprehensive protection but can be time-consuming. It’s particularly useful for file servers or systems with minimal changes between backups. Rescuezilla creates image backups of partitions or entire drives, saving them to USB or network drives. Create a bootable USB stick or DVD from the downloaded ISO.
Click “Save,” specify the source drive, partitions, and destination drive. Choose “Uncompressed” under “Compression method.” Rescuezilla’s Image Explorer allows extracting individual files or folders from the image. “Restore” copies the image back to a hard drive. Rescuezilla utilizes Clonezilla, which offers advanced options accessible via the terminal for experienced users.
Conclusion: Choosing the Right Backup Strategy
Selecting the right backup tool and strategy depends on your specific needs. Duplicati excels at regular file backups, while Timeshift provides efficient system snapshots. Aptik simplifies software migrations, and Rescuezilla offers full disk imaging for comprehensive disaster recovery. By implementing a robust backup plan, you can ensure your data remains safe and recoverable, regardless of unforeseen circumstances.


