Extended screen time can lead to eye strain and headaches. While specialized glasses and screen protectors offer solutions, Windows 11 provides a built-in, cost-free feature called Night Light to mitigate blue light exposure. This guide will walk you through enabling and customizing this helpful tool.
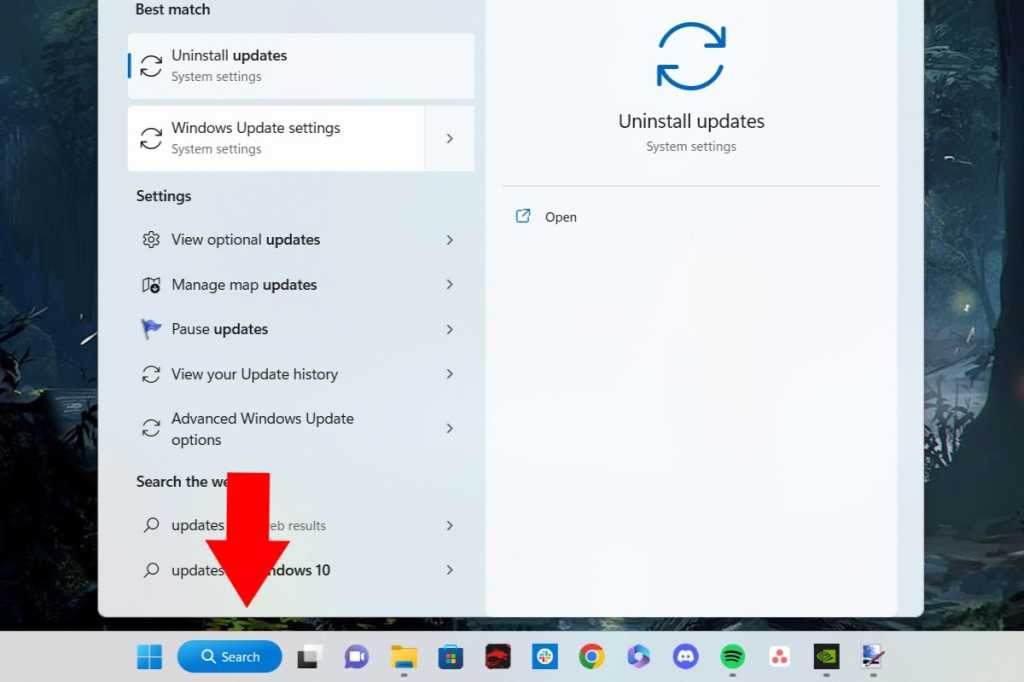
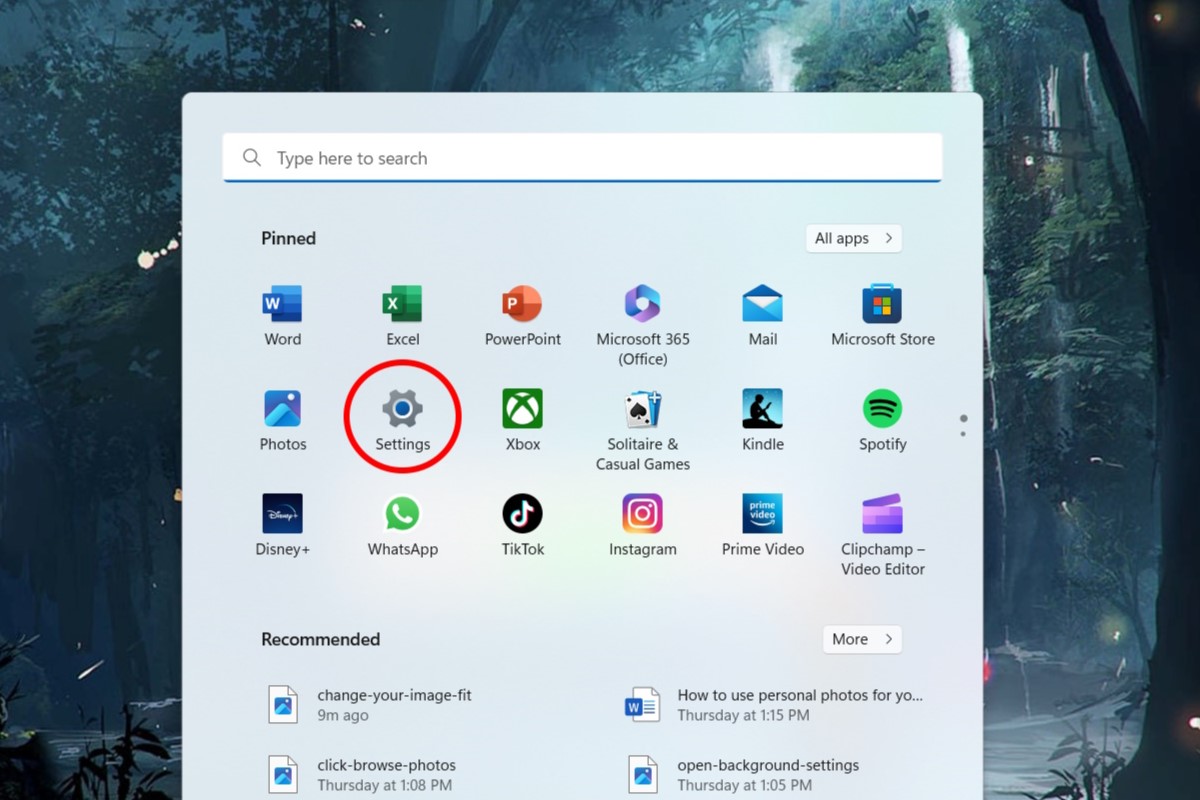 Accessing Windows 11 settings through the taskbar icon.
Enabling Night Light
Begin by clicking the Windows icon on your taskbar. From the menu that appears, select the gear-shaped icon labeled “Settings.” This will open the system settings menu.
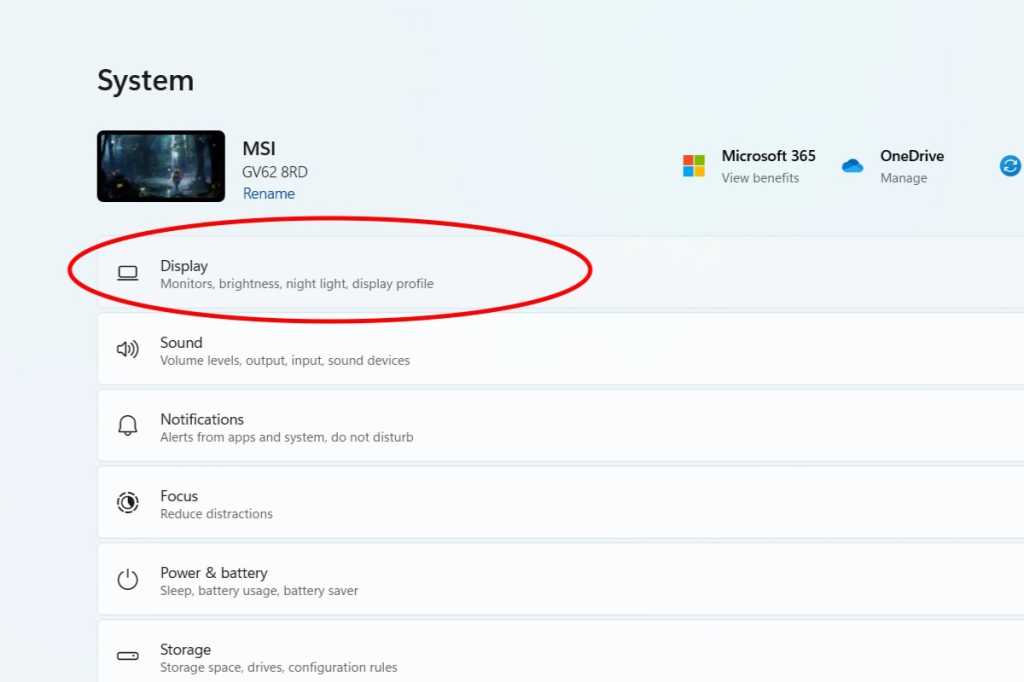
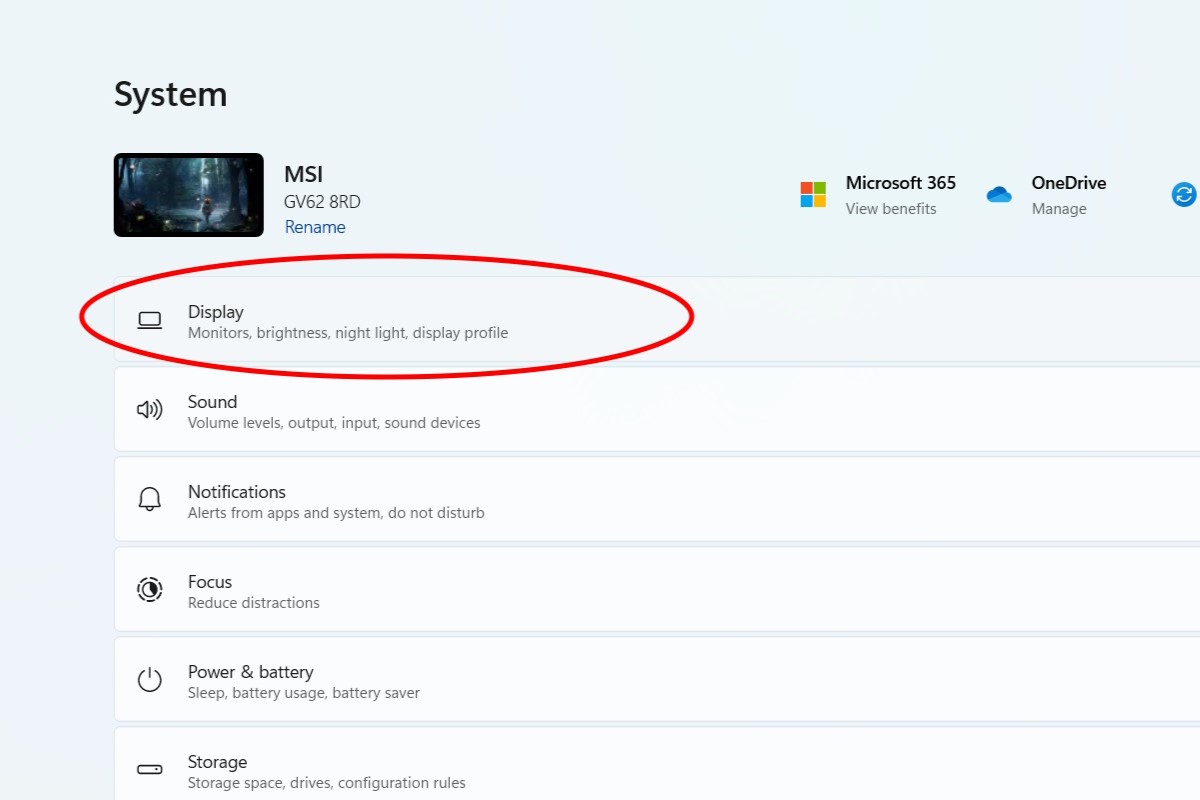 Navigating to Display Settings in Windows 11.
Within the system settings, choose “Display” to access the Night Light settings.
Activating and Customizing Night Light
To enable Night Light continuously, simply click the slider to the “On” position.
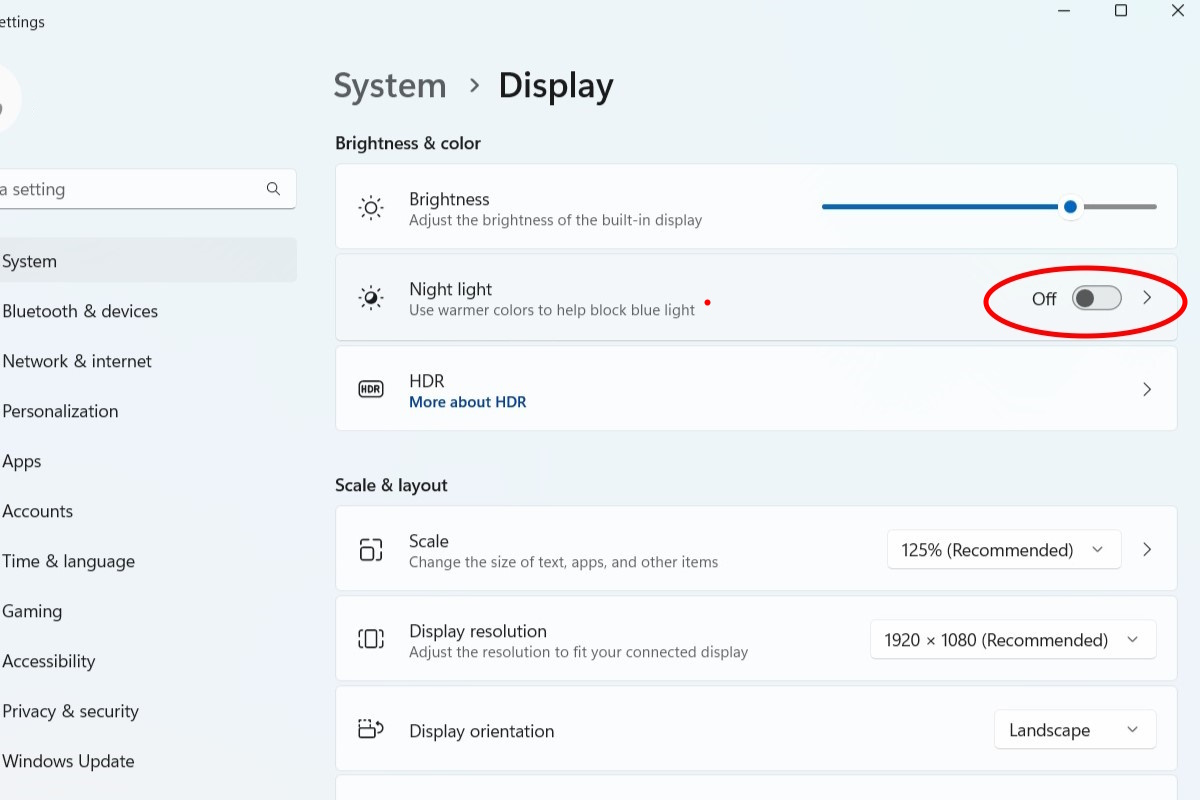 Activating Night Light using the slider in Display Settings.
For more granular control, click the arrow to expand the Night Light options. Here, you can adjust the strength of the blue light filter or set a schedule for automatic activation.
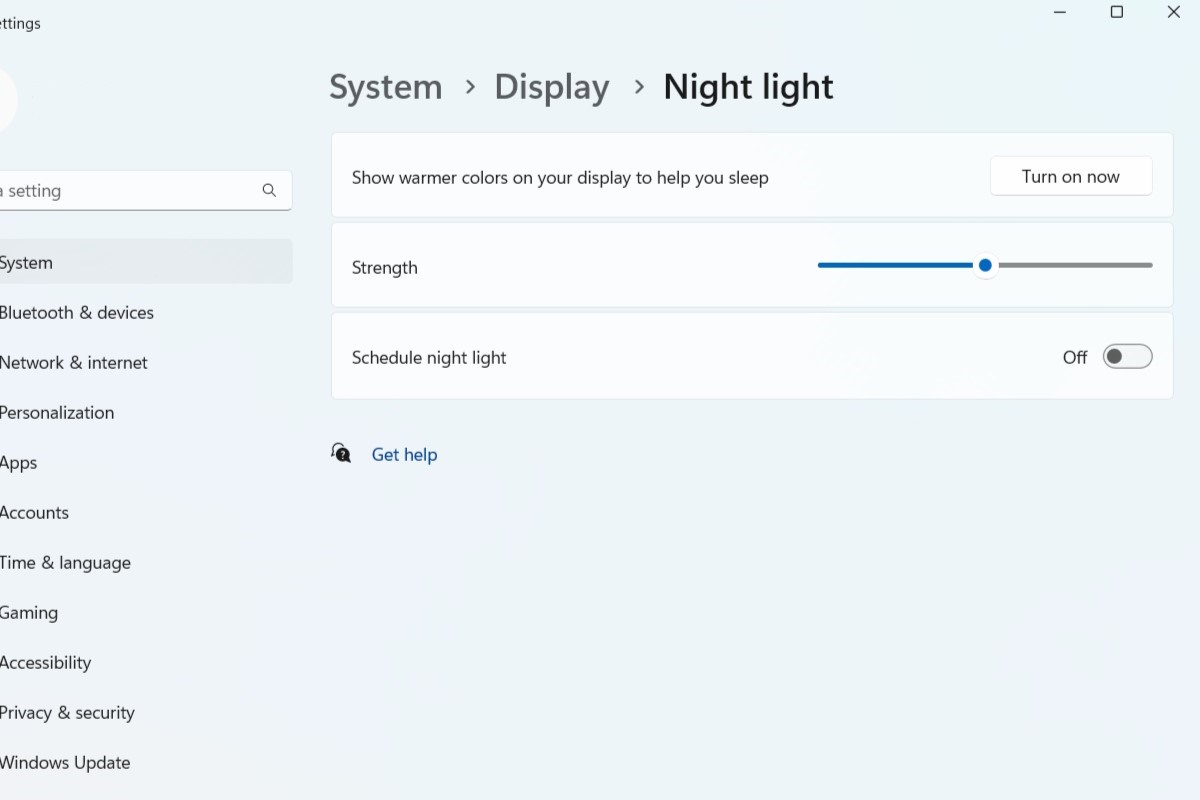 Adjusting Night Light strength and scheduling options.
Scheduling Night Light
To schedule Night Light, activate the “Schedule night light” slider. You can then choose between two options: “Set hours” or “Sunset to sunrise.”
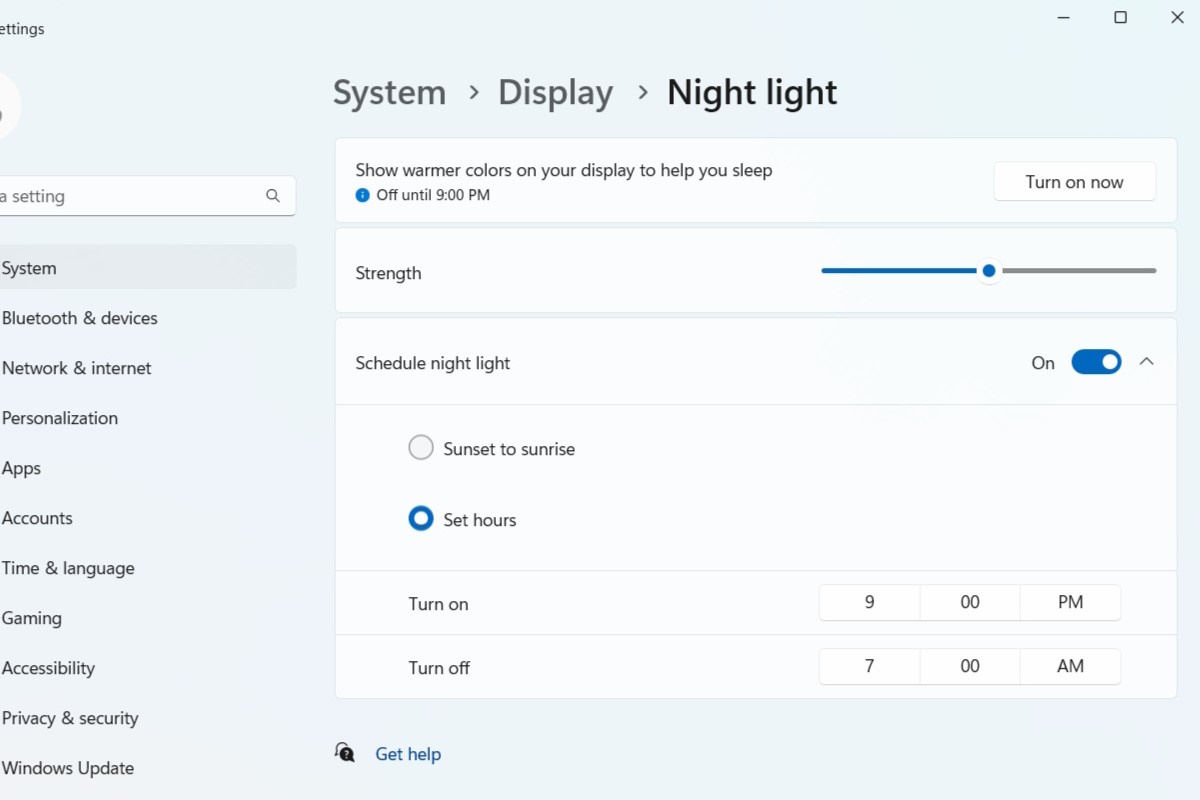 Setting custom hours for Night Light activation.
Selecting “Set hours” allows you to define a custom time range for Night Light. Click the numbers and AM/PM designations to set your desired start and end times.
The “Sunset to sunrise” option automatically activates Night Light based on your location’s sunset and sunrise times, providing a dynamic schedule aligned with natural light patterns.
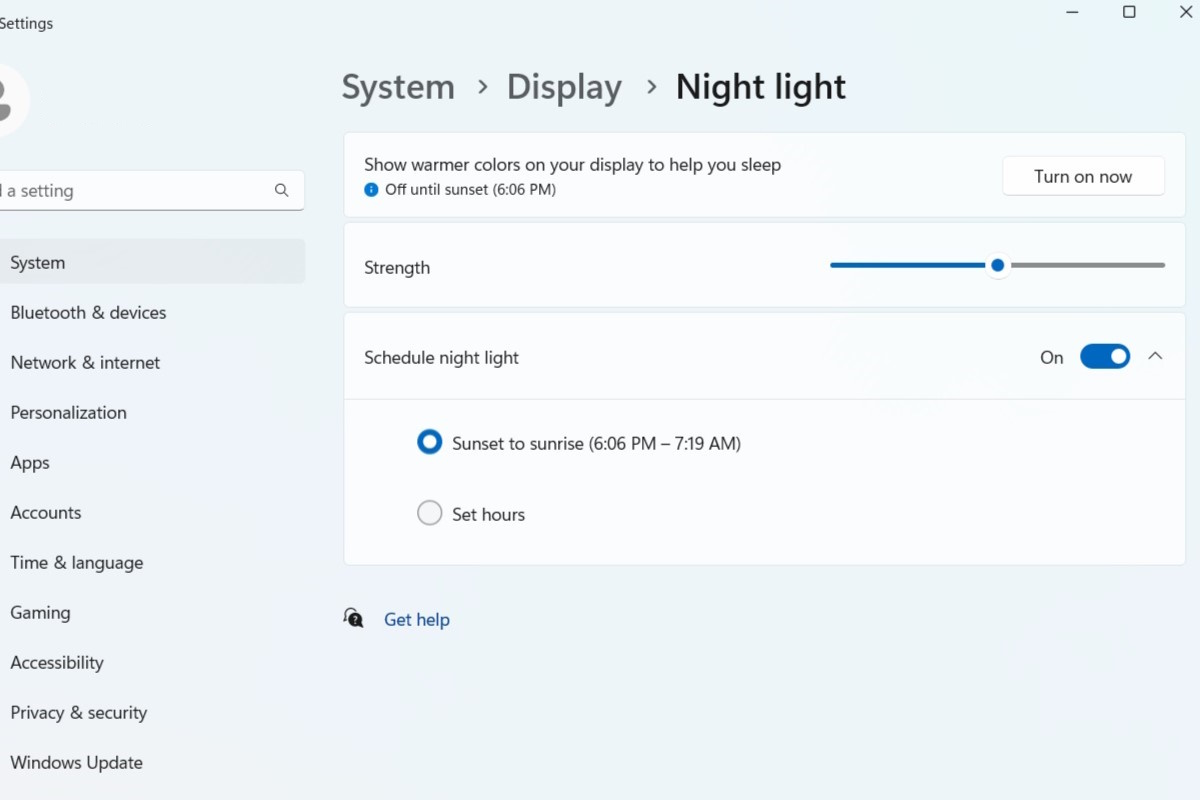 Using location-based sunset to sunrise scheduling for Night Light.
Disabling Night Light
To deactivate Night Light, simply return to the Display settings and toggle the Night Light slider to the “Off” position.
With these simple steps, you can effectively manage blue light exposure on your Windows 11 device and minimize eye strain.


