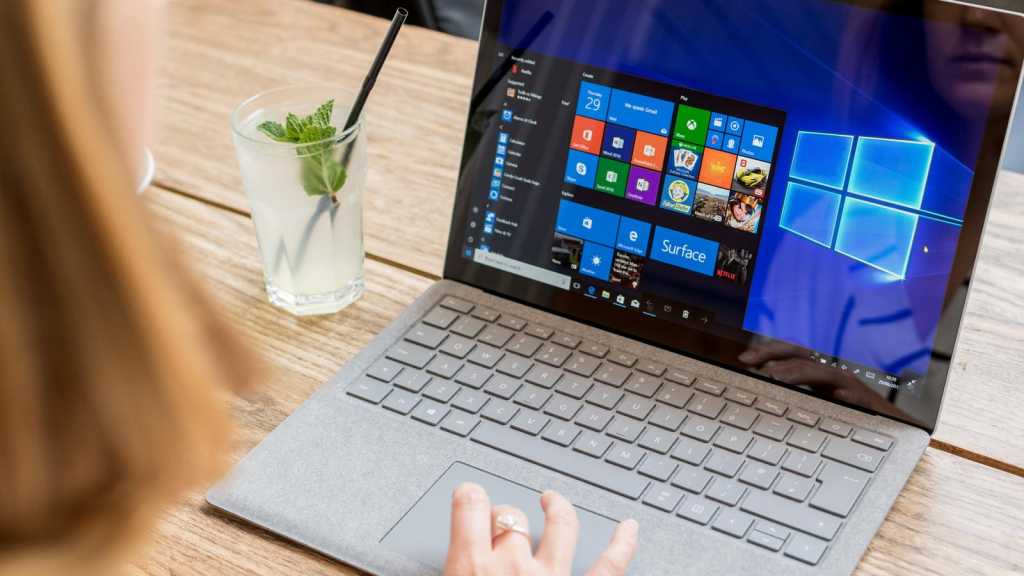
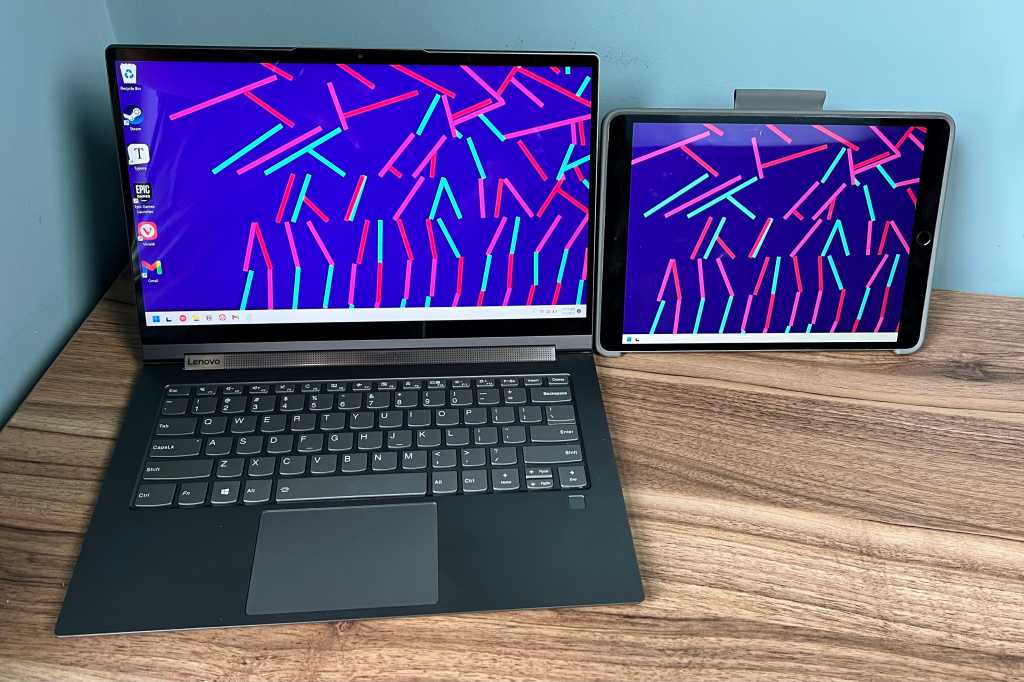
One of the perks of laptop ownership is portability. For frequent travelers, ensuring your computer’s clock accurately reflects the local time is essential. Windows 11 makes this easy with automatic time zone adjustments. This guide will walk you through the process.
Accessing Time & Language Settings
Begin by opening the Windows 11 settings menu. Click the Windows icon on the taskbar and select the gear-shaped settings icon.
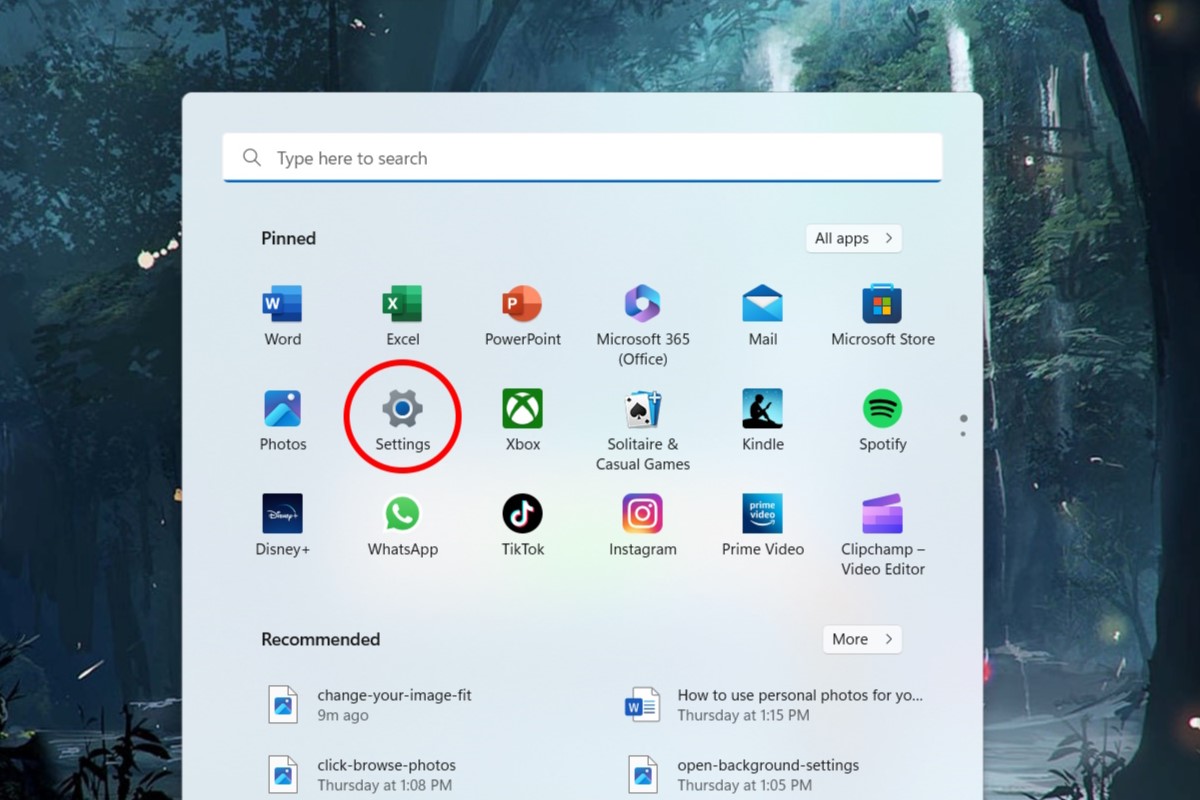 Accessing Windows 11 settings menu via the taskbar icon.
In the left-hand navigation menu, choose “Time & language.”
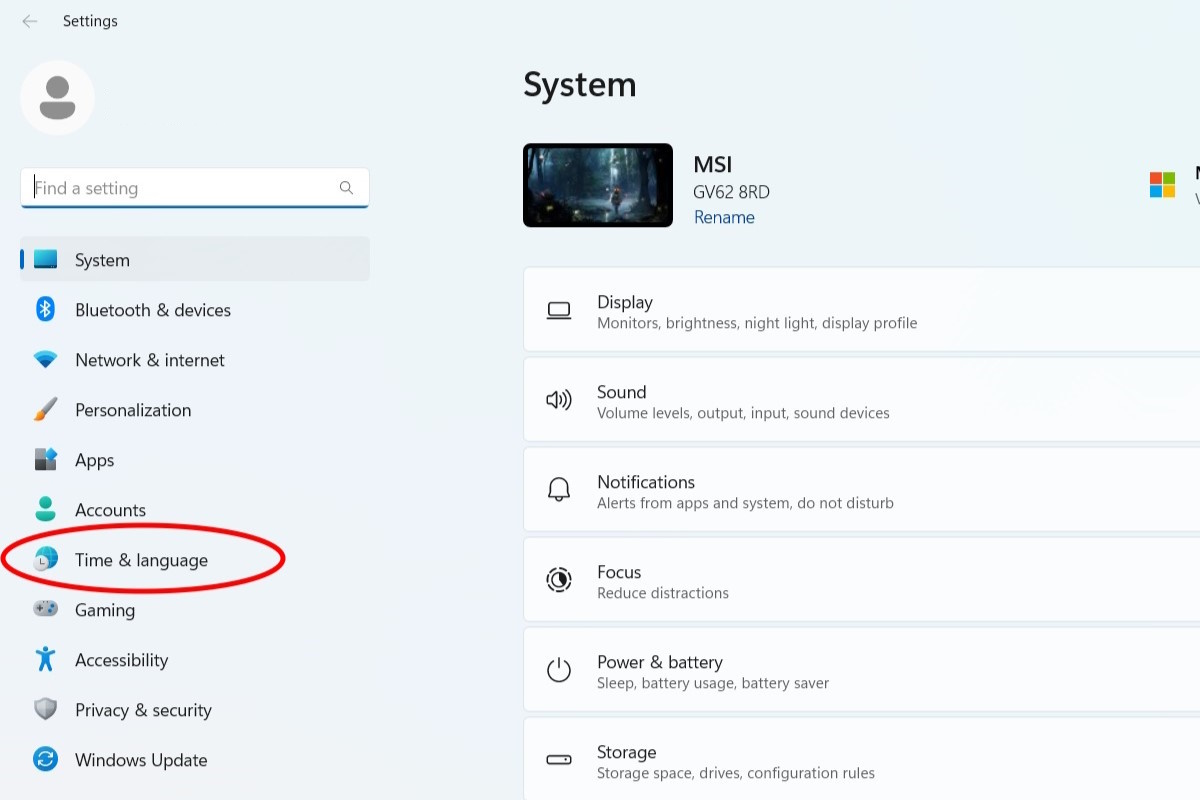 Selecting 'Time & language' in the settings menu.
Configuring Date & Time
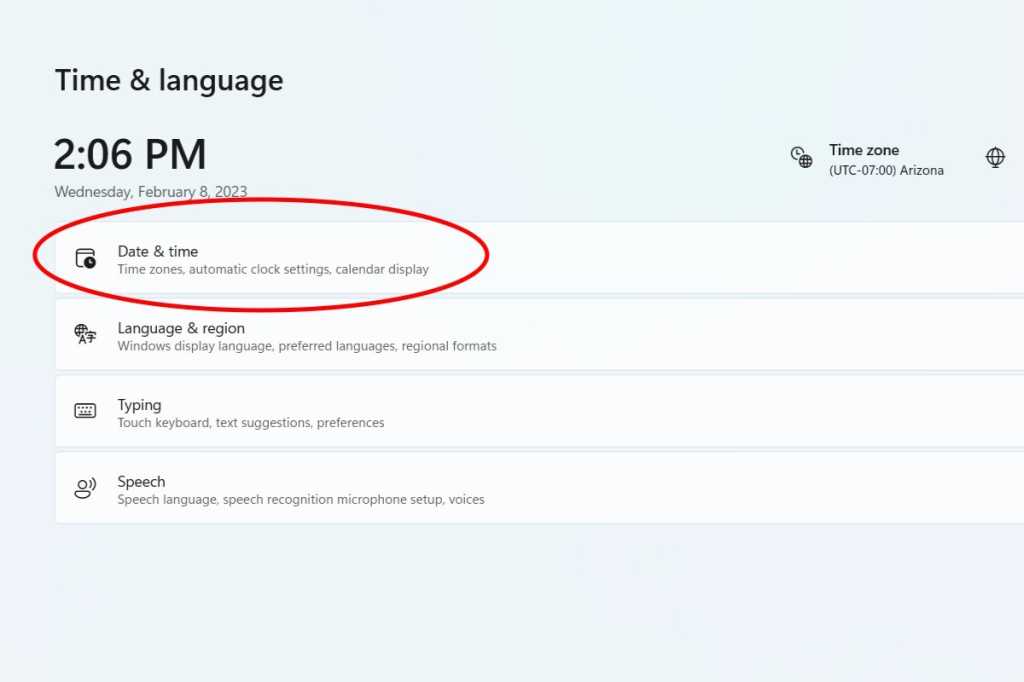
Within the “Time & language” settings, click on “Date & time.”
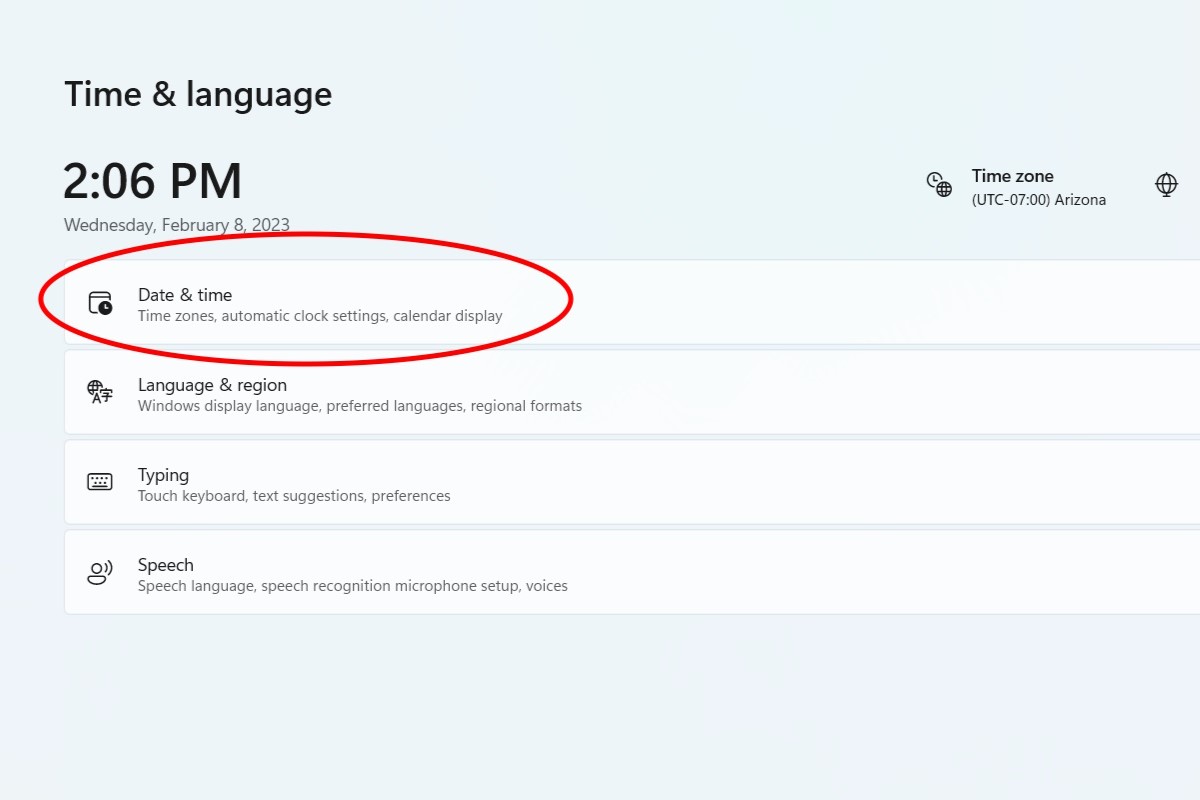 Choosing 'Date & time' within 'Time & Language'.
Enabling Automatic Time Zone
Locate the “Set time zone automatically” option. Ensure the slider is toggled to the “On” position. This enables Windows to automatically update your time zone based on your location.
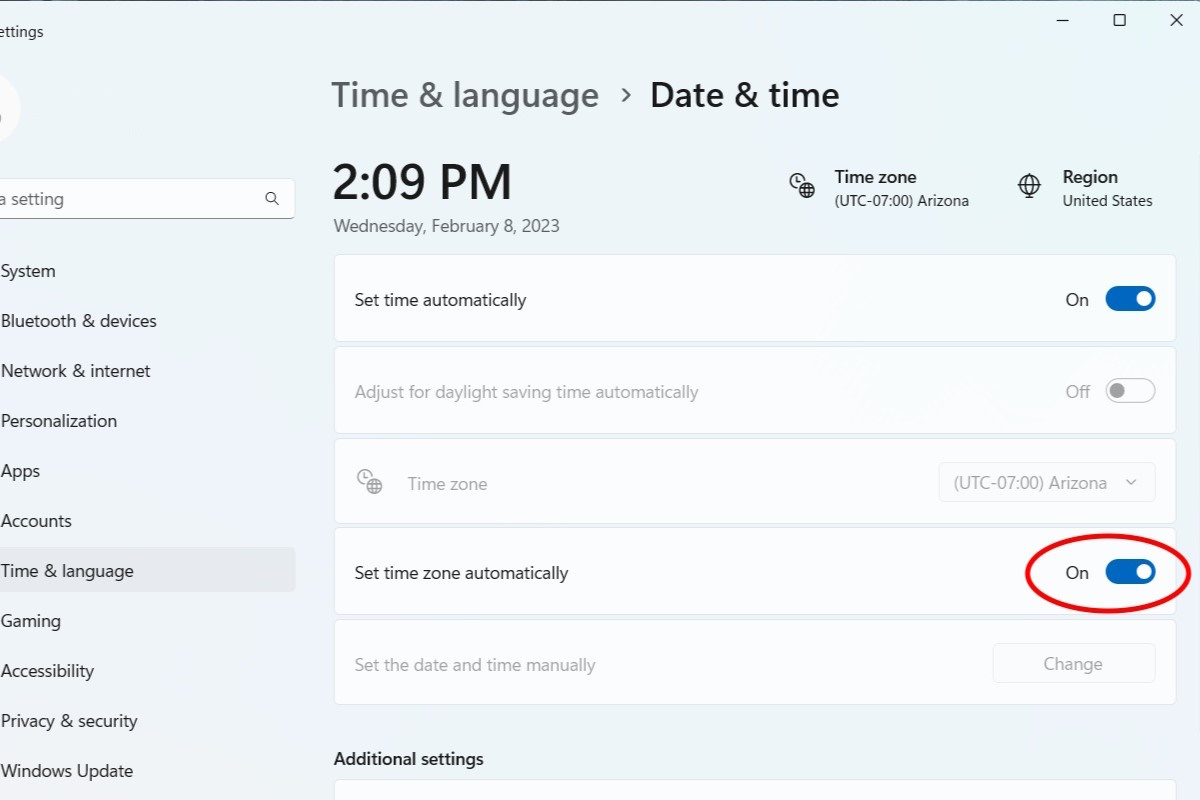 Enabling the 'Set time zone automatically' feature.
Setting a Specific Time Zone
If you prefer a fixed time zone, disable the automatic setting. A dropdown menu will appear, allowing you to select your desired time zone manually.
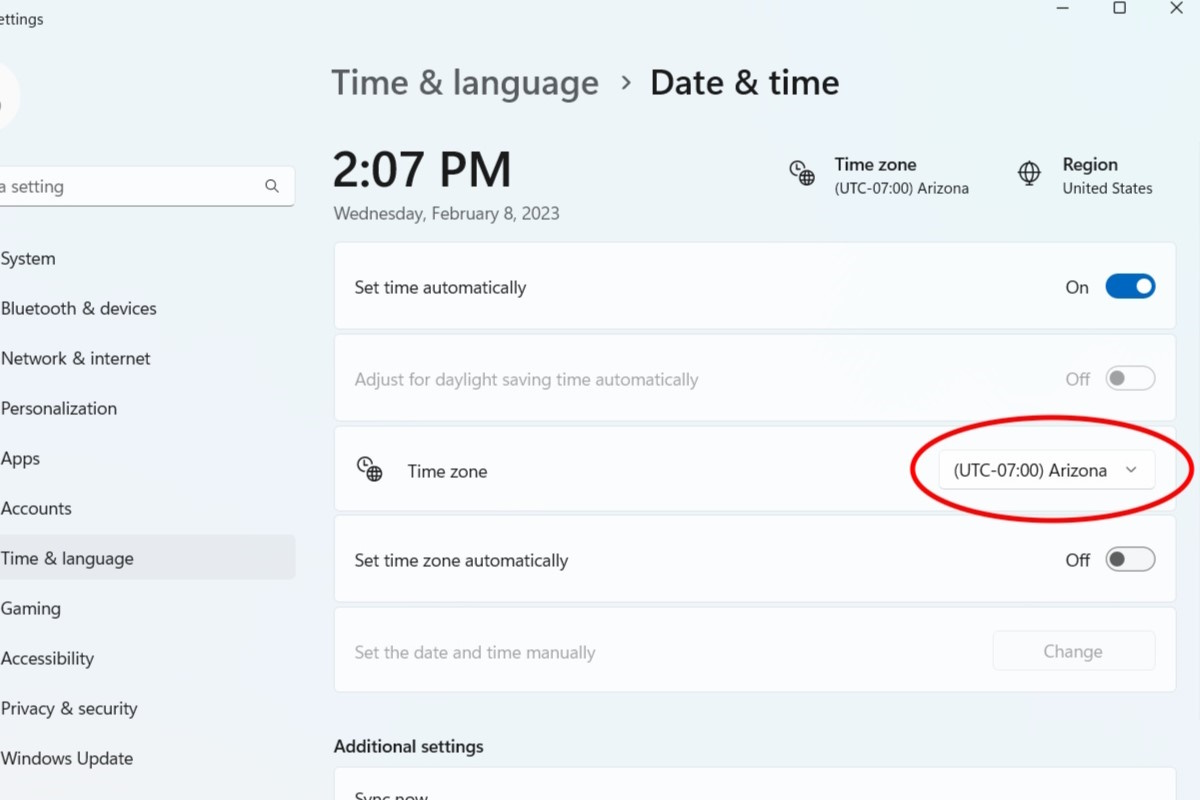 Manually selecting a time zone from the dropdown menu.
Syncing Your Time
If the time remains incorrect after configuring these settings, you may need to manually synchronize. Under “Additional settings,” click the “Sync now” button. This will force Windows to update the time with an internet time server.
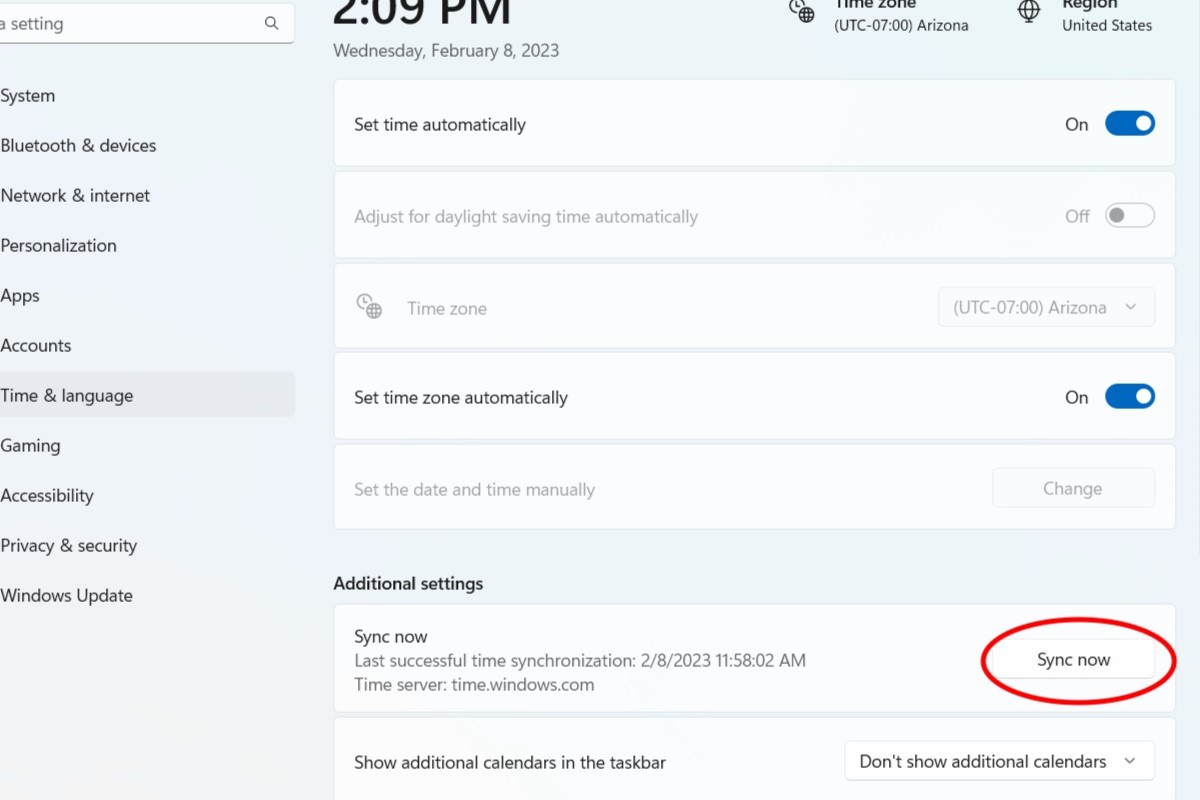 Manually syncing the time with an internet time server.
Conclusion
By following these steps, you can ensure your Windows 11 laptop always displays the correct local time, whether you’re traveling or staying put. Automatic time zone updates simplify time management and eliminate the hassle of manual adjustments.


