The dreaded blue screen of death (BSOD) with the SYSTEM_SERVICE_EXCEPTION error can halt your productivity and cause frustration. While this error can stem from several issues, it often points to a driver problem. The good news is that Windows 11 offers built-in tools to help you troubleshoot and resolve this error, often without needing to reinstall your operating system. This guide provides step-by-step instructions on how to fix the SYSTEM_SERVICE_EXCEPTION BSOD and break free from the reboot loop.
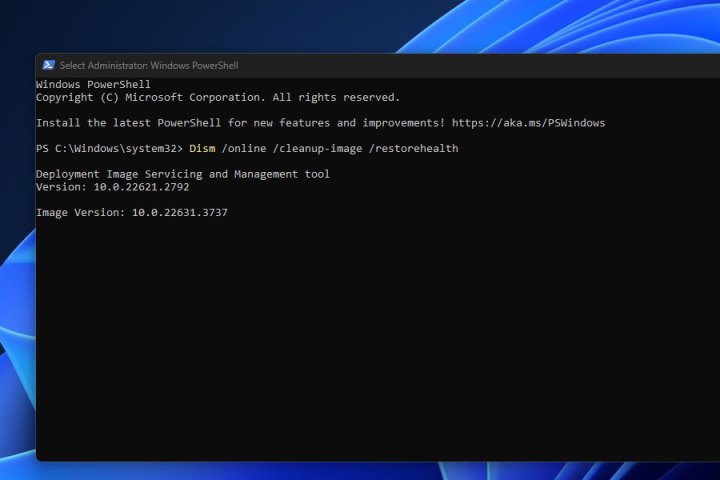 Running a DISM scan.
Running a System Scan
As mentioned, SYSTEM_SERVICE_EXCEPTION errors are typically caused by faulty system drivers. Unlike chipset or graphics drivers, these system drivers aren’t directly updated by the user. Windows, however, provides tools to address corrupted or missing system files and driver errors. If the BSOD prevents you from booting normally, try booting into Safe Mode first.
Step 1: Open PowerShell as an administrator. Search for “Powershell” in the Windows search bar, right-click the result, and select “Run as administrator.”
Step 2: Initiate the Deployment Image Servicing and Management (DISM) tool. Type the following command into PowerShell and press Enter:
Dism /online /cleanup-image /restorehealthThis command scans the Windows Component Store for corrupt or missing files and replaces them. The process might take a few minutes.
Step 3: Next, run the System File Checker (SFC) to verify the integrity of Windows system files. In the same PowerShell window, type the following command and press Enter:
SFC /scannowStep 4: Once both scans are complete, restart your PC. This should resolve the BSOD issue in many cases. If the problem persists, proceed to the next section.
Utilizing Driver Verifier
If system scans don’t resolve the error, the Windows Driver Verifier can pinpoint problematic drivers.
Important: Driver Verifier can sometimes trigger a BSOD if it detects a faulty driver. Creating a system restore point or backing up your data before proceeding is highly recommended.
Step 1: Open PowerShell with administrator privileges (as described in the previous section).
Step 2: Launch the Driver Verifier tool. Type “verifier.exe” into PowerShell and press Enter.
Step 3: Configure standard settings. Select “Create standard settings” and click “Next.”
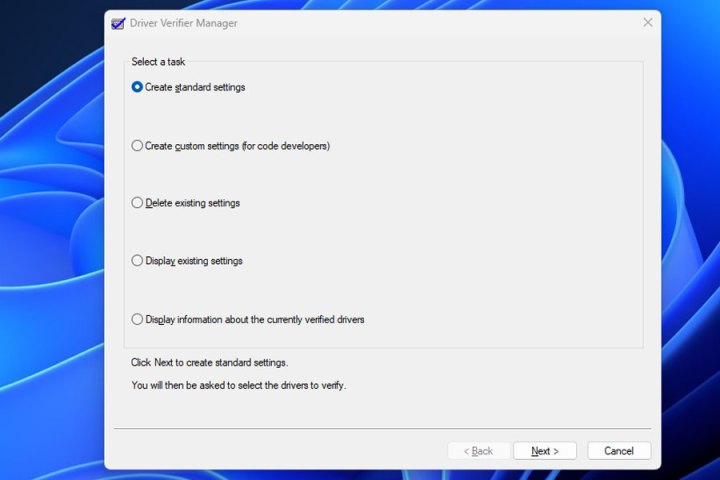 Driver verification in Windows.
Step 4: Target all drivers. Choose “Automatically select all drivers installed on this computer” and click “Finish.”
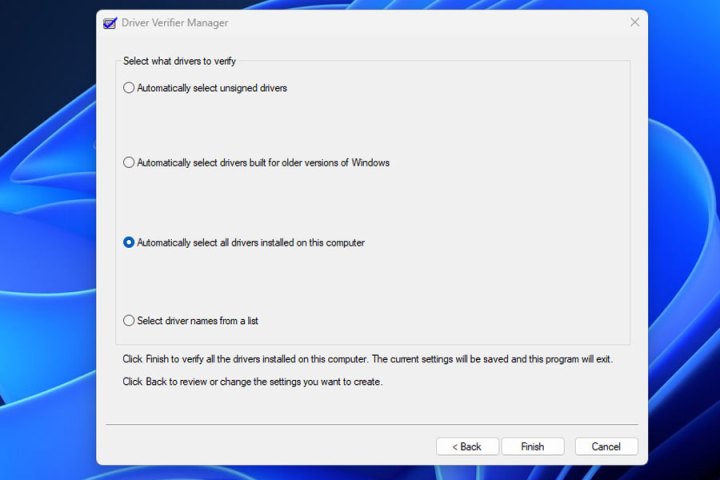 Driver verification in Windows.
Step 5: Restart your PC. Driver Verifier will run during startup. If a BSOD occurs, note the error message. This message typically identifies the problematic driver, allowing you to update, upgrade, or replace it. If a BSOD prevents you from booting, boot into Safe Mode, relaunch Verifier, select “Delete existing settings,” and click “Finish.”
System Restore as a Solution
If the previous methods are unsuccessful, using a system restore point can often rectify the issue. This is particularly useful if the BSOD began after installing new hardware or software. Restore your system to a point before the blue screen errors started.
Conclusion
The SYSTEM_SERVICE_EXCEPTION BSOD can be disruptive, but it’s often fixable using the built-in Windows troubleshooting tools outlined above. By systematically checking for system file corruption and verifying driver integrity, you can usually identify and resolve the root cause. If all else fails, a system restore can often get your PC back on track. If the BSOD persists even after these steps, consider resetting Windows to factory defaults.


