Paint.net, often seen as a budget-friendly alternative to Photoshop, is a surprisingly sophisticated and free image editing program. Developed by dotPDN, this versatile software makes semi-professional image editing accessible to everyone. With continuous development and impressive features, Paint.net offers a powerful toolkit for enhancing and manipulating images. This article explores five of the best features that make Paint.net a true Photoshop contender.
Download Paint.net for free from the official website. It’s also available on the Microsoft Store for a small fee. System requirements include Windows 11, Windows 10 (version 1809 or newer), Windows Server 2019, or Windows Server 2022; a 64-bit CPU (Intel/AMD x64 or ARM64); and optionally, a drawing tablet with Windows Ink support.
Instant Image Enhancement with Auto Mode
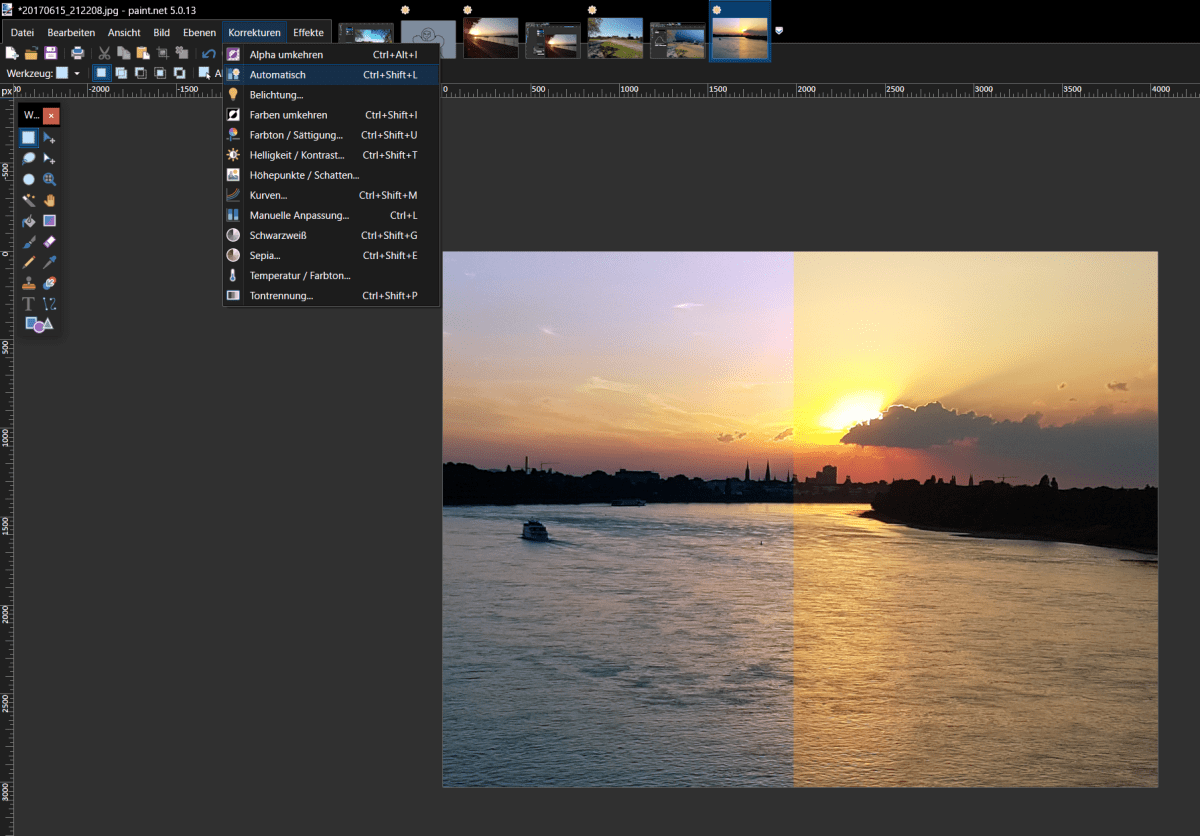 Paint.net Automatic Correction
Even without delving into the more complex tools, Paint.net offers a quick and easy way to enhance your images. The powerful Auto Mode automatically optimizes contrast, saturation, and brightness. The image above demonstrates the effectiveness of this feature. The left side shows the optimized image, while the right side displays the original. Notice how the optimization brings out details and creates more realistic colors.
Access Auto Mode through the Corrections menu under Automatic or use the keyboard shortcut Ctrl+Shift+L.
Precision Luminosity and Brightness Adjustments with Curves
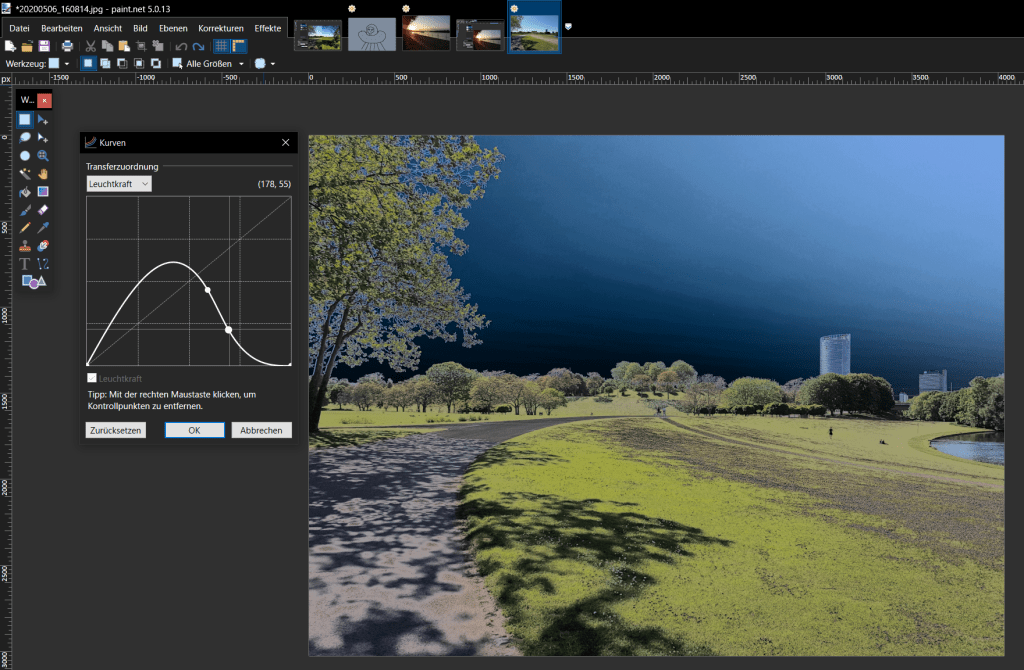
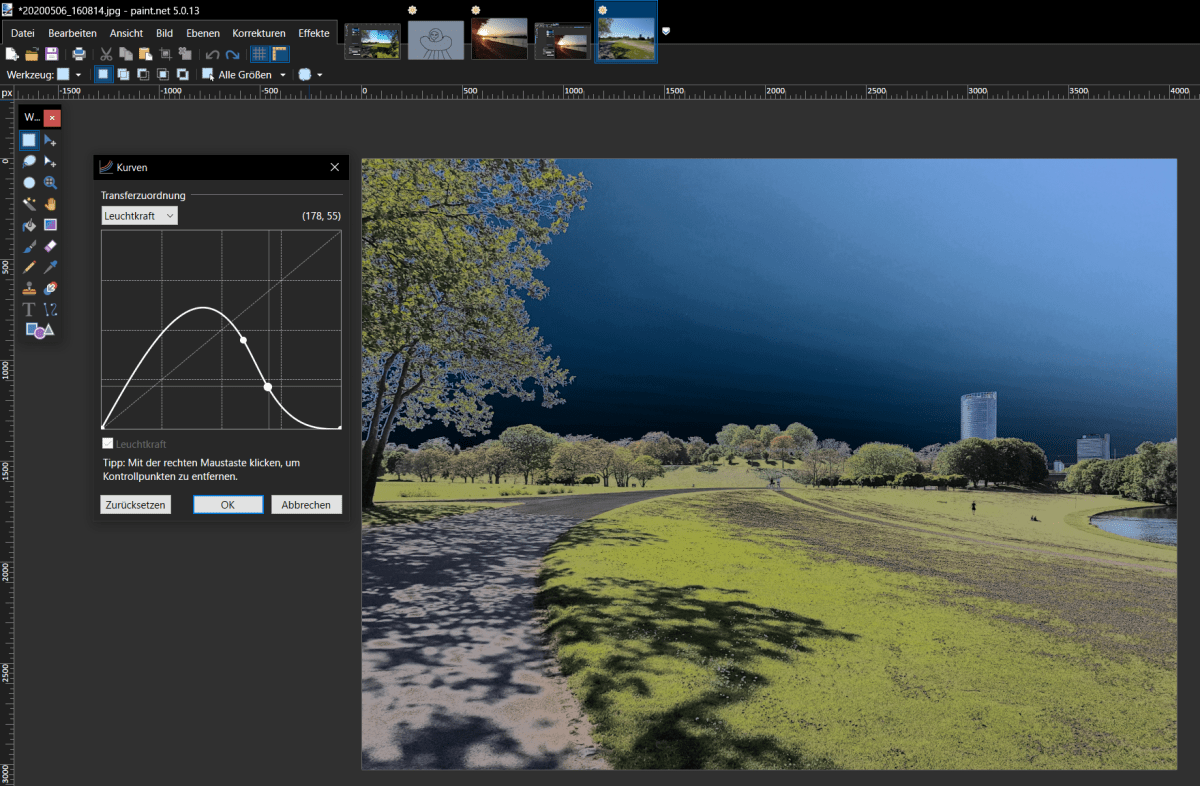 Paint.net Curves Adjustment
Dealing with overly bright or dark areas in specific parts of an image can be challenging. Using the standard brightness and contrast sliders often affects the entire image, which isn’t always desirable. Paint.net provides a solution with its Curves feature.
Access Curves through the Corrections menu or by pressing Ctrl+Shift+M. This tool allows you to adjust the luminosity and brightness of individual color channels in specific tonal ranges. This means you can brighten dark areas without overexposing the correctly lit parts of the image.
Within the Curves window, adjust the bottom left portion of the line to modify dark areas and the top right for light areas. Click to add anchor points and right-click to remove them. Use this feature for subtle adjustments or dramatic artistic effects. For individual RGB color channel adjustments, switch to RGB under Transfer Assignment.
Working with Layers
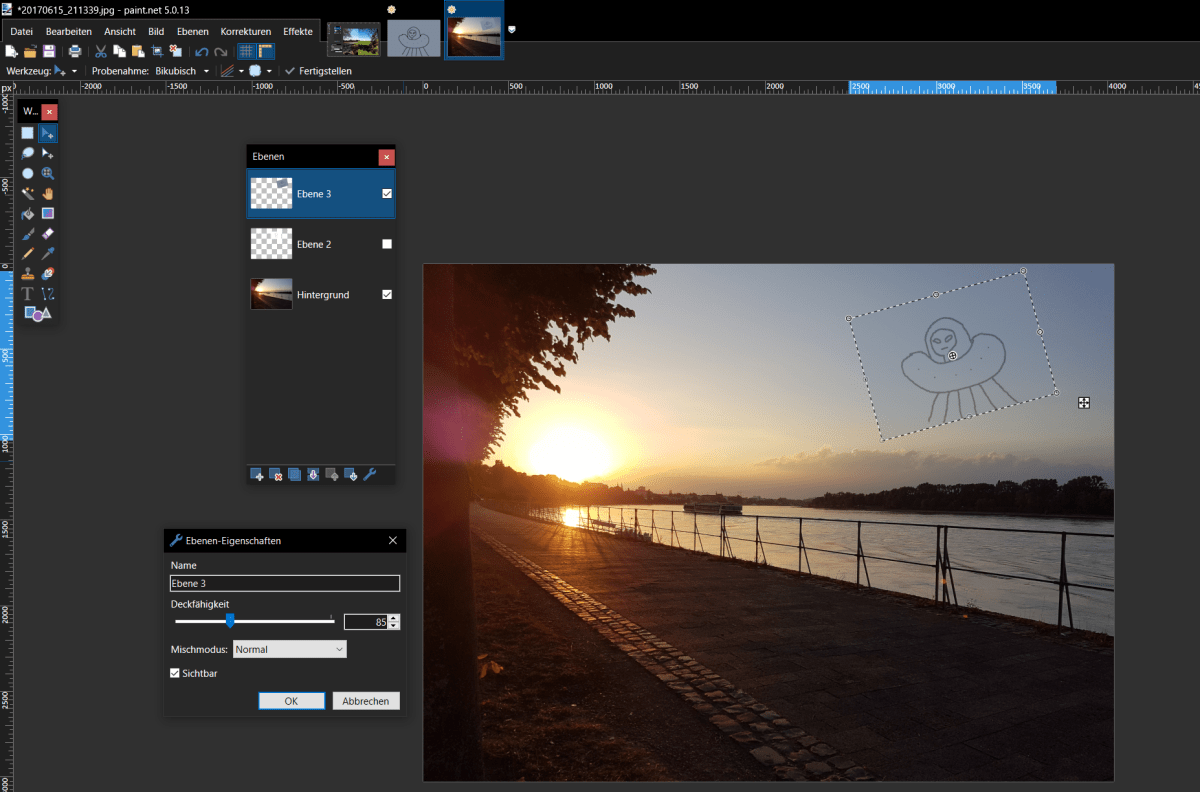 Paint.net Using Layers
Layers are essential for complex image editing and compositing. Paint.net’s layer window (accessible by pressing F7) provides a comprehensive set of layer manipulation tools. Swap, copy, fade, and blend layers with transparency effects, adjust color tones, and much more.
Add new layers using the plus symbol below the layer window. Fill layers with color or images by clicking on them and using Ctrl+V to paste copied content. Edit layers with various tools, such as the bucket tool for filling with color. Remember that changes are only visible on the topmost active layer. Rearrange layers by dragging them up or down in the hierarchy, and toggle their visibility using the checkboxes. Control layer transparency with the opacity slider in the layer window.
Enhancing Images with Effects
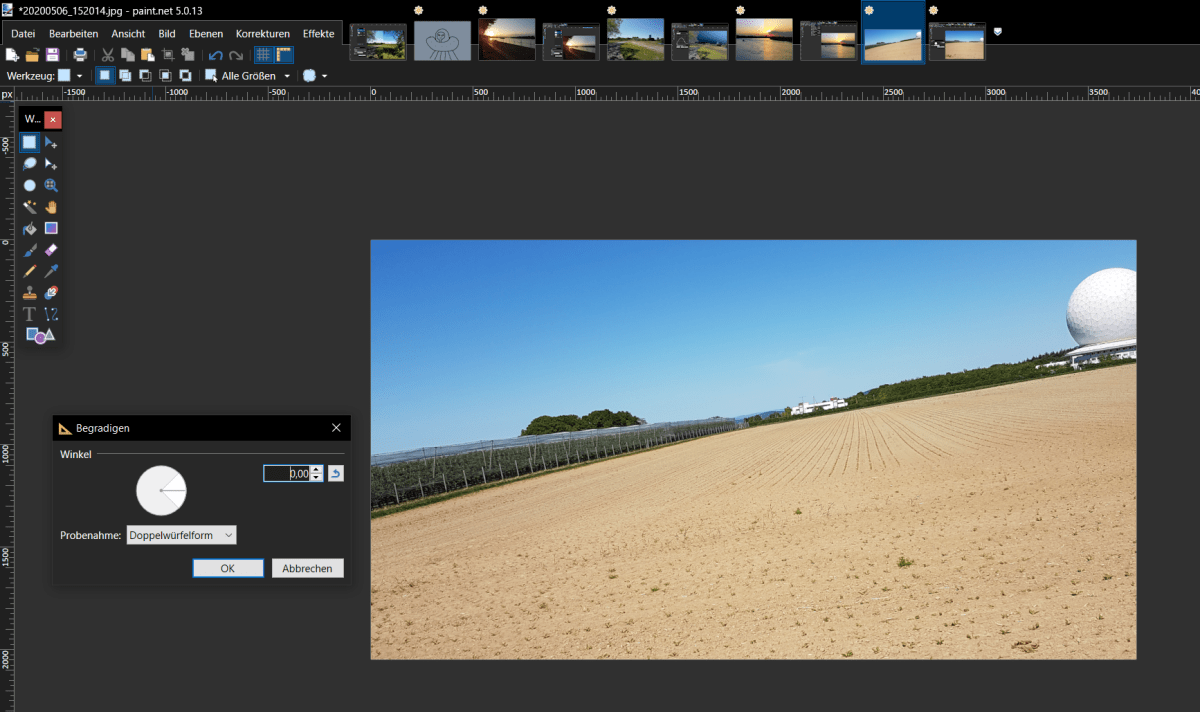 Paint.net Straighten Photo
Correcting skewed images is a common editing task. Paint.net simplifies this process with its Straighten feature, found under Effects > Photo. This tool automatically attempts to straighten the image. If necessary, fine-tune the correction manually using numerical values or by dragging within the circular window. The function intelligently crops the resulting empty spaces.
Explore other useful features under Effects > Photo, including red-eye removal, vignette creation, and portrait softening.
Time-Saving Hotkeys
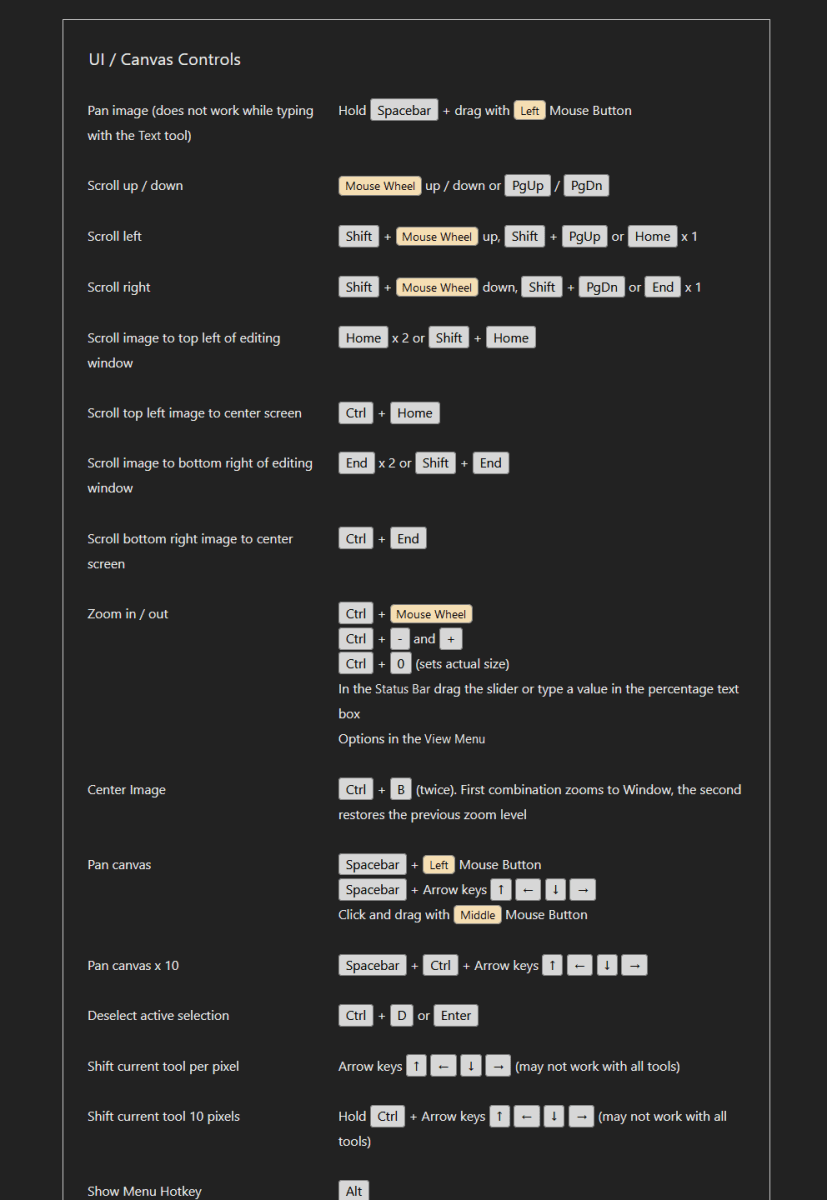 Paint.net Hotkey Table
Paint.net offers a wide array of hotkeys to streamline your workflow. These shortcuts eliminate the need for constant menu navigation, allowing you to work more efficiently. Some of the most useful key combinations are:
| Key(s) | Function |
|---|---|
| Spacebar + Left-click, drag | Move workspace |
| Mouse wheel scroll | Move workspace vertically |
| Shift + Mouse wheel scroll | Move workspace horizontally |
| Ctrl + C | Copy selection |
| Ctrl + X | Cut selection |
| Ctrl + V | Paste |
| Ctrl + D or Enter | Deselect |
| Ctrl + Mouse wheel scroll | Zoom |
| Ctrl + B | Center image |
| F5 | Toggle tool window |
| F6 | Toggle history window |
| F7 | Toggle layer window |
| F8 | Toggle color window |
| Ctrl + N | New image |
| Ctrl + O | Open image |
| Ctrl + S | Save image |
| Ctrl + Shift + S | Save as |
| Ctrl + P | Print image |
| Ctrl + Z | Undo |
| Ctrl + Y | Redo |
| Delete | Delete selection |
These five powerful features demonstrate that Paint.net is more than just a basic image editor. It’s a versatile and capable program that offers a compelling free alternative to more expensive software like Photoshop.


