Adding a signature to your Apple Pages document is crucial for establishing authorship and professionalism, especially when sharing or exporting your files. This guide provides a comprehensive walkthrough of various methods for inserting signatures in Pages across macOS, iOS, and iPadOS.
Using an Image of Your Signature
The simplest method is inserting a pre-existing image of your signature.
- Open your Pages document and position the cursor where you want the signature.
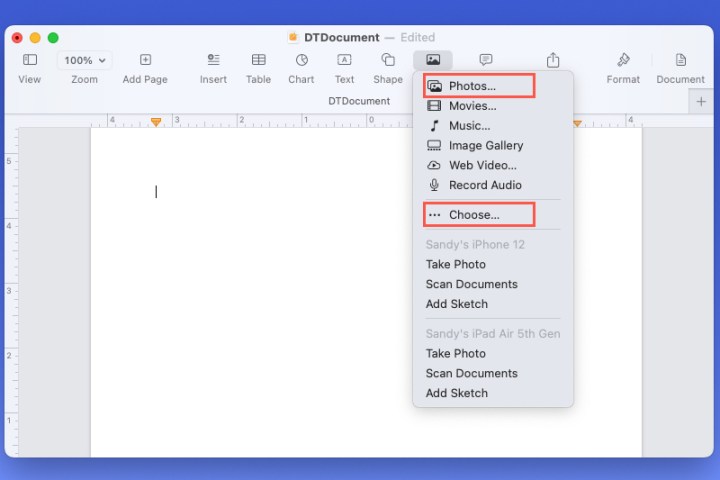
- Click Media in the toolbar.
- Choose Photos if the image is in your Photos app, or Choose if it’s saved elsewhere. You can also drag the image directly from your desktop or an open folder.
- Resize the inserted image by dragging a corner or using the Size options within the Arrange tab of the Format sidebar.
Inserting a Screenshot from Preview
If you don’t have a signature image, you can create one using Preview.
- Open a blank document or a PDF with a white background in Preview.
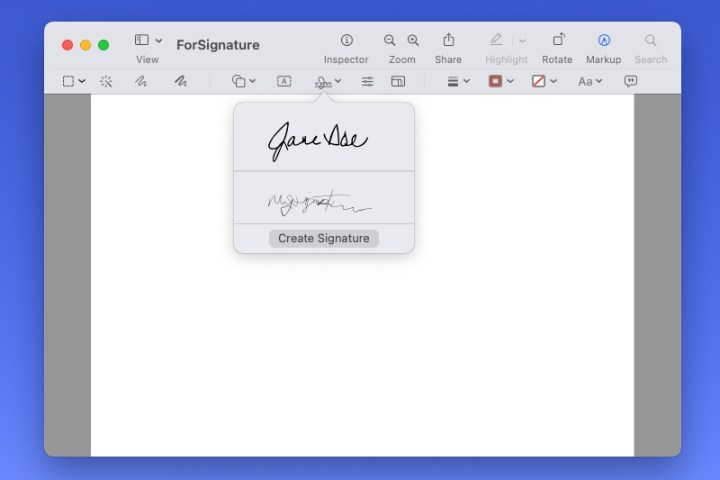
- Click Markup then select the Sign dropdown. Choose an existing signature or create a new one.
- Resize the signature within Preview if necessary.
- Take a screenshot of the signature using File > Take Screenshot > From Selection or by pressing Command + Shift + 4.
- Drag the screenshot from your desktop into your Pages document, or insert it using the Media options as described above.
- Resize the image in Pages as needed.
Signing Directly from iPhone or iPad
You can create and insert a signature directly from your connected iPhone or iPad.
- Place your cursor in the desired location within your Pages document.
- Select Media in the toolbar or Insert > Insert from iPhone or iPad from the menu bar.
- Choose Add Sketch below your connected device.
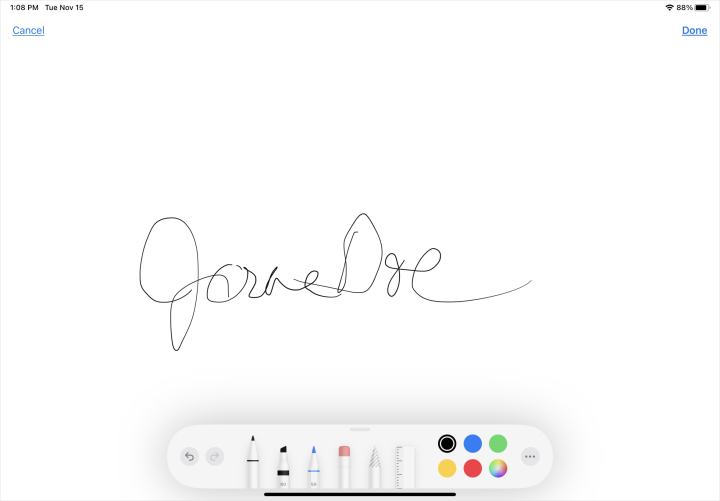
- On your device, use the Pen tool to sign your name and tap Done.
- The sketch will automatically appear in your Pages document. Resize and adjust as needed using the methods described previously.
Adding a Signature in Pages on iPhone or iPad
You can also add signatures directly within the Pages app on your iPhone or iPad.
- Open your Pages document and position the cursor.
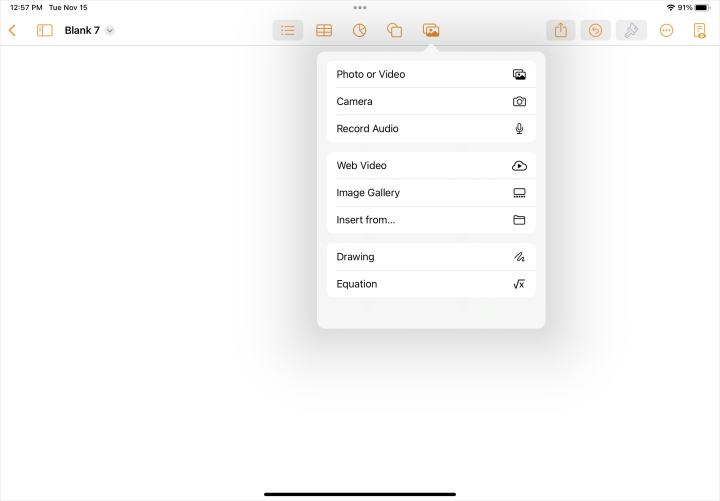
- On iPhone, tap the Plus sign and select the Media tab. On iPad, tap the Media button.
- Choose Photo or Video to insert an existing image, Camera to capture a new photo of your signature, or Drawing to create a signature using the Pen tool.
- Resize and adjust the inserted signature using the Format options.
Leveraging the Apple Pencil
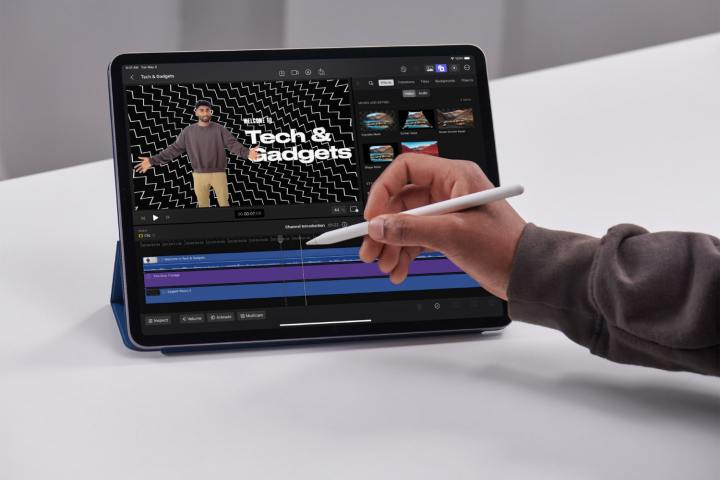
The Apple Pencil offers enhanced signature creation, especially on iPad. Scribble automatically converts handwriting to text, while drawing tools allow precise signature creation and annotation.
Using Your Mail App Signature
While you can create custom signatures in the Mail app, these are typically only usable within Mail unless they are image files.
Conclusion
Adding a signature in Apple Pages is straightforward, offering multiple approaches across different devices. Choose the method that best suits your needs and workflow to personalize and authenticate your documents. For further customization, explore features like word count and bullet points within Pages.


