Connecting your iPhone to your Mac unlocks a wealth of features, from syncing data and updating iOS to leveraging powerful continuity tools. This guide provides a step-by-step walkthrough for both wired and wireless connections, ensuring a seamless experience between your Apple devices.
Wired Connection: Syncing and Updating
A wired connection is essential for tasks like syncing content, managing data and settings, and updating your iPhone’s software. Here’s how to connect your iPhone to your Mac using a cable:
-
Identify Your Cables and Ports: Determine whether your iPhone uses a Lightning or USB-C cable and the type of ports available on your Mac (USB-A, USB-C). You may need an adapter if the connectors don’t match. For example, if your iPhone has a Lightning connector and your Mac only has USB-C ports, you’ll need a USB-C to Lightning adapter.
-
Connect and Open Finder (macOS Catalina and later): Plug your iPhone into your Mac and open Finder. For older macOS versions, use iTunes.
-
Locate Your iPhone: Select your iPhone in the Finder sidebar under the “Locations” section.
-
Trust and Update (if prompted): You might see prompts to “Trust This Computer” or update to the latest iOS version. Follow the onscreen instructions.
-
Manage Content: Use the tabs in Finder (or iTunes for older macOS) to manage your iPhone’s content, including music, photos, and backups.
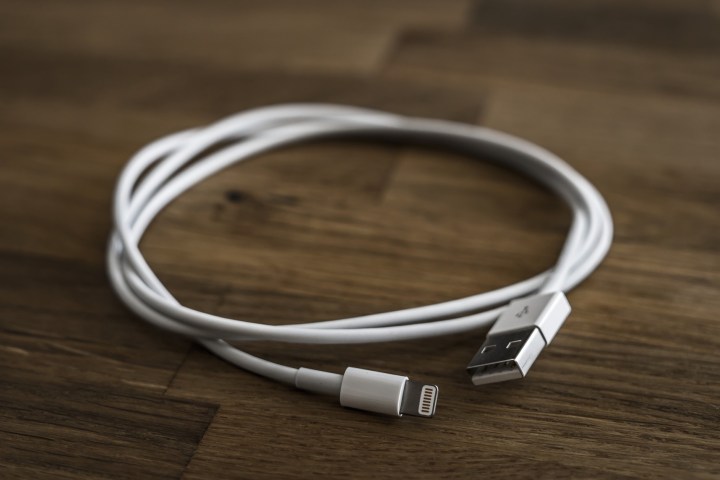 A Lightning to USB cable.
- Enable Wi-Fi Syncing (Optional): For future convenience, enable Wi-Fi syncing in Finder. With your iPhone selected in Finder, go to the “General” section, check “Show this iPhone when on Wi-Fi” under “Options,” and click “Apply.” This allows you to access the syncing menu without a physical connection.
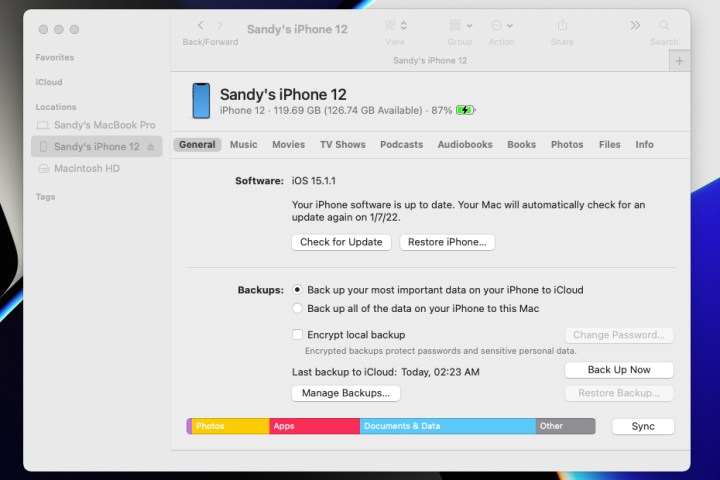 iPhone details in Finder on Mac.
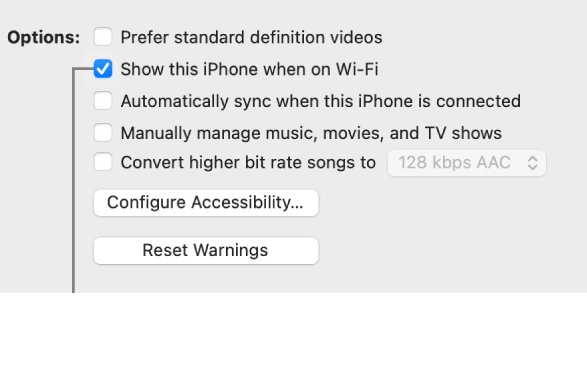 Sync iPhone on Wi-Fi.
- Safely Disconnect: Click the “Eject” icon next to your iPhone in the Finder sidebar before unplugging the cable.
 android nearby share stacks up against apple airdrop iphone
Wireless Connection: Continuity Features
A wireless connection via Bluetooth and the same Wi-Fi network enables features like Handoff, AirPlay, AirDrop, Continuity Camera, Instant Hotspot, and Universal Clipboard.
-
Wi-Fi and Bluetooth: Ensure both your iPhone and Mac are connected to the same Wi-Fi network and that Bluetooth is enabled on both devices.
-
Bluetooth Pairing: Pair your iPhone and Mac via Bluetooth. Open Bluetooth preferences on your Mac, find your iPhone in the list of available devices, and click “Connect.”
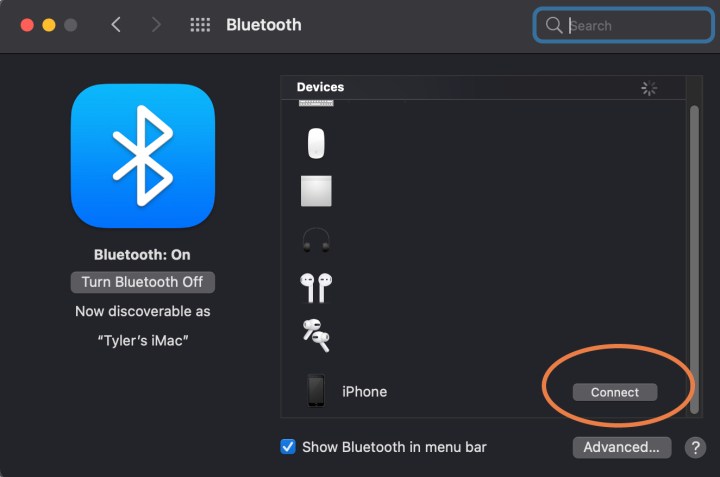 Connect iPhone with Bluetooth.
- Enable Handoff: On your iPhone, go to Settings > General > AirPlay & Handoff and ensure Handoff is toggled on.
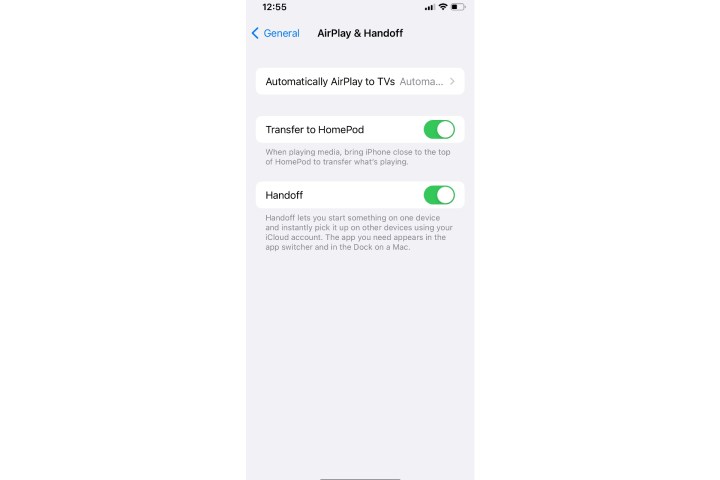 Enable Handoff on iPhone.
-
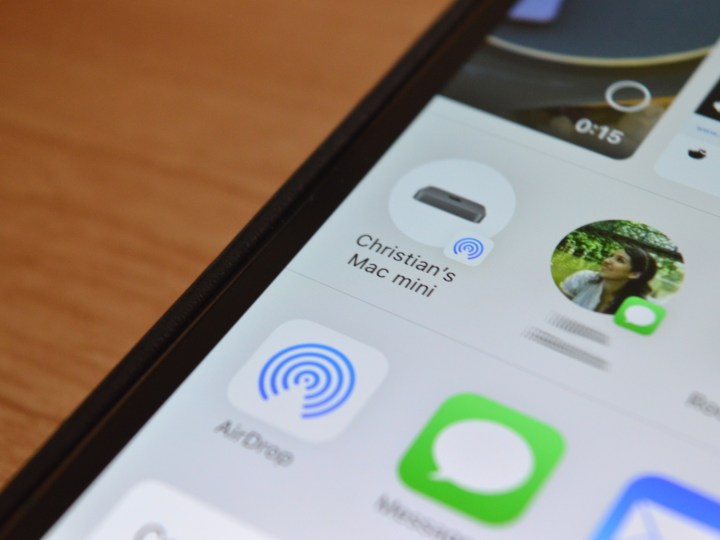
Using AirDrop: For AirDrop, ensure both devices are on the same Wi-Fi network. Select the “Share” option on your iPhone, and compatible devices, including your Mac, will appear.
-
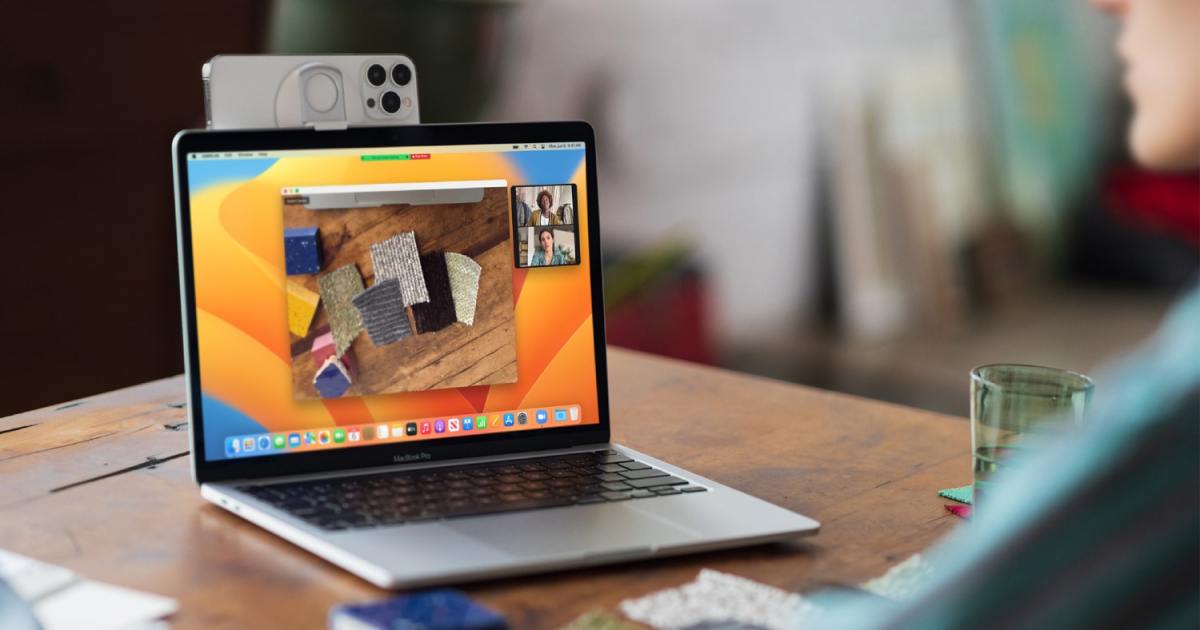
Continuity Camera: To use Continuity Camera, Control-click in a compatible app on your Mac where you want to insert content, select “Import from iPhone or iPad,” and choose either “Take Photo” or “Scan Documents.”
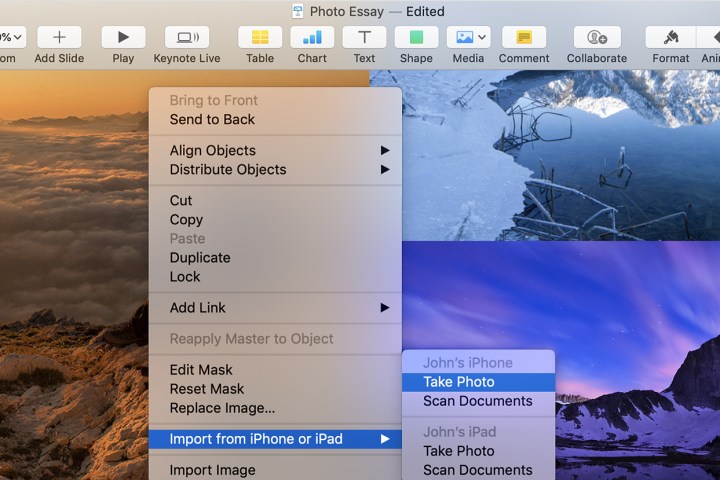 iPhone Continuity on Mac.
Troubleshooting
If your Mac doesn’t recognize your iPhone, ensure both devices are running the latest software versions and try restarting both. Also, check if the iPhone is visible in Finder (or iTunes for older macOS).
Conclusion
Connecting your iPhone and Mac opens up a world of possibilities, streamlining workflows and enhancing productivity. Whether you choose a wired or wireless connection, following these steps will ensure a seamless experience between your Apple devices.


