Diskpart, a Windows utility, offers a secure method for wiping a hard drive by overwriting all data with zeros. This is particularly effective for traditional magnetic hard drives (HDDs). This article will guide you through the process.
Diskpart is accessed via the command prompt. To begin, search for “cmd” in the Windows search bar and choose “Run as administrator.”
 Diskpart
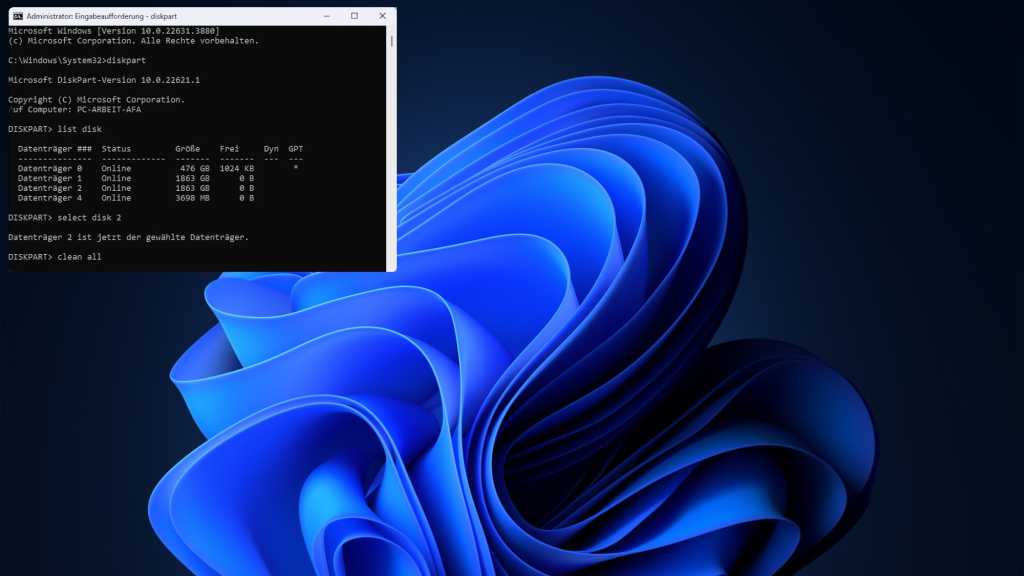
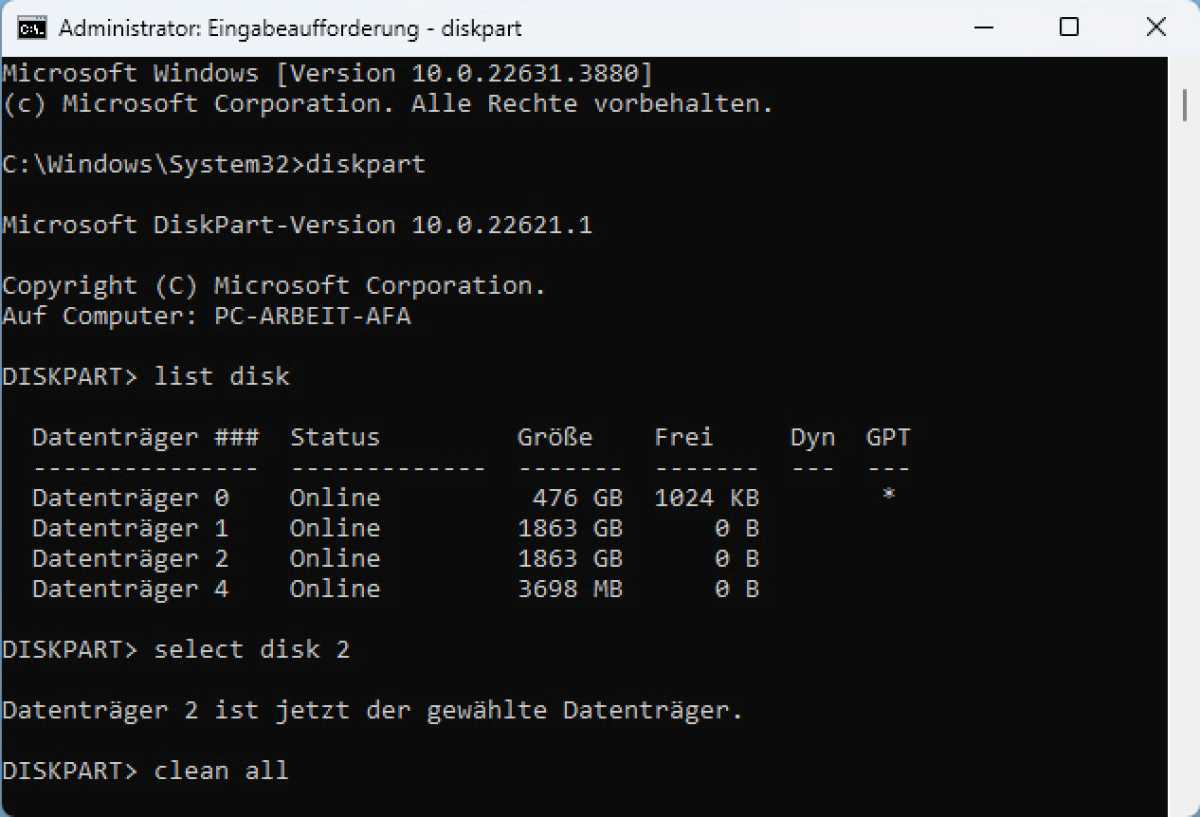
In the command prompt window, type “diskpart” and press Enter. Diskpart operates interactively; commands are entered and executed one at a time. After entering “diskpart,” the command prompt will change to “DISKPART>”. Next, enter “list disk” to display all connected storage devices.
Identify the target hard drive based on its size. If multiple drives have similar sizes, cross-reference with Disk Management to verify the disk number. Disk Management also displays the drive letter, providing further clarity. Access Disk Management through: Windows logo > All apps > Windows Tools > Computer Management > Disk Management.
Once you’ve identified the correct disk number (e.g., Disk 2), select it using the command: “select disk 2”. Replace “2” with the appropriate disk number.
The following command will permanently erase all data on the selected hard drive: “clean all”.
Caution: This operation is irreversible and occurs without further confirmation. Exercise extreme care. Note: This method won’t delete the system partition. For system partition deletion, use a bootable deletion tool like Shred OS. Tools like Rufus can create bootable USB drives with Shred OS.
In conclusion, Diskpart provides a powerful way to securely erase data from traditional HDDs. Remember to double-check the disk number before executing the “clean all” command due to its irreversible nature. For wiping system partitions, consider using dedicated bootable erasure tools like Shred OS.


