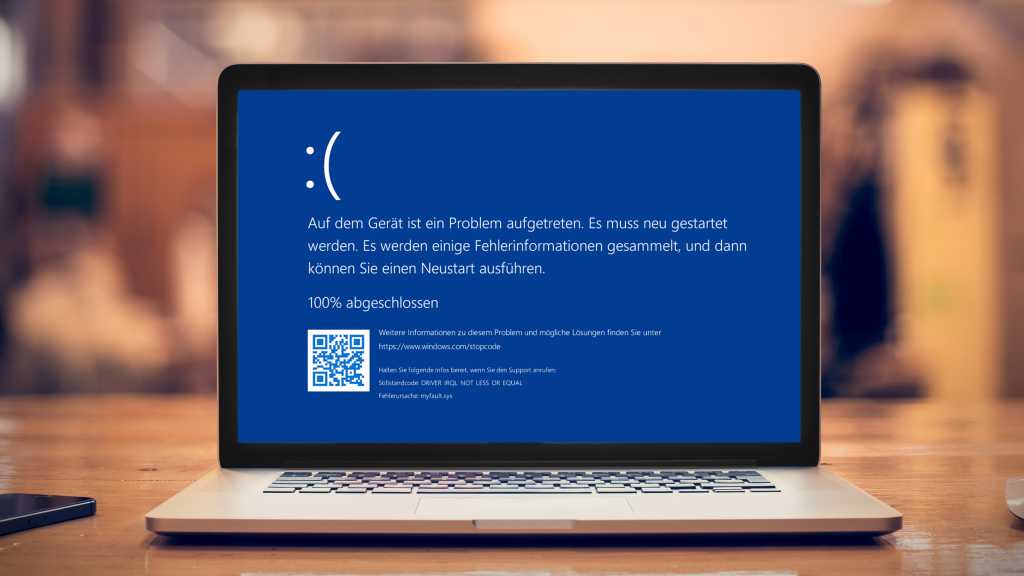
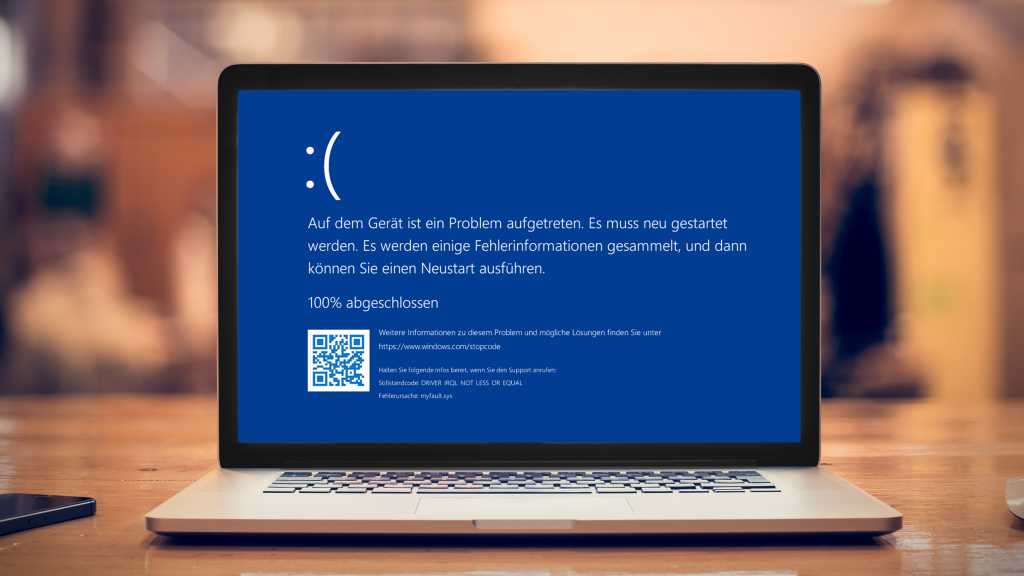
The infamous “Blue Screen of Death” (BSOD) is a Windows user’s worst nightmare. A sudden system shutdown, a cryptic error message on a blue background, and the dreaded restart—it’s a recipe for lost data and frustration. This article provides comprehensive troubleshooting steps to diagnose and resolve BSOD errors, helping you regain control of your Windows system.
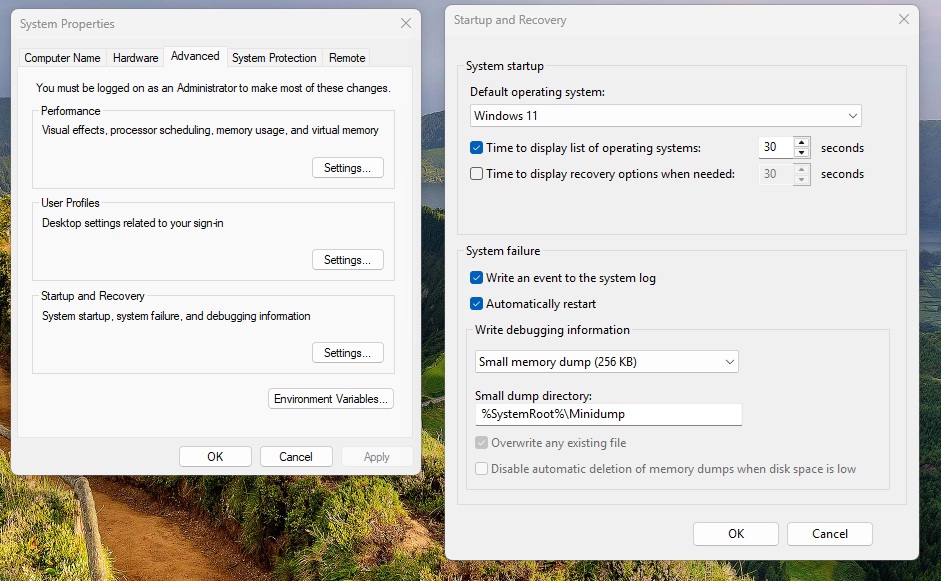 Advanced System Properties
Understanding the Blue Screen of Death
BSODs are typically caused by driver or hardware issues. Even drivers not directly linked to hardware, like antivirus components, can trigger a crash. Drivers operate in a privileged mode with direct access to memory and hardware interfaces. When a critical error occurs, the system halts with a stop error (the BSOD) to prevent further damage, such as file system corruption. The error message often includes an error code and sometimes the name of the faulty driver. Third-party drivers are more prone to causing BSODs than Windows-supplied drivers. Windows updates can also introduce incompatibilities with existing drivers, leading to system crashes.
Preventing Automatic Restart
By default, Windows quickly restarts after a BSOD, making the error message difficult to read. Adjusting this setting is crucial for troubleshooting.
- If Windows starts, navigate to Settings > System > About > Advanced system settings.
- Under Startup and Recovery, uncheck Automatic restart.
- Select Small memory dump (256 KB) to create a dump file (
.dmp) inC:WindowsMinidumpfor later analysis.
Troubleshooting with Onboard Tools
If Windows crashes repeatedly shortly after startup, you’ll need the Windows Recovery Environment (WinRE).
- Power on the PC. When the Windows logo appears, hold down the power button to shut down.
- Repeat this process two more times. Windows should enter automatic repair mode.
- If automatic repair fails, the message “The PC did not start correctly” will appear. Click Advanced options.
- Navigate to Troubleshoot > Advanced options > Startup Settings > Restart.
- Select Disable automatic restart after failure.
Note: If BitLocker is enabled, have your recovery key ready.
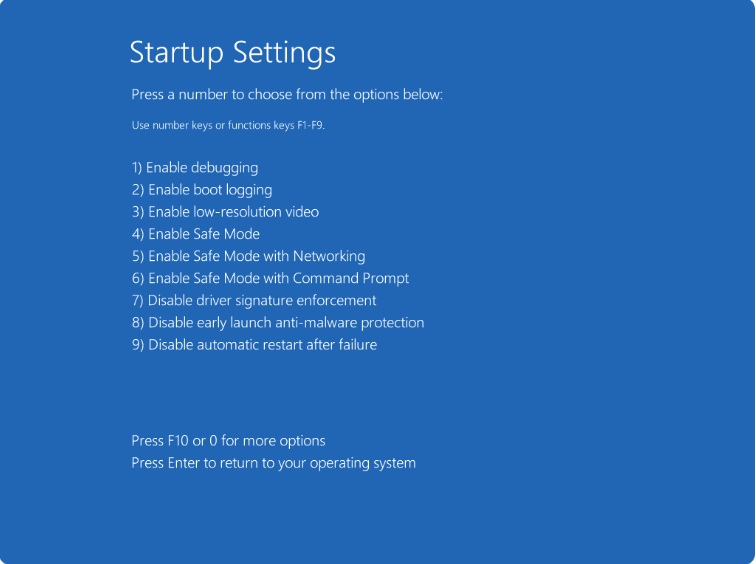 Startup settings
Advanced Startup Options and Safe Mode
Reactivating the classic boot manager allows access to advanced startup options via the F8 key. Use the Bootice tool for this.
- In Bootice, go to the BCD tab and click Easy mode.
- Click Add and create a new boot entry named “Windows secured.” Mirror the existing Windows entry settings.
- Under SafeBoot:, choose Safe Mode w/ Network. Click Save current system.
- Uncheck Metro Boot Manager (Win8) for both entries and save.
- Under Global settings, tick Display boot menu and save.
On restart, the classic boot menu will appear. Press F8 to access advanced options or choose “Windows secured” for Safe Mode with networking.
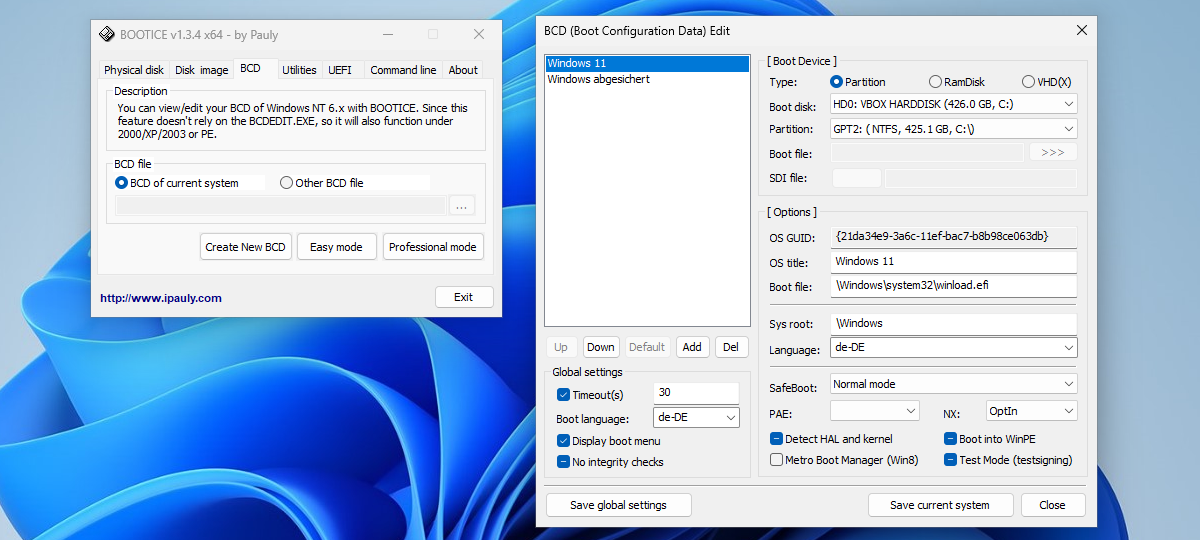 Boot-Konfiguration anpassen: Mit Bootice erstellen Sie neue Einträge für das Bootmenü oder passen die vorhandene Konfiguration an.
Utilizing a Rescue System
For persistent BSODs, a rescue system is essential. Create a Windows installation USB drive using the Media Creation Tool or Rufus.
- Boot from the USB drive.
- Click Next, then Repair your computer (or Repair my PC for Windows 11 24H2 and later).
- Navigate to Troubleshoot > Startup Repair.
- For Windows 11 24H2 and later, choose language and keyboard settings before troubleshooting.
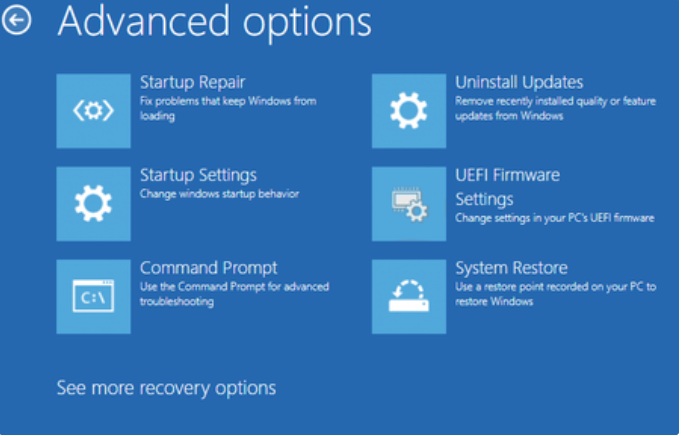 Windows Recovery
Disabling Automatic Restart via the Rescue System
- Boot from the USB drive. When the setup window appears, press Shift+F10.
- Type
regeditand press Enter. - In the registry editor, navigate to
HKEY_LOCAL_MACHINEand select File > Load Hive. - Browse to
WindowsSystem32configon the system drive, selectSYSTEM, and enter “Z” as the key name. - Navigate to
HKEY_LOCAL_MACHINEZControlSet001ControlCrashControl. - Set the value of
AutoRebootto 0. - Unload the hive (
HKEY_LOCAL_MACHINEZ) via File > Unload Hive. - Exit the registry editor and command prompt, then cancel the installation.
Note for BitLocker users: Unlock the system drive in the command prompt using manage-bde -unlock C: -recoverypassword [recovery key].
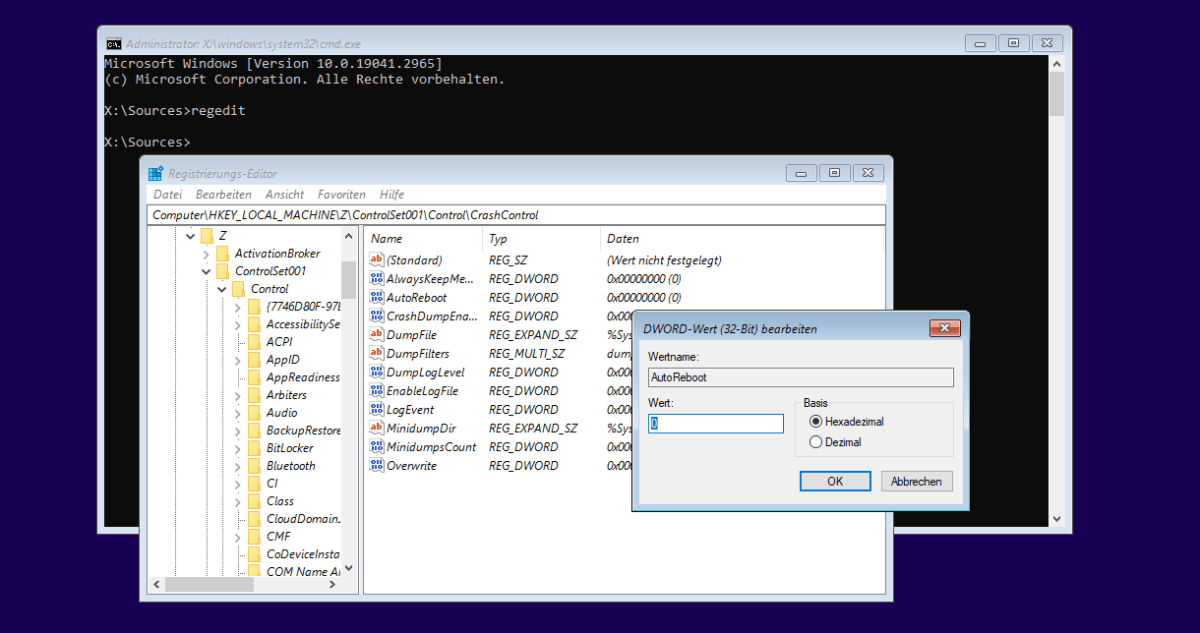 Option im Rettungssystem setzen: Enthält der Wert
Directly Accessing the Repair System
From a running Windows system:
- Click the power button in the Start menu. Hold Shift and click Restart.
- Select Troubleshoot > Advanced options > Startup Settings > Restart.
- Choose Disable automatic restart on system errors or Safe mode.
If Windows crashes immediately, use the rescue system (previous section). Alternatively, add WinRE to the boot menu using Bootice.
- In Bootice’s BCD tab, choose Professional mode.
- Right-click Windows Recovery Environment and select Duplicate this entry.
- Rename the new entry to “WinRE.”
- Switch to Easy Mode and verify the “WinRE” entry settings. Ensure the partition and boot file paths are correct.
- Optionally disable Metro Boot Manager (Win8) for all entries.
Troubleshooting Faulty Updates and Drivers
Suspect recent updates or software installations?
-
Uninstall recent programs: In Settings > Apps > Installed apps, sort by installation date and uninstall recently added programs.
-
Suspend Windows Updates: In Settings > Windows Update, pause updates.
-
Uninstall Windows Updates: In Settings > Windows Update > Update history, identify and uninstall recent updates that might be causing the issue.
-
Safe Mode: Boot into Safe Mode (see previous sections) to uninstall programs or updates in a minimal environment.
-
Uninstall Updates via Rescue System: Boot from the installation media, select Repair your computer/Repair my PC > Troubleshoot > Uninstall updates.
-
Driver Updates/Rollbacks: In Device Manager, update or rollback drivers for the suspected hardware.
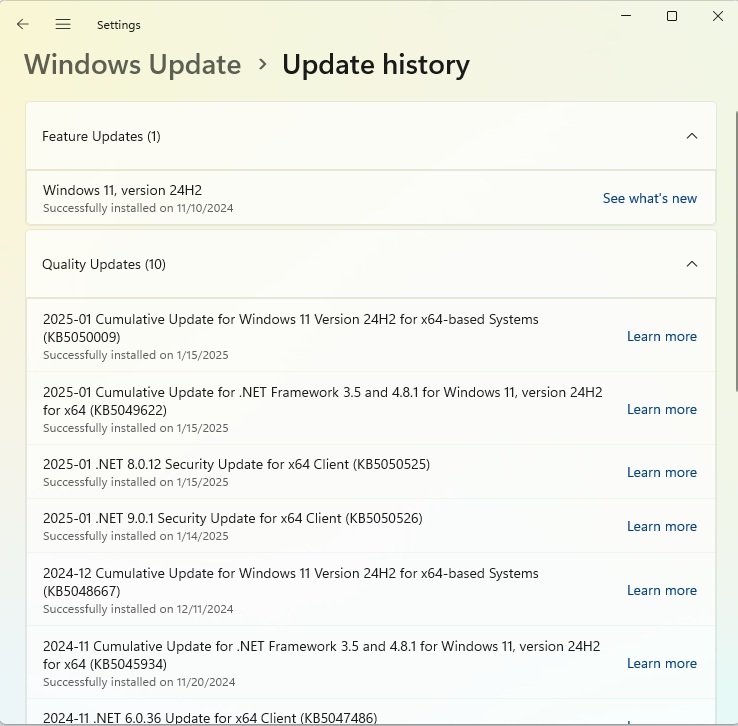 Update History
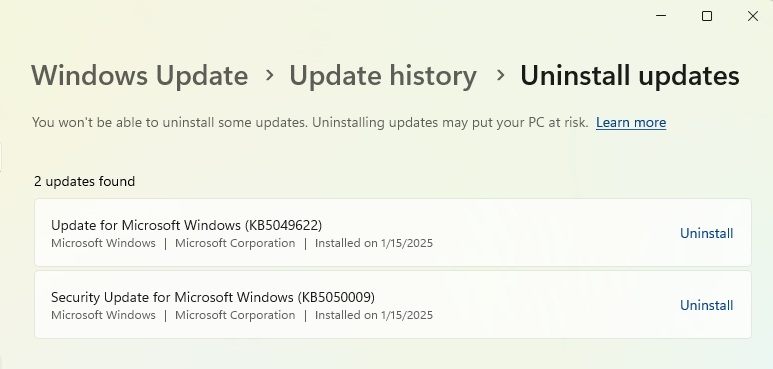 Uninstall update
System Restore
System Restore reverts Windows to a previous state.
- Press Win+R, type
rstrui, and press Enter. - Choose a recommended restore point or select another one.
- Review affected programs and click Finish.
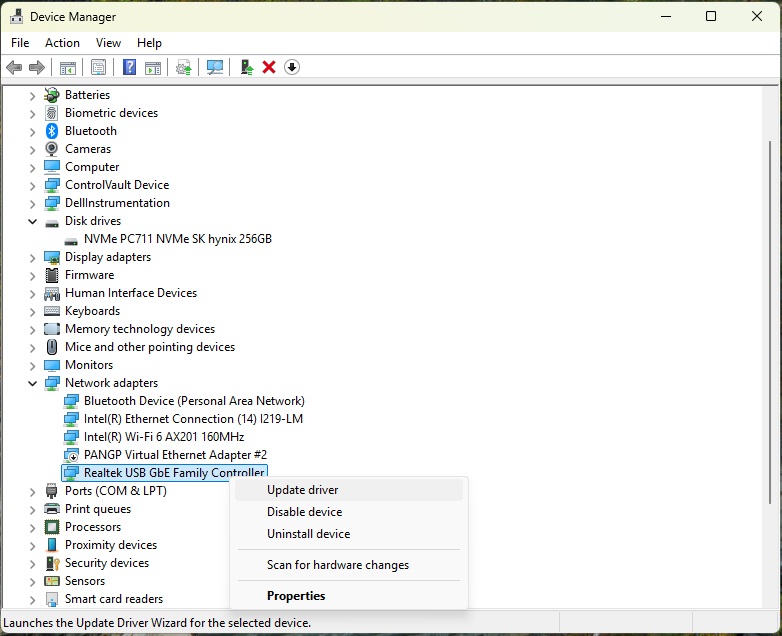 update driver
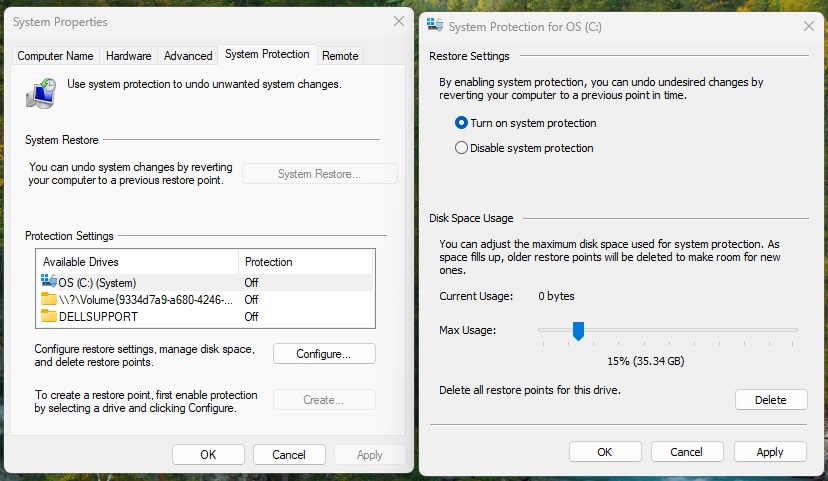 System protection
Addressing Unspecific Errors
For vague BSOD messages:
-
IRQL_NOT_LESS_OR_EQUAL: Indicates an incompatible or outdated driver.
-
UNEXPECTED_KERNEL_MODE_TRAP: Can be caused by overheating components. Check and clean fans.
-
DATA_BUS_ERROR or PAGE_FAULT_IN_NON_PAGED_AREA: Suggests faulty RAM.
-
INACCESSIBLE_BOOT_DEVICE: Windows cannot access the system partition. Check BIOS/firmware for drive recognition, cables, and power supply. Test drive accessibility using a Linux live system. If accessible, try Startup Repair or check and repair system files using
sfc /scannowandDISMcommands in the rescue environment.
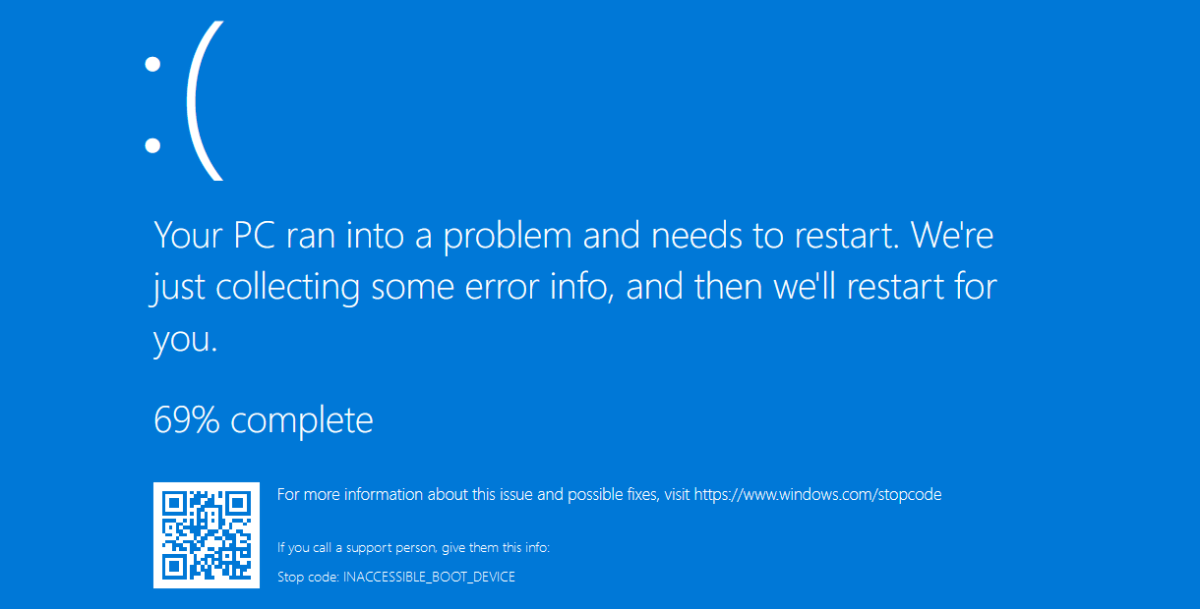 Reparatur im Rettungssystem: Vor Wiederherstellung der Bootumgebung weisen Sie der EFI-Partition (FAT32) einen Laufwerksbuchstaben zu.
Repairing Windows Startup Files
- In the rescue environment’s command prompt, type
diskpartand press Enter. - Use
list disk,sel disk [number], andlist volto identify the EFI partition (FAT32, ~100MB). - Assign a letter (e.g., “B:”) to the EFI partition using
sel vol [number]andassign letter=b:. - Exit Diskpart with
exit. - Execute the following commands:
cd /d b:EFIMicrosoftBoot
bootrec /fixboot
ren BCD BCD.bak
bcdboot C:Windows /l en-us /s b: /f UEFI
(Replace “C:” if your Windows installation is on a different drive.)
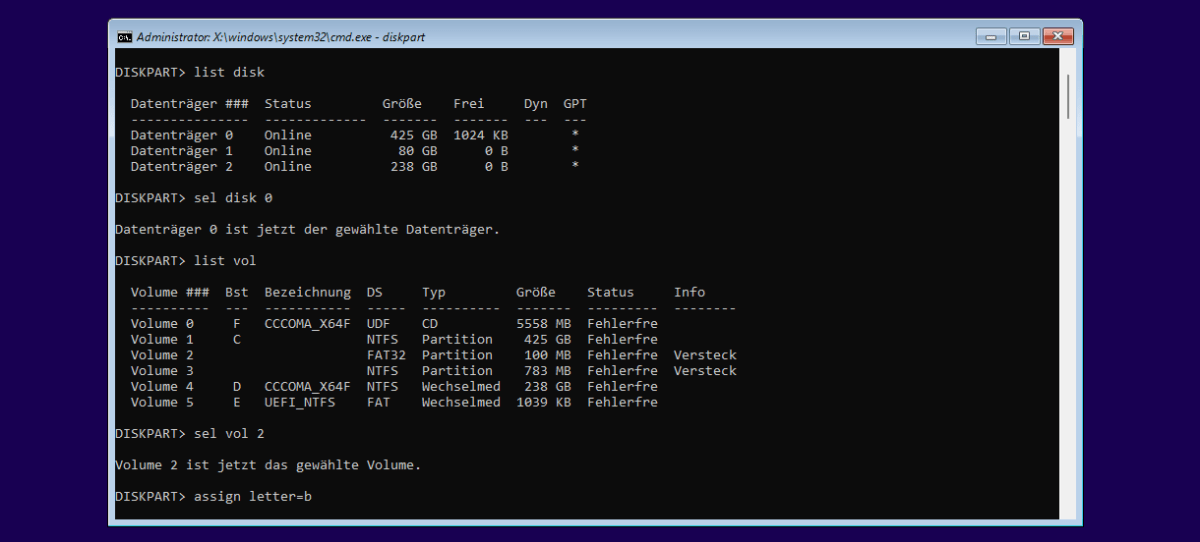 Reparatur im Rettungssystem: Vor Wiederherstellung der Bootumgebung weisen Sie der EFI-Partition (FAT32) einen Laufwerksbuchstaben zu.
Resetting Windows
As a last resort:
- Settings > System > Recovery > Reset PC.
- Choose Keep my files or Remove everything. The latter requires a backup of your personal files.
Alternatively, reinstall Windows from the installation media.
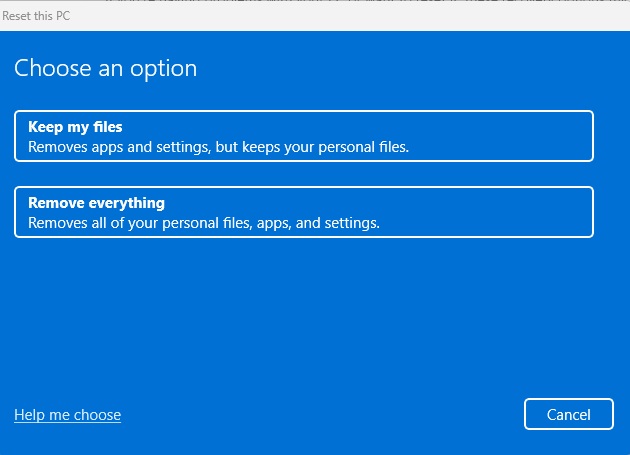 Reset PC
Analyzing BSOD Errors with Tools
Tools like WhoCrashed, WinDbg (Microsoft Store), and BlueScreenView can analyze memory dump files (.dmp) for deeper insights into the crash cause. These tools can help pinpoint the problematic driver or component.


