Creating personalized mass emails or letters can be a tedious task. Fortunately, Microsoft Word’s mail merge feature automates this process, seamlessly inserting recipient details. This guide provides a step-by-step walkthrough of two effective mail merge methods in Word, empowering you to create personalized communications efficiently.
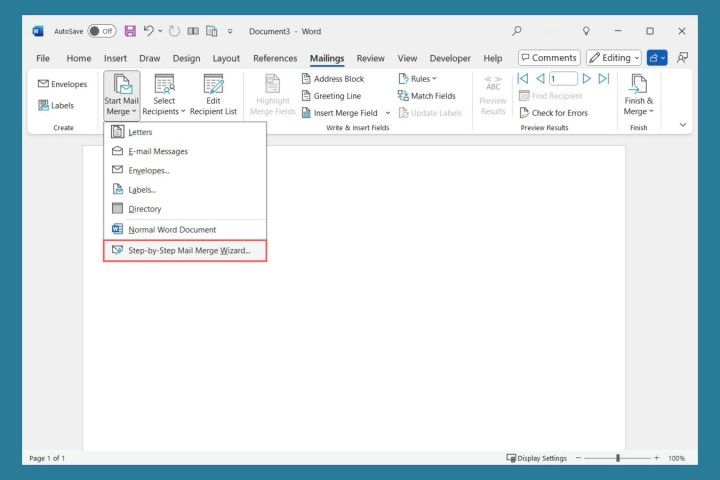 Mail Merge Wizard on the Word Mailings tab. Mail Merge Wizard interface in Microsoft Word.
Using the Mail Merge Wizard (Windows Only)
The Mail Merge Wizard simplifies the process, guiding you through each step. Note: This feature is unavailable in Word for Mac.
- Navigate to Mailings: Open Word and select the “Mailings” tab.
- Launch the Wizard: Click “Start Mail Merge” and choose “Step-by-Step Mail Merge Wizard.”
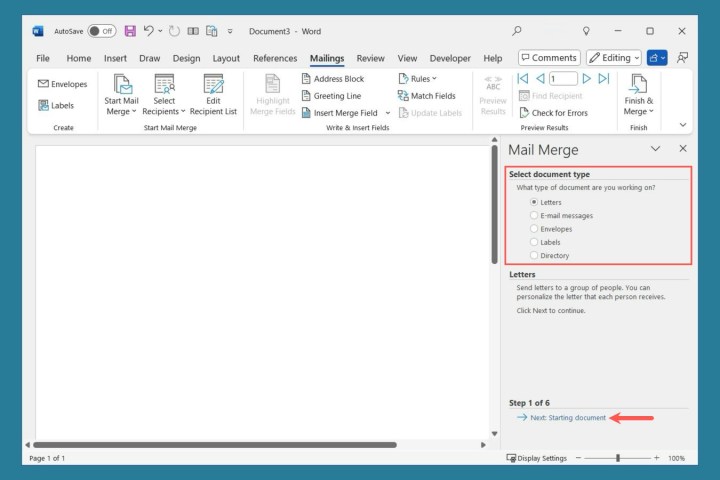 Word Mail Merge Wizard document types. Selecting the document type in the Mail Merge Wizard.
- Choose Document Type: Select the desired document type (e.g., “Letters,” “Email messages”). Click “Next.”
- Select Starting Document: Choose to use the current document, a template, or an existing document. Click “Next.”
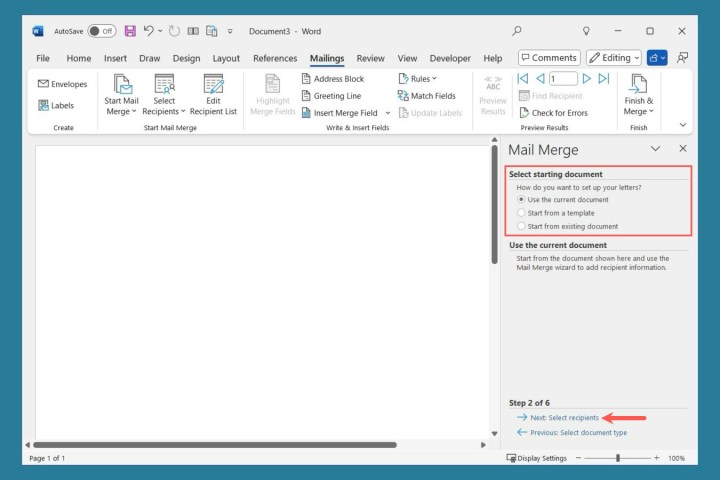 Word Mail Merge Wizard current or template. Choosing a starting document for mail merge.
- Specify Recipients: Select recipients from an existing list, Outlook contacts, or create a new list. Click “Next.”
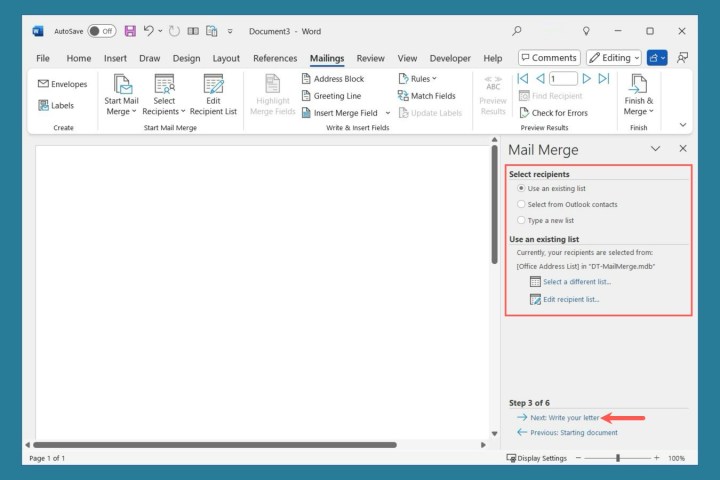 Word Mail Merge Wizard recipient selection. Selecting recipients for the mail merge.
- Compose Message: Type your message and insert merge fields from the sidebar.
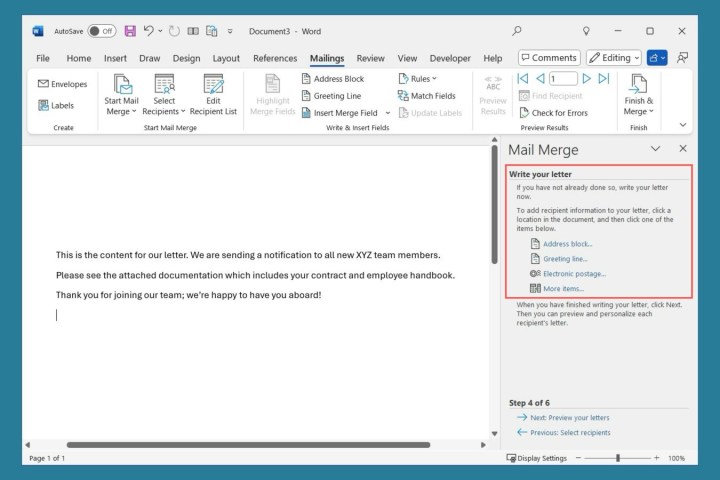 Word Mail Merge Wizard field selection. Inserting merge fields into the document.
- Format Fields (Optional): Customize field formatting as needed.
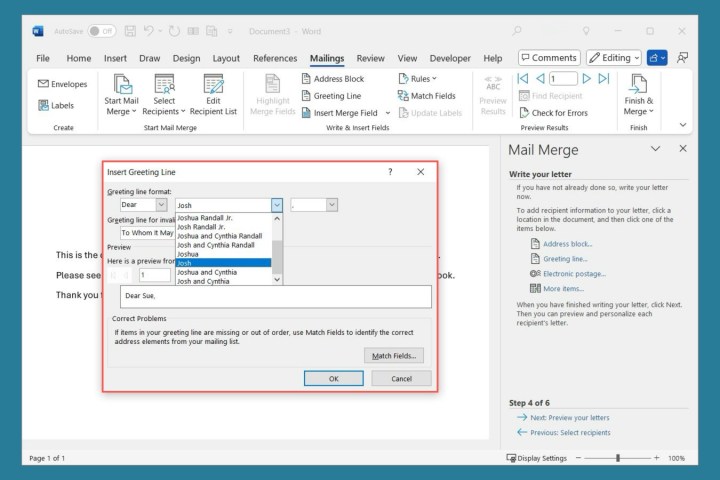 Greeting Line formatting options in Word. Formatting options for merge fields.
- Review Fields: Verify the inserted fields (displayed in angle brackets). Click “Next.”
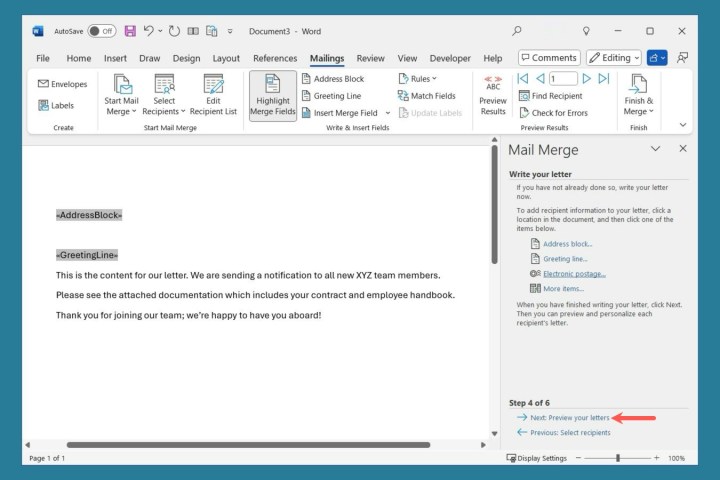 Fields added to a mail merge in Word. Merge fields displayed in the document.
- Preview Messages: Preview each message and exclude recipients if necessary. Click “Next.”
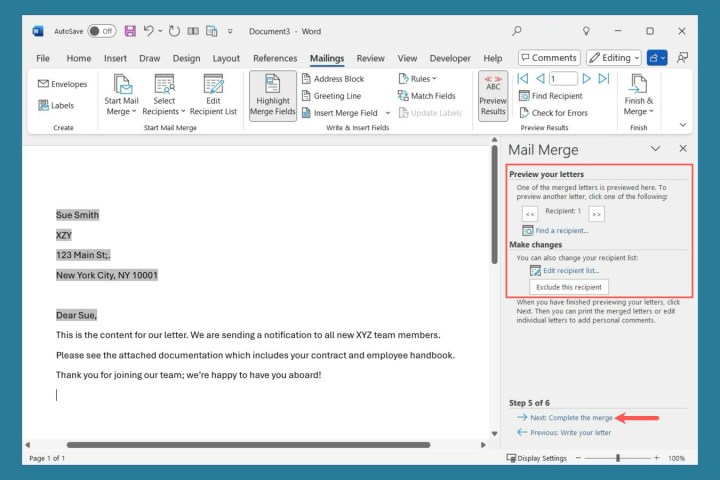 Word Mail Merge Wizard preview. Previewing the merged documents.
- Finalize and Distribute: Print, edit individual letters, or send emails as required.
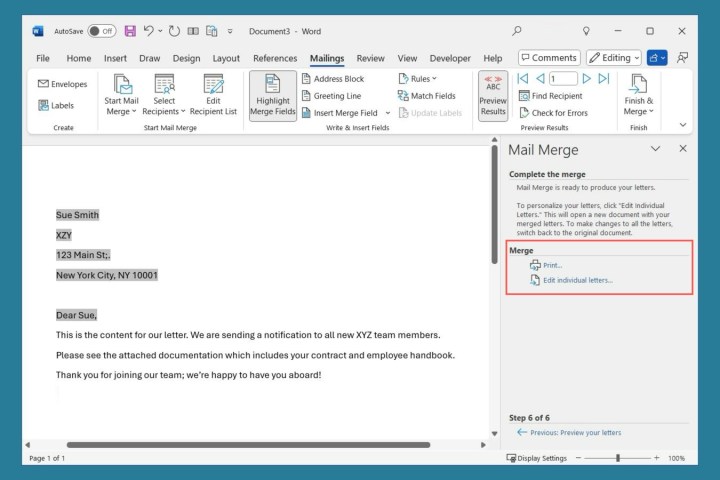 Word Mail Merge Wizard print or edit options. Finalizing and distributing the mail merge output.
Utilizing the Mailings Tab (All Versions)
The “Mailings” tab offers a more flexible approach to mail merge, providing additional options.
- Prepare Content: Open Word and type your message.
- Initiate Mail Merge: Go to “Mailings,” click “Start Mail Merge,” and select “Letters” or “Email messages.”
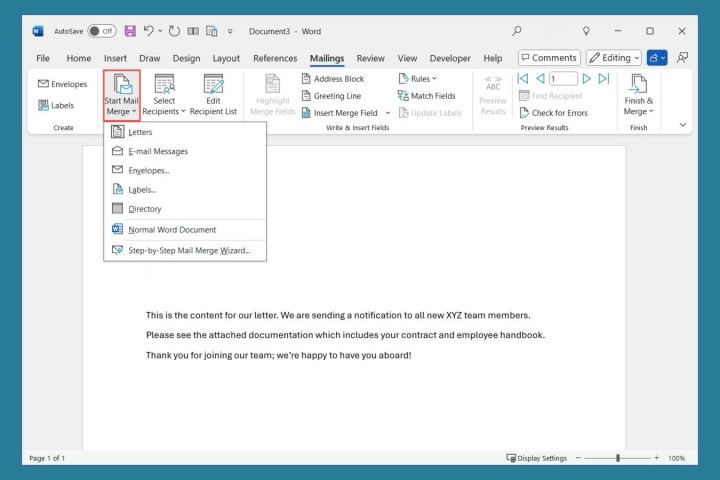 Word Mailings tab Start Merge menu. Starting the mail merge from the Mailings tab.
- Select Recipients: Choose from typing a new list, using an existing list, or selecting Outlook contacts. Use “Edit Recipient List” for modifications.
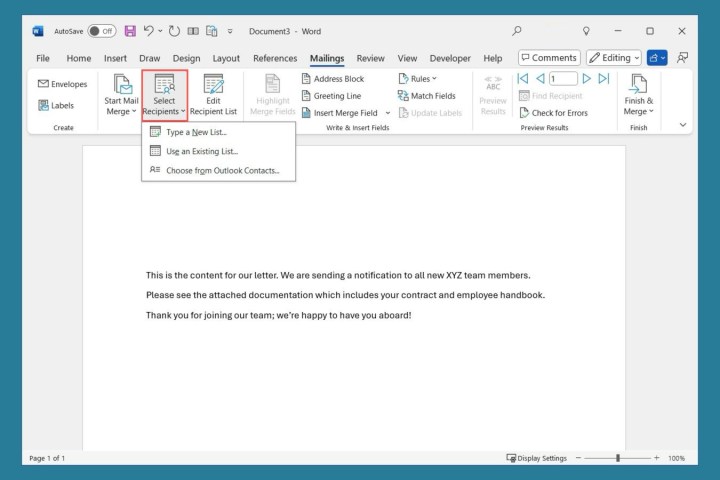 Word Mailings tab recipient selection. Selecting recipients using the Mailings tab options.
- Insert Fields: Use “Address Block” and “Greeting Line” for standard fields, or “Insert Merge Field” for additional details.
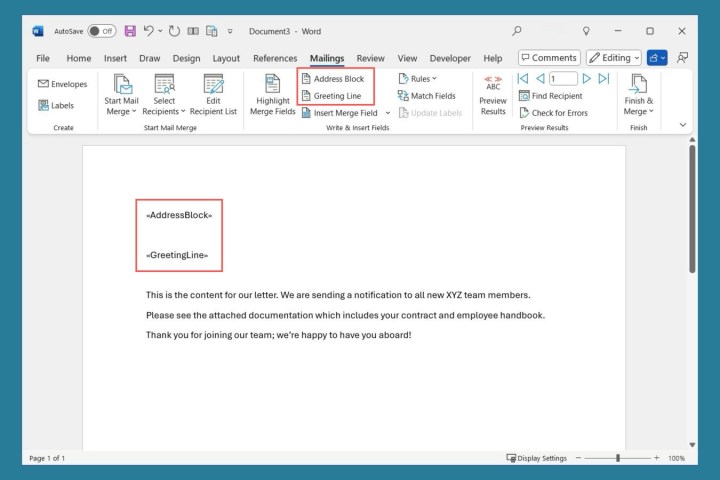 Address and Greeting Line fields for a Word mail merge. Inserting address block and greeting line fields.
- Advanced Options (Optional): Utilize “Rules” for handling specific scenarios or “Match Fields” to align data discrepancies.
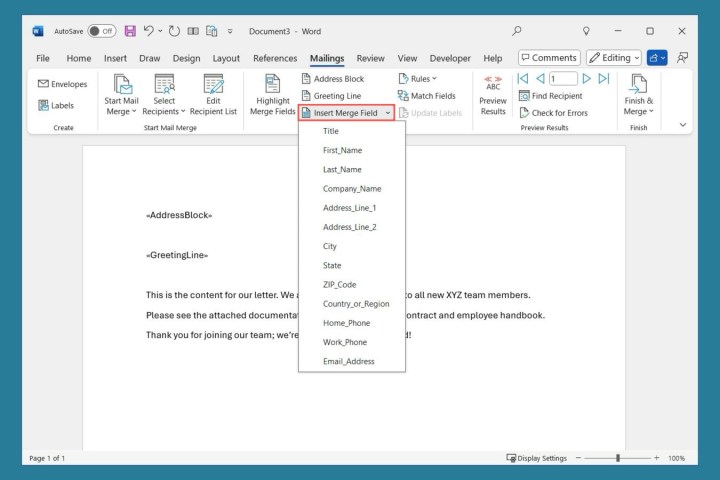 Word Insert Mail Merge Field menu. Inserting merge fields using the dropdown menu.
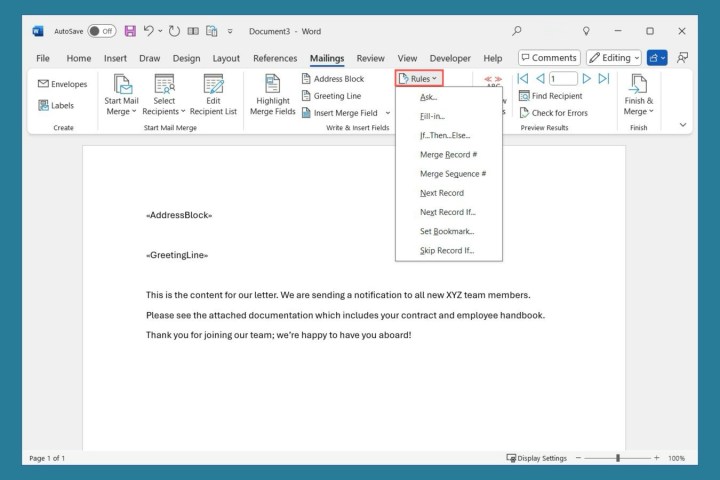 Word mail merge Rules. Setting up rules for the mail merge.
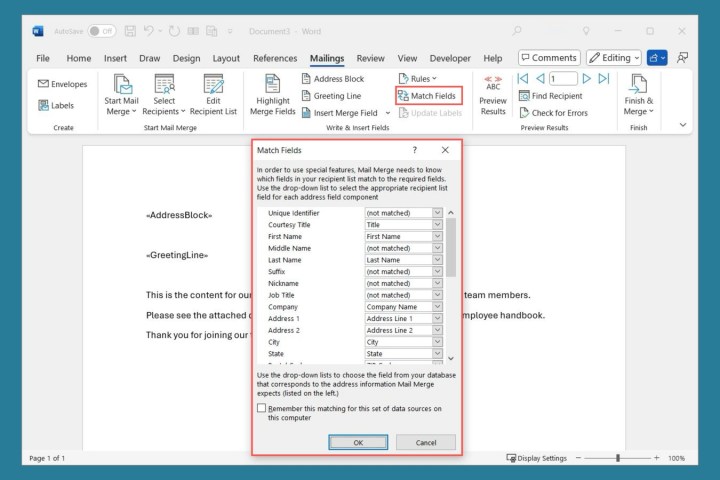 Match Fields window for a Word mail merge. Matching fields between the data source and the document.
- Error Checking (Optional): Employ “Check for Errors” to identify and address potential issues.
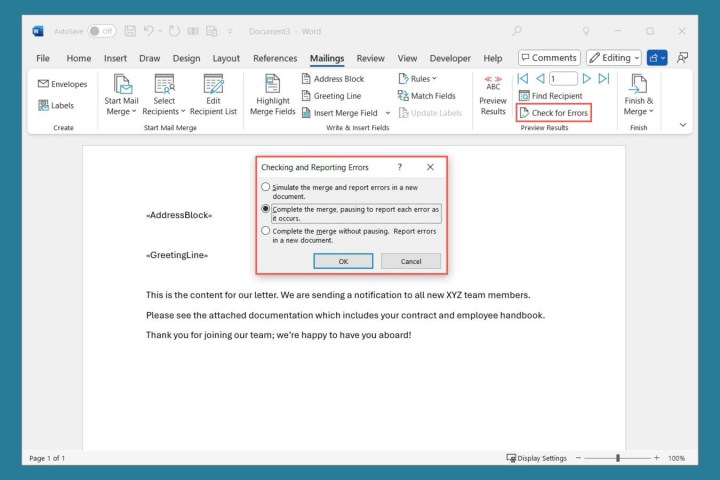 Check For Errors window for a Word mail merge. Options for checking for errors in the mail merge.
- Preview Mailings: Use “Preview Results” and the arrows to review each record.
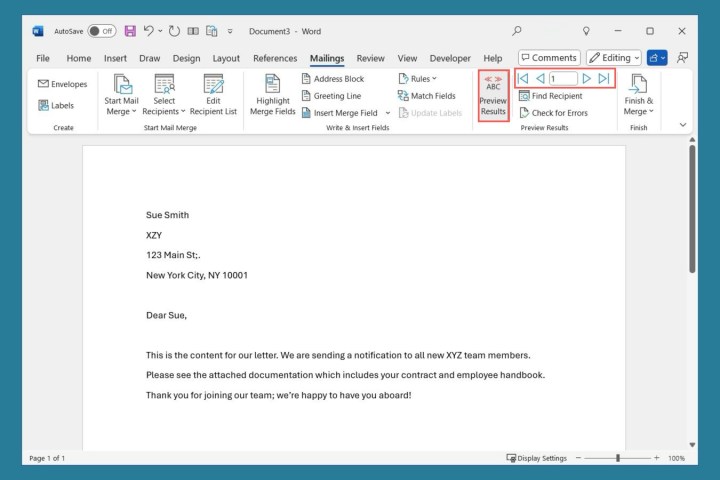 Preview on the Word Mailings tab. Previewing the merged documents.
- Complete Merge: Click “Finish & Merge” to edit, print, or send the merged documents.
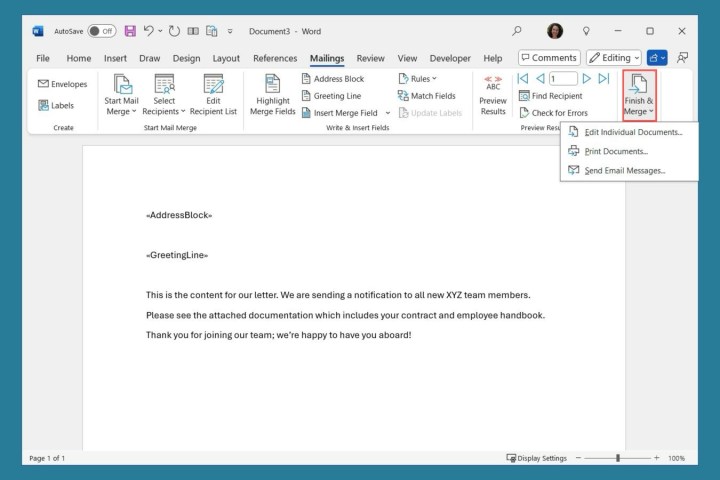 Finish and Merge on the Word Mailings tab. Completing the mail merge and choosing output options.
Conclusion
Microsoft Word’s mail merge functionality offers a powerful solution for creating personalized mass communications. By following these detailed instructions, you can streamline your workflow and generate professional, targeted messages efficiently. Whether you choose the guided Wizard or the flexible Mailings tab, mail merge empowers you to communicate effectively with your audience.


