While Google Docs doesn’t offer a dedicated text box feature like Microsoft Word, there are several ways to achieve the same visual effect. Whether you’re aiming to emphasize specific text, maintain a consistent look for content sections, or simply add a visual element, this guide provides three practical methods for inserting a text box in Google Docs, along with their respective advantages and disadvantages.
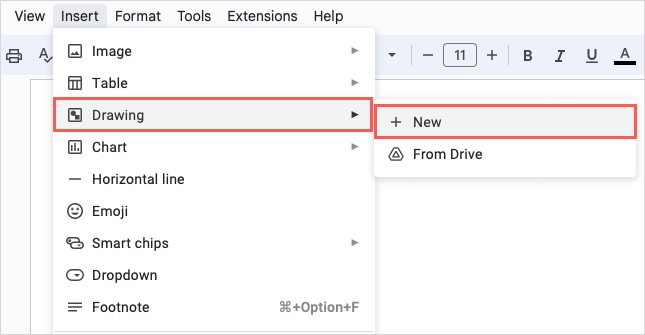 alt text: Google Docs menu with Insert, Drawing, and New highlighted
Using the Drawing Tool to Create a Text Box
The Drawing tool is a versatile option for creating customizable text boxes in Google Docs. This method allows you to treat the text box as an image, giving you greater control over its placement and appearance.
- Position your cursor: Place your cursor where you want the text box to appear.
- Open the Drawing tool: Navigate to Insert > Drawing > New.
- Select the Text box tool: In the Drawing window, click the Text box icon in the toolbar. Alternatively, you can choose a Shape (like a callout or oval) and insert text within it.
- Draw the text box: Click and drag your cursor to create a text box of the desired size. Remember that you can resize it later.
- Add and customize text: Enter your text into the box. Use the formatting tools at the top to customize the font, size, color, alignment, spacing, and add a border.
- Save and close: Click Save and Close to insert the text box into your document.
- Adjust placement and wrapping: A floating toolbar will appear when you select the inserted text box. Use this to wrap text around the box, keep it inline, rotate, or resize it.
- Edit the text: To modify the text, click Edit in the floating toolbar to reopen the Drawing tool.
This method provides flexibility in customization and positioning, but requires opening the Drawing tool for text edits.
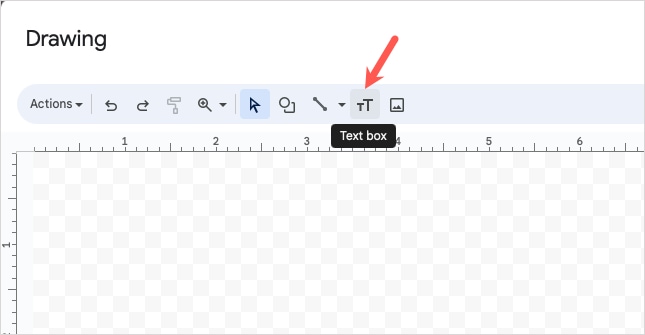 alt text: Text box option selected in Google Docs Drawing toolbar
Adding a Single-Cell Table as a Text Box
A single-cell table can effectively function as a text box in Google Docs. This approach is particularly useful for creating structured, box-like containers for text.
- Position your cursor: Place your cursor where you want the text box.
- Insert a table: Go to Insert > Table.
- Choose a single cell: Select the “1 x 1” option in the pop-out menu.
- Add and format text: Enter your text in the cell. Use the toolbar to format the font, size, and color.
- Resize the table: Drag the table edges to adjust its width.
- Customize table properties: Right-click the table and select Table properties to customize its appearance further, including style, alignment, size, border, and background color.
- Close the sidebar: Click the X to close the Table Properties sidebar.
This method offers easy text editing and a structured appearance but can be less flexible in terms of positioning within the document flow.
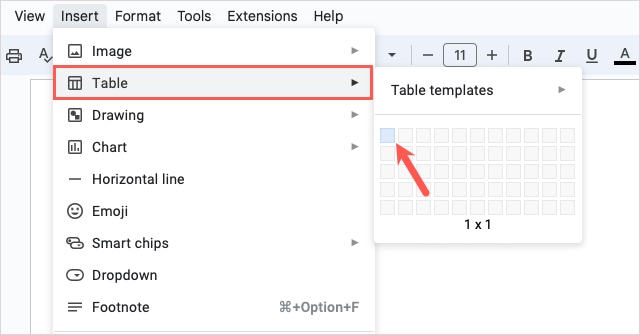 alt text: A single table cell selected from the Insert Table menu in Google Docs
Mimicking a Text Box with Borders
This workaround involves adding borders around text to create the visual impression of a text box. It’s a simple solution for adding visual emphasis without needing separate text box tools.
- Enter and select text: Type the text you want enclosed in a border and select it.
- Open Borders and shading: Go to Format > Paragraph styles > Borders and shading.
- Add borders: Use the Position boxes in the pop-up window to add borders around the selected text.
- Customize borders: Adjust the border width, style, and color. Optionally, add a background color and padding. Click Apply.
- Edit text freely: Adding or removing text automatically adjusts the border, maintaining the text box effect.
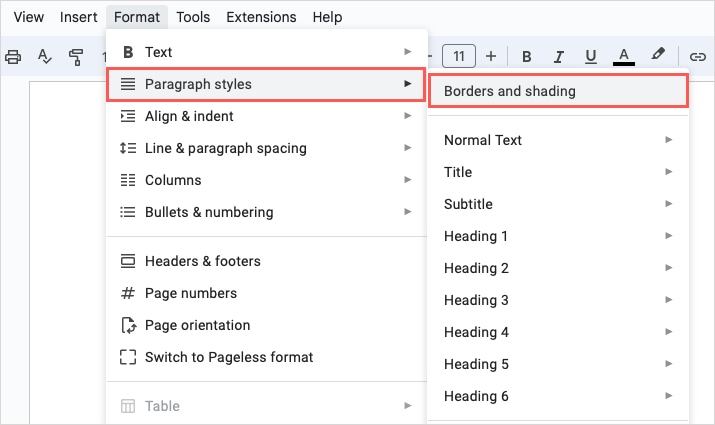 alt text: Borders and Shading option selected from the Paragraph styles menu in Google Docs
This method allows for quick text editing but lacks the flexibility of moving and resizing the bordered area independently of the text.
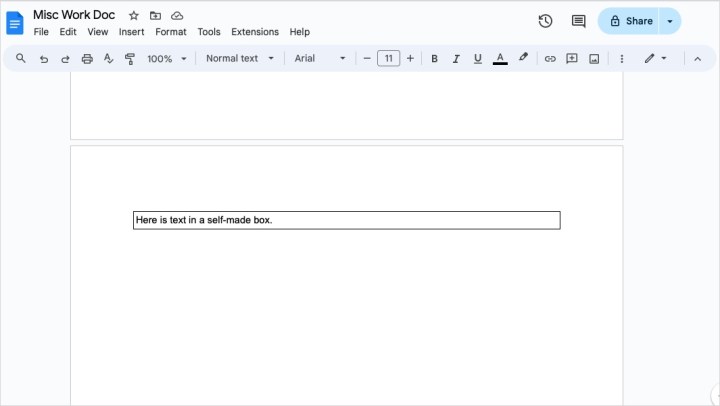 alt text: Borders applied to text in Google Docs creating a text box effect


