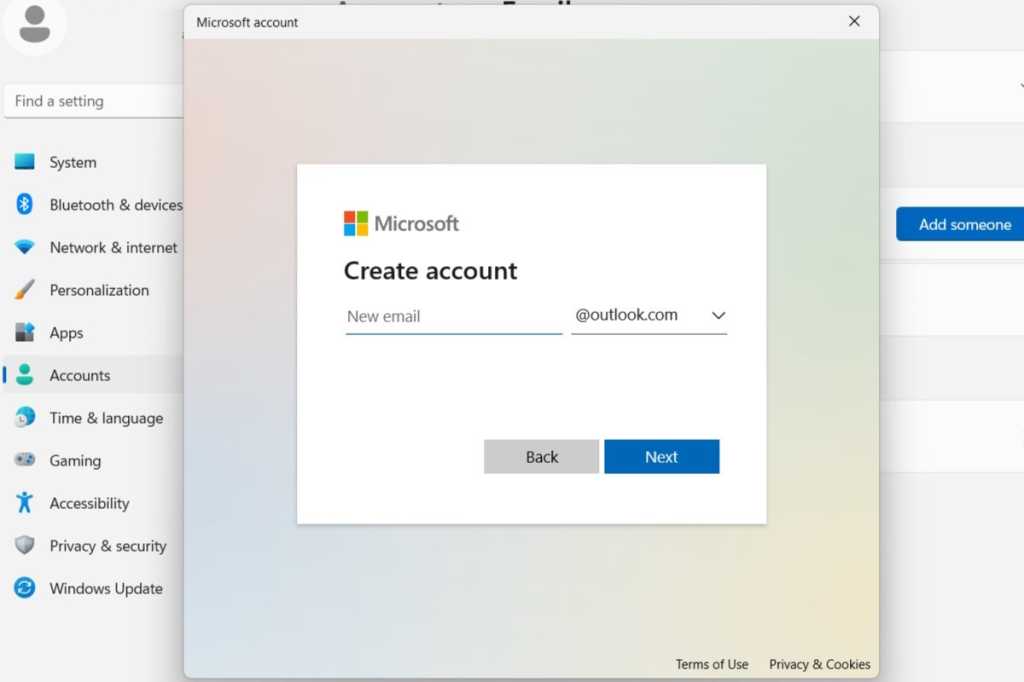
Sharing a computer can be inconvenient. Separate user accounts on Windows 11 offer a solution, providing organization and preventing file clutter. This guide simplifies the process of adding both adult and child user accounts to your Windows 11 PC.
Adding an Adult User
Creating a separate account for each adult user ensures personalized settings and data privacy. Follow these steps to add an adult user:
- Open the Windows Settings: Click the Windows icon in the taskbar and select the settings icon.
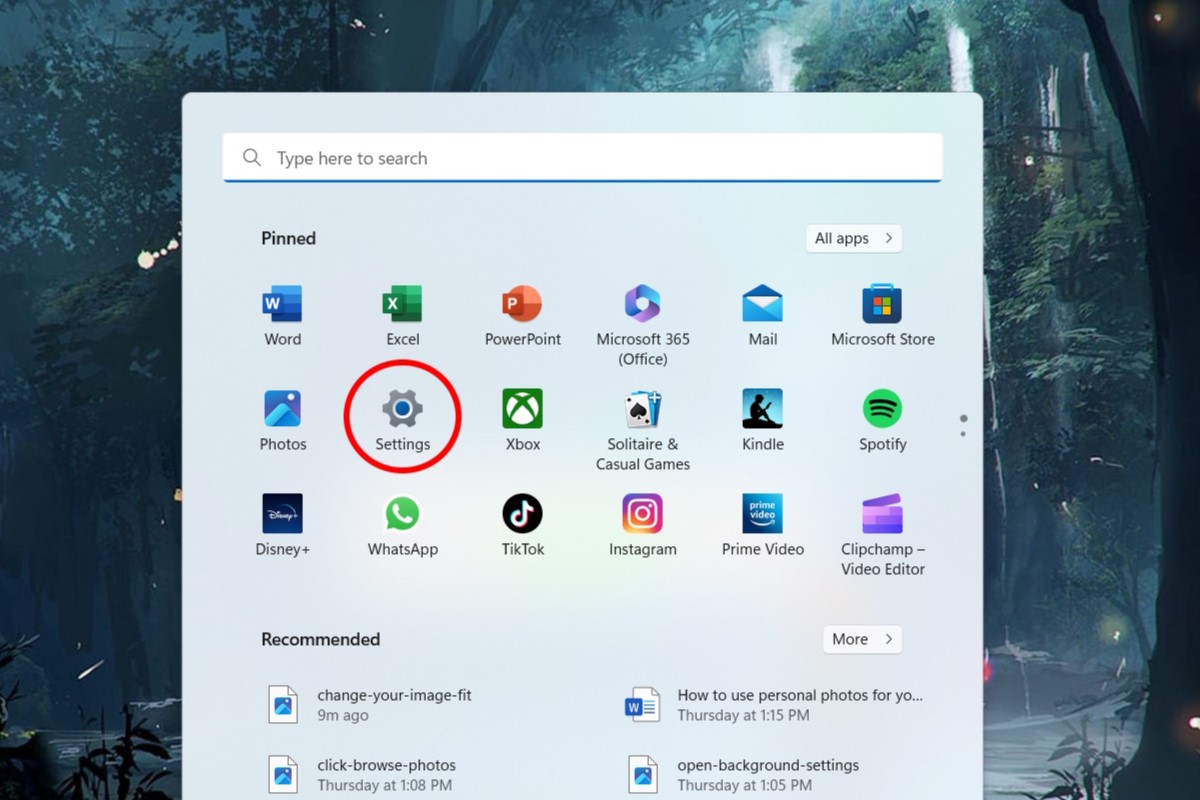 Opening Windows Settings
- Navigate to Accounts: In the Settings menu, select “Accounts” from the left-hand menu.
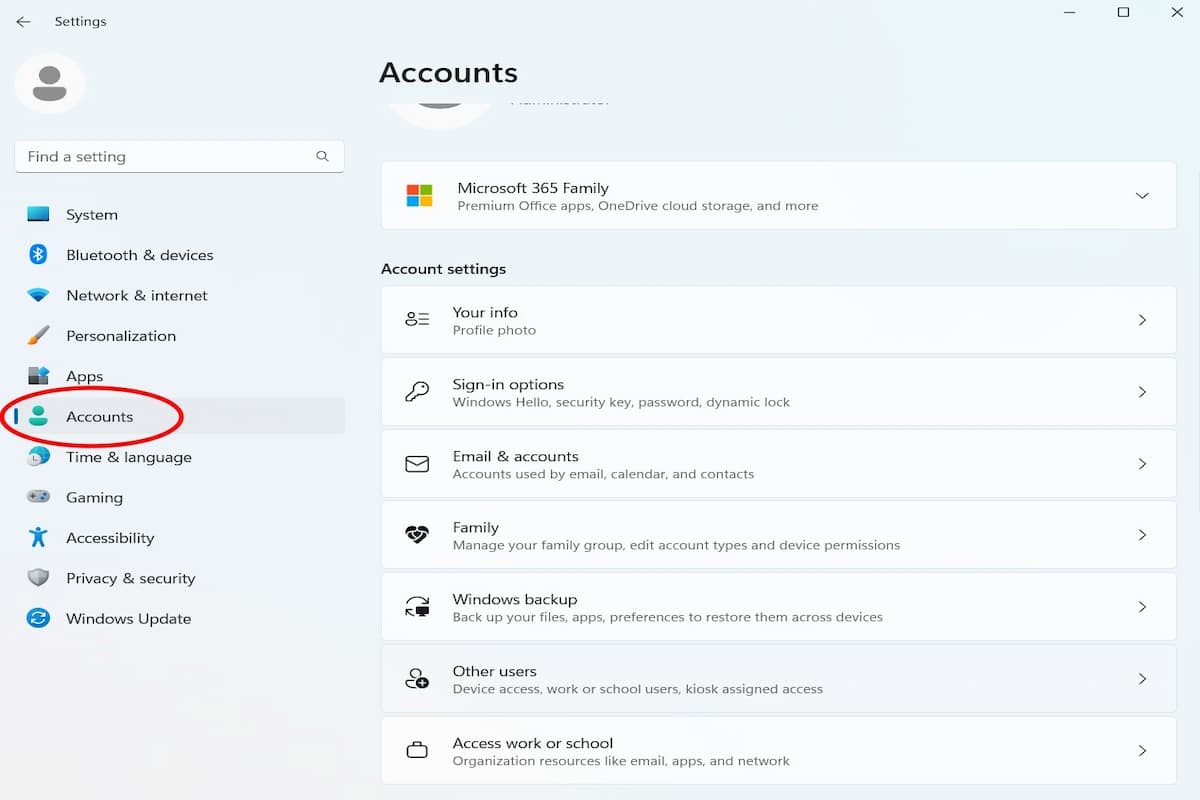 Selecting Accounts in Settings
- Access Other Users: On the Accounts settings page, click “Other users” towards the bottom of the menu.
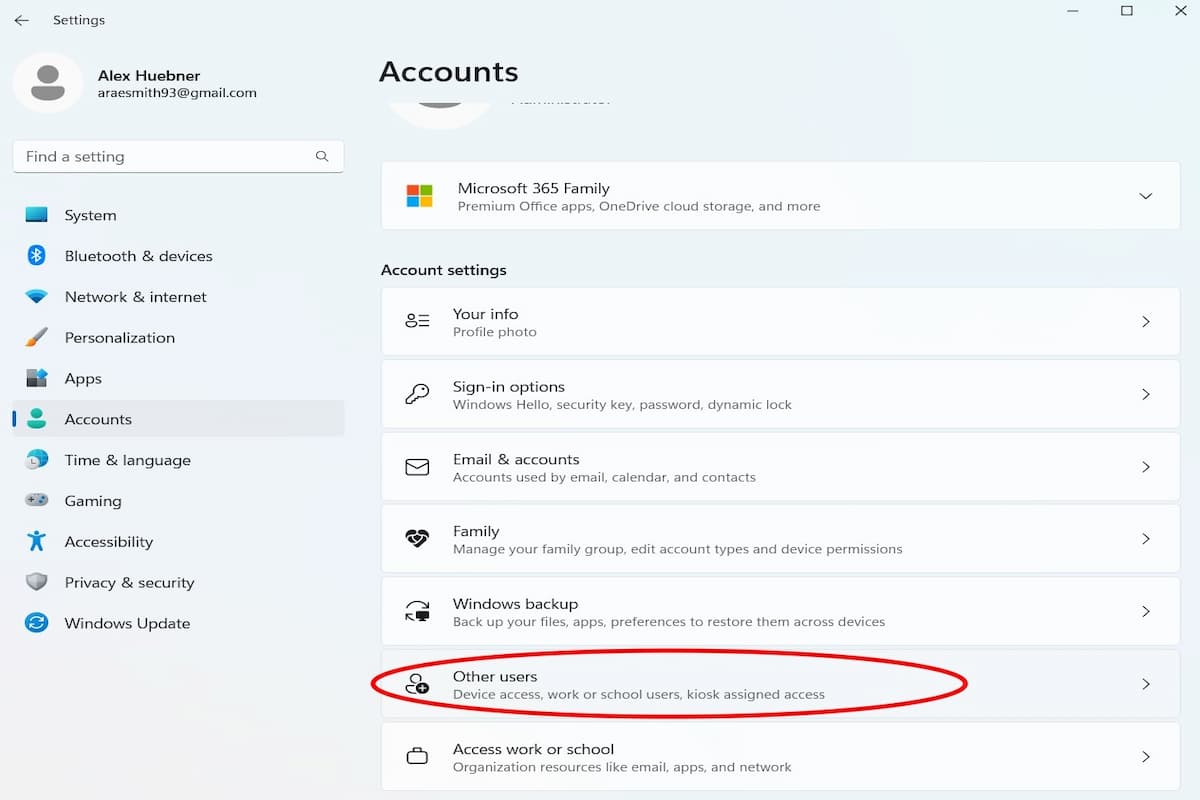 Accessing Other Users settings
- Add User: Click the blue “Add user” button.
 Clicking Add User
- Microsoft Account Login: A Microsoft account login window will appear. The new user will need a Microsoft account. If they don’t have one, they can create one at this stage. Enter the login credentials and follow the on-screen prompts.
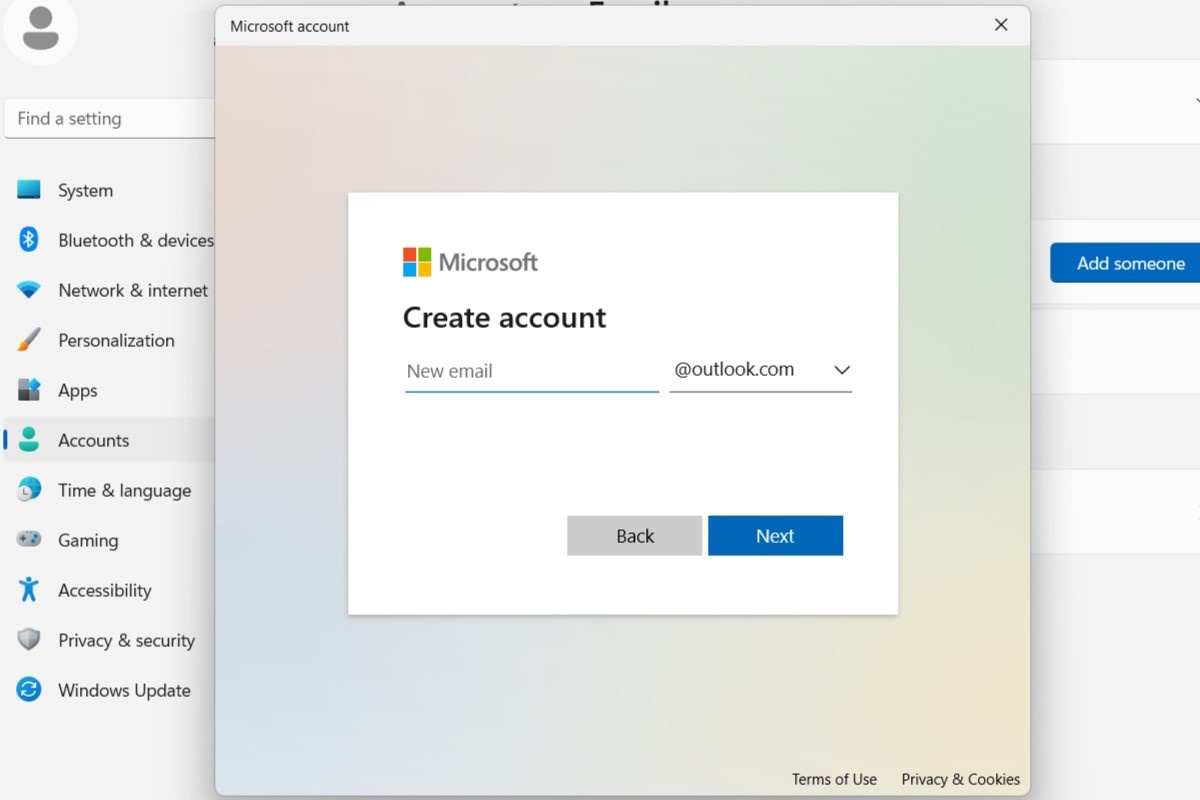 Microsoft Account Login Window
- Switching Users: After setup, you can switch between users by clicking the profile icon at the bottom of the Start menu and selecting the desired user. You can also select a different user from the password screen after the computer is locked, in sleep mode, or powered back on.
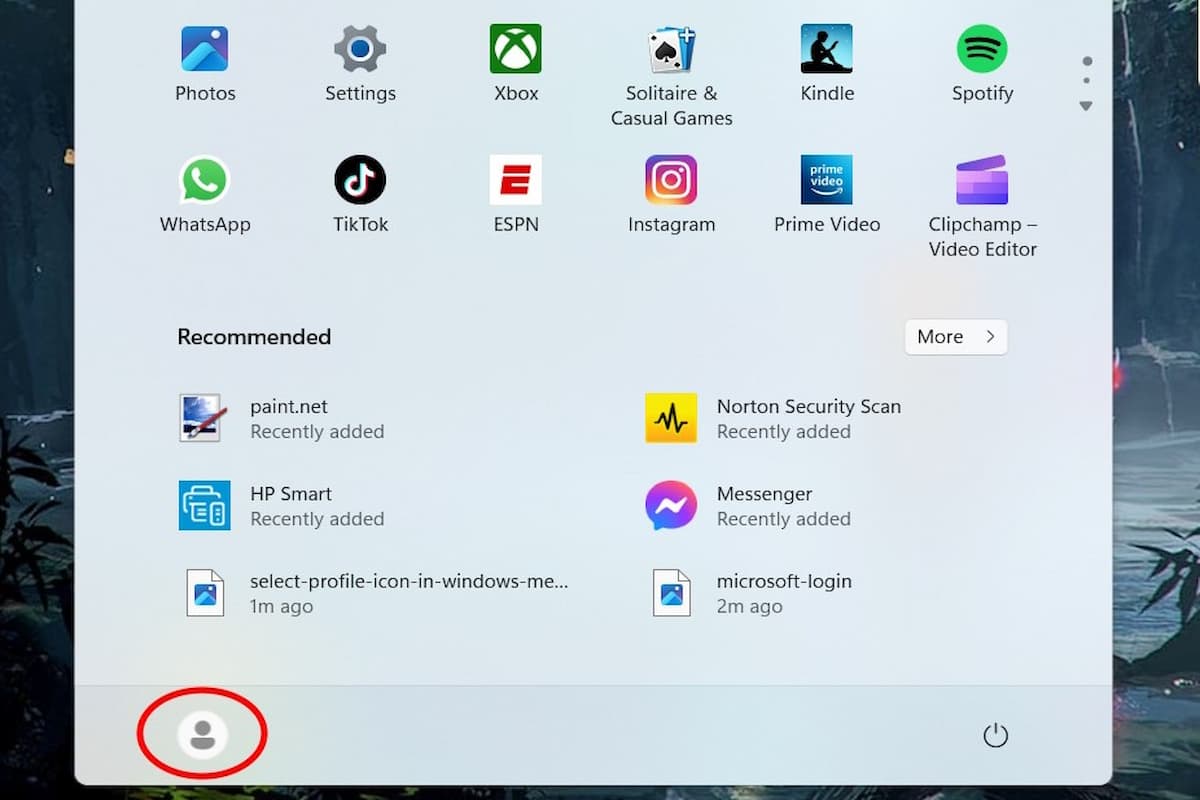 Switching Users
Adding a Child User
Adding a child user provides access to parental controls, allowing you to manage their computer usage. Here’s how to add a child user:
- Access Settings: Click the Windows icon and open the Settings menu.
 Accessing Windows Settings
- Select Accounts: Click the “Accounts” option on the left side of the screen.
 Selecting Accounts Setting
- Family Settings: In the Accounts page, click the “Family” setting.
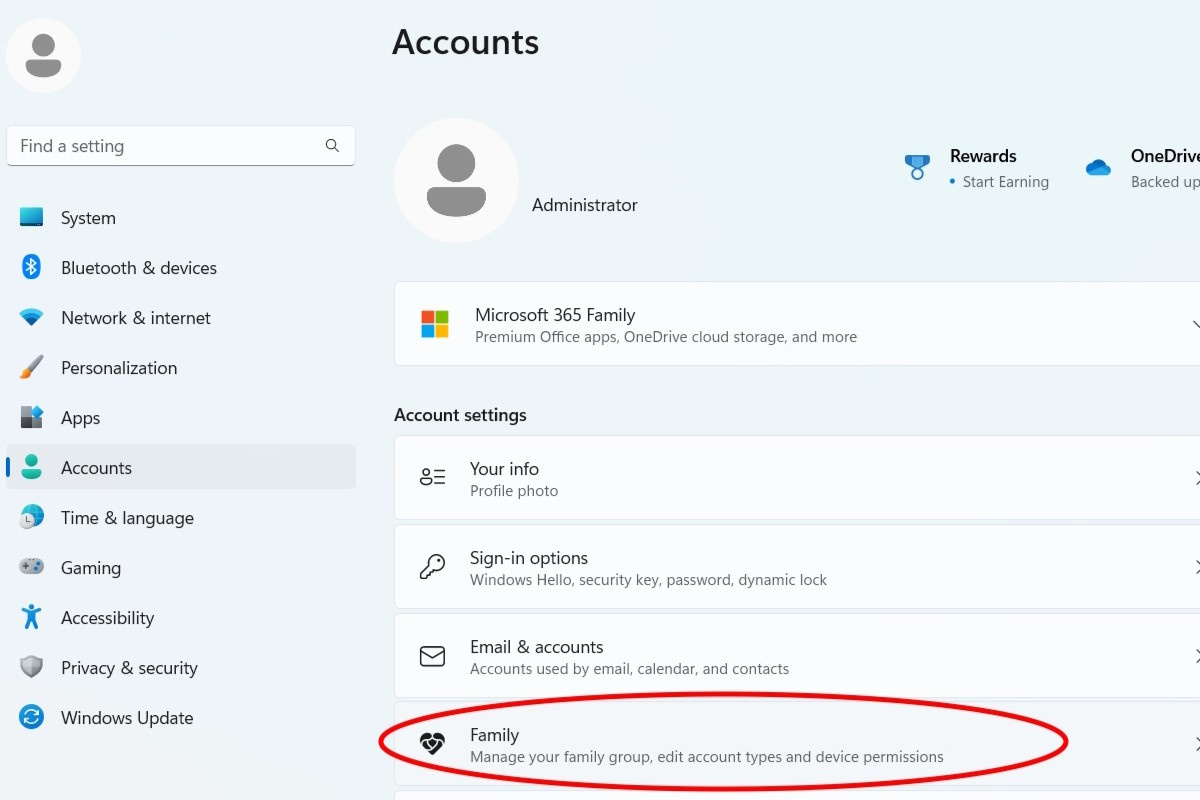 Accessing Family Settings
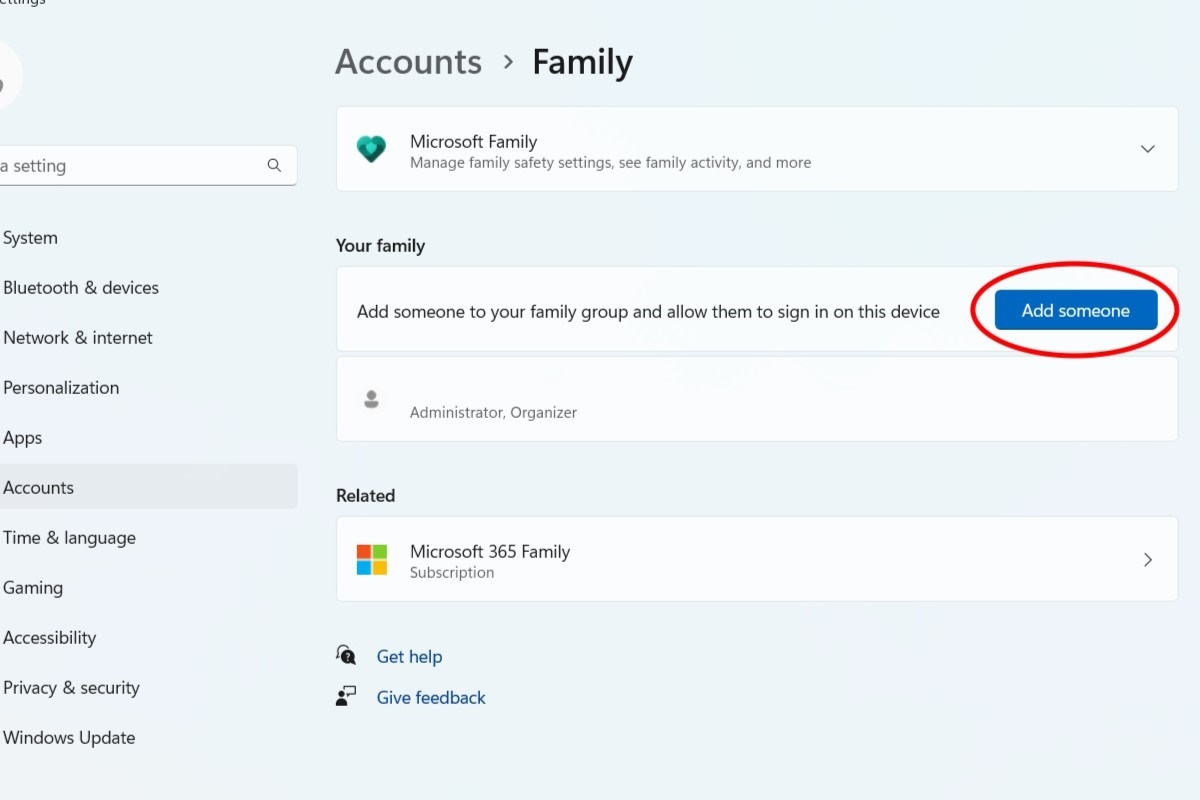
- Add Someone: Click the “Add someone” button on the right.
 Clicking Add Someone
- Microsoft Account Login/Creation: A login window will open. Enter your child’s Microsoft account information or create a new one if they don’t already have an account.
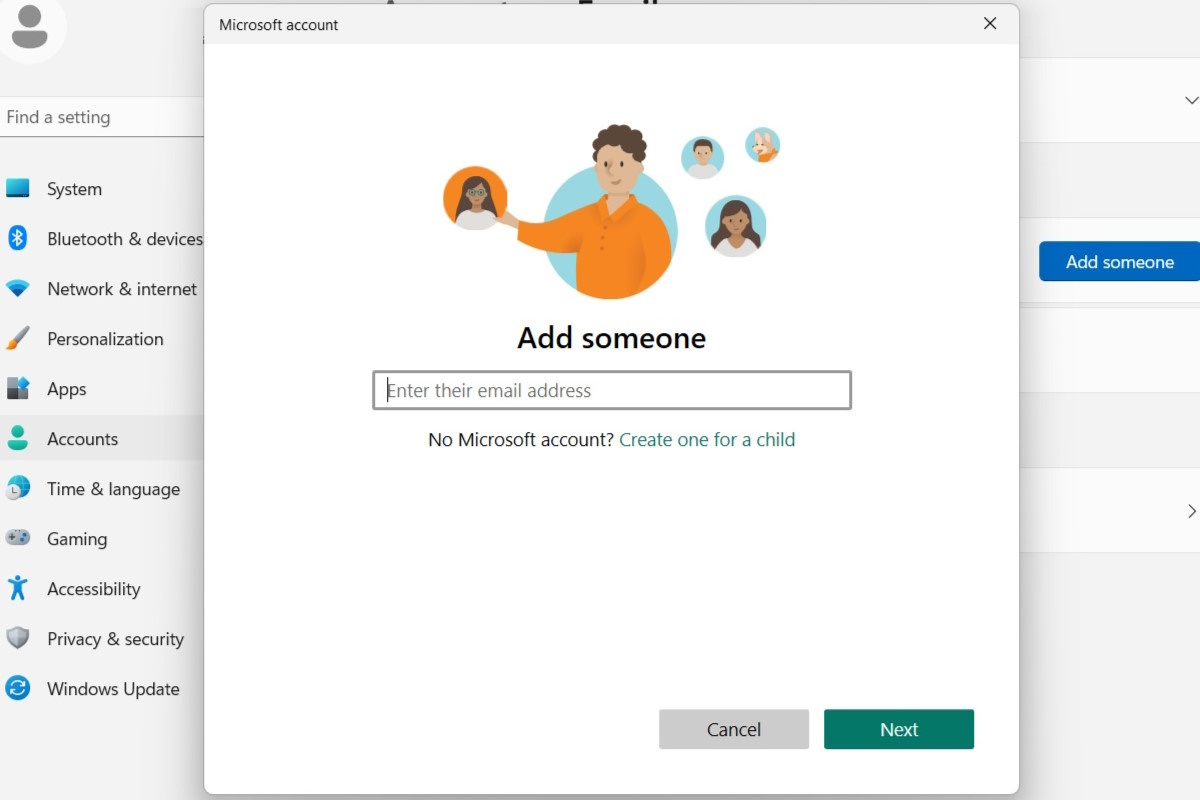 Microsoft Account Login for Child User
- Account Setup: Follow the prompts to create the account. After logging in, enter their login email and select “Member” on the following screen.
 Setting up Child Account
- Confirm Member Status: Ensure the child account is designated as a “Member”.
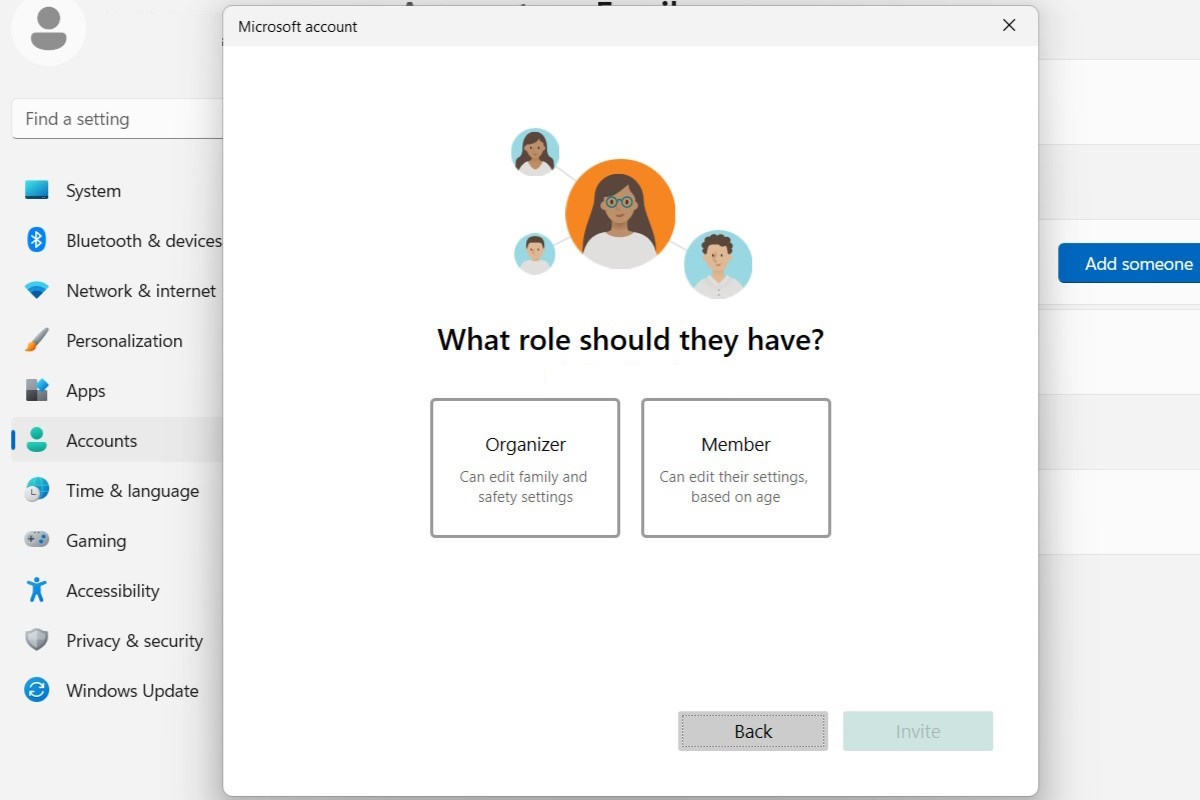 Confirming Member Status
- Parental Controls: After adding the account, you can access and configure parental controls to manage your child’s computer access and activities.
Conclusion
Setting up individual user accounts in Windows 11 is a straightforward process that significantly enhances organization and privacy for everyone sharing a computer. By following this guide, you can easily create accounts for both adults and children, enabling a more personalized and secure computing experience.


