Windows 11 offers a built-in solution for capturing screenshots and recording screencasts called the Snipping Tool. Access it quickly using the Windows key + Shift + S shortcut or by searching “snipping tool” in the Start menu.
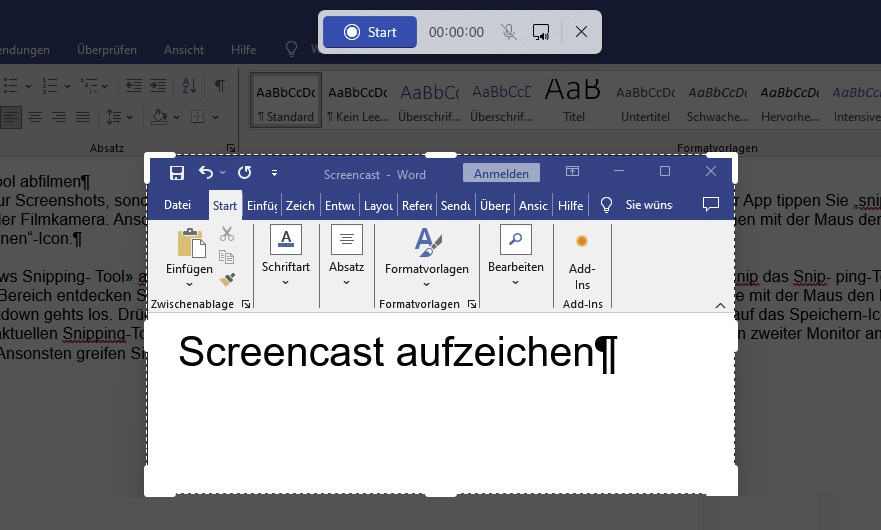
The Snipping Tool allows you to easily switch between screenshot and screencast modes. To record a screencast, click the film camera icon. Then, drag your mouse cursor to select the recording area, whether it’s a specific window or a portion of your screen.
To begin recording, click the Start button.
 Snipping-Tool Screencast
A three-second countdown will initiate the recording process. All on-screen activity within the defined area will be captured. Utilize the Pause button to temporarily halt the recording or the Stop button to finish. Control audio recording with the Microphone and Speaker buttons to mute or unmute your microphone and system sounds, respectively.
Once finished, preview your recorded video directly within the Snipping Tool using the Play button. Save your screencast by clicking the Save icon in the top right corner.
With its intuitive interface and readily available controls, the Snipping Tool provides a convenient method for capturing both static images and dynamic screen recordings in Windows 11.


