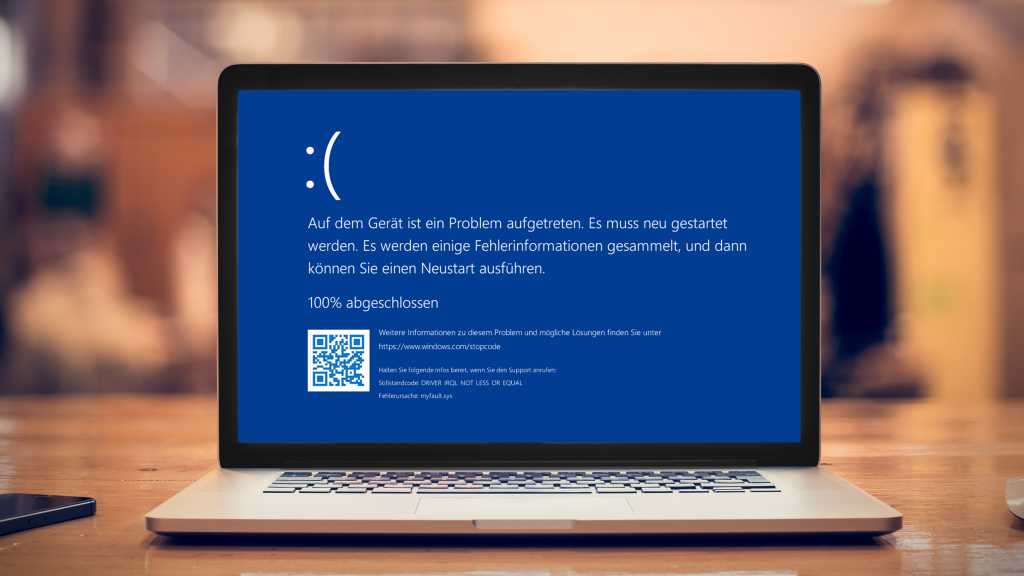
The dreaded “Blue Screen of Death” (BSOD) is a Windows user’s worst nightmare. A sudden system shutdown, a cryptic error message on a blue background, and the inevitable restart—it’s a recipe for lost data and frustration. Recurring BSODs can render your system unusable, requiring repairs through a secondary or rescue system. This article provides comprehensive troubleshooting steps to diagnose and resolve BSOD errors, helping you reclaim control of your Windows PC.
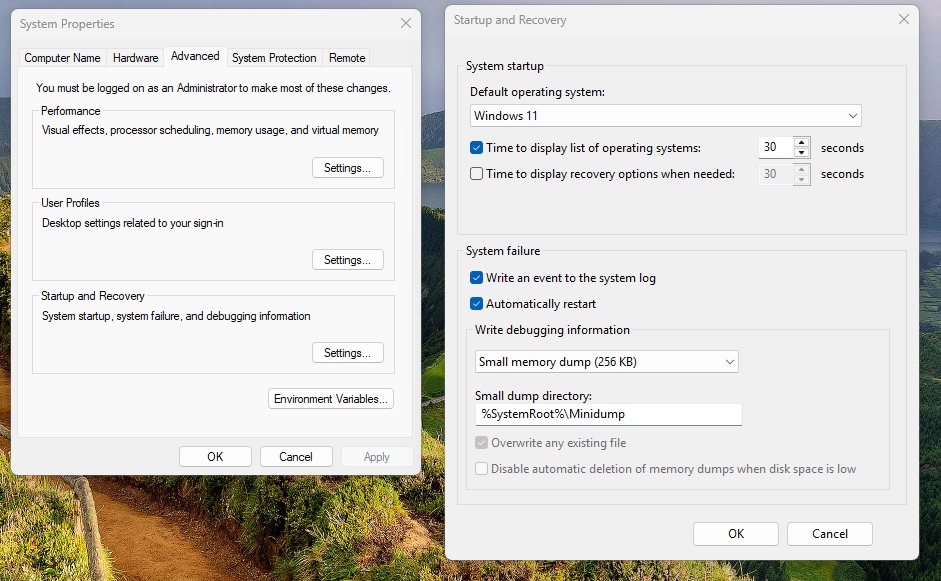 Advanced System Properties
Understanding the Blue Screen
BSODs are typically caused by driver or hardware issues. Even drivers not directly linked to hardware, like antivirus components, can be culprits. Drivers operate in a privileged mode with direct access to memory and hardware interfaces. A critical error triggers a system halt (the BSOD) to prevent further damage, such as file system corruption. The error message often, but not always, identifies the offending driver. While Windows-supplied drivers are rarely problematic, third-party drivers are more susceptible to errors, particularly after installation or updates. Windows updates themselves can also introduce incompatibilities with existing drivers, leading to crashes.
Preventing Automatic Restart
By default, Windows quickly reboots after a BSOD, making the error message difficult to read. To disable automatic restart:
- Open Settings (Win-I) and navigate to System > About (if Windows is still booting normally).
- Click Advanced system settings (located under “Related links” in Windows 11, or under “Related settings” in Windows 10).
- In System Properties, select the Advanced tab.
- Under Startup and Recovery, click Settings.
- Uncheck Automatically restart.
- Under Write debugging information, select Small memory dump (256 KB). This creates a “.dmp” file in
C:WindowsMinidumpfor later analysis (see section “Error Analysis Tools”).
Troubleshooting with Onboard Tools
If Windows repeatedly crashes shortly after startup, preventing access to Settings, utilize the Windows Recovery Environment (WinRE):
- Power on your PC. When the Windows logo appears, force a shutdown by holding the power button.
- Repeat this process two or three times until Automatic Repair initiates.
- If Automatic Repair fails, repeat the power cycle until “The PC did not start correctly” appears with the Advanced options button.
- Click Advanced options > Troubleshoot > Advanced options > Startup Settings > Restart.
- In Advanced Startup Options, select Disable automatic restart after failure.
Note: If you use Bitlocker, have your recovery key ready.
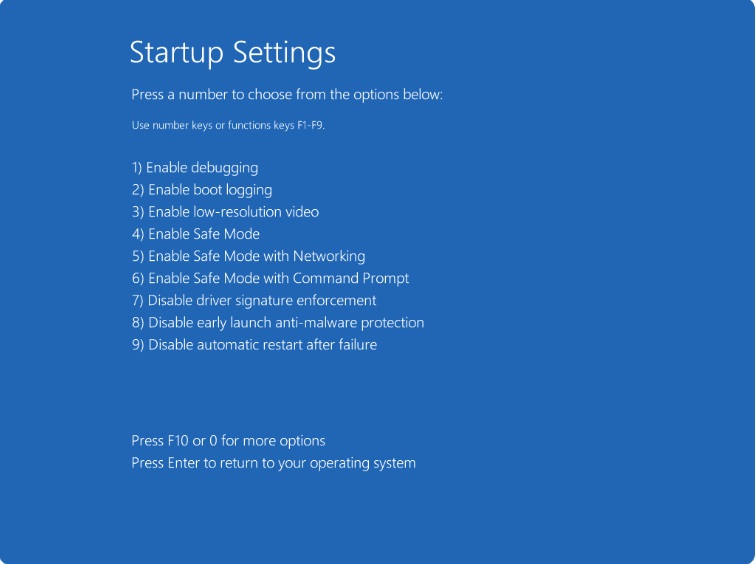 Startup settings
Accessing Advanced Startup Options Directly
Reactivate the classic boot manager for quicker access to advanced startup options:
- Download and run the Bootice tool.
- In the BCD tab, click Easy Mode. Ensure BCD of current system is selected.
- Click Add and create a new boot entry named “Windows Secured”. Mirror the existing Windows entry’s settings.
- For the new entry, select Safe Mode w/ Network under SafeBoot. Click Save current system.
- For both entries, uncheck Metro Boot Manager and save. Under Global settings, check Display boot menu and save.
- Upon restart, the classic boot menu will appear. Press F8 for advanced startup options.
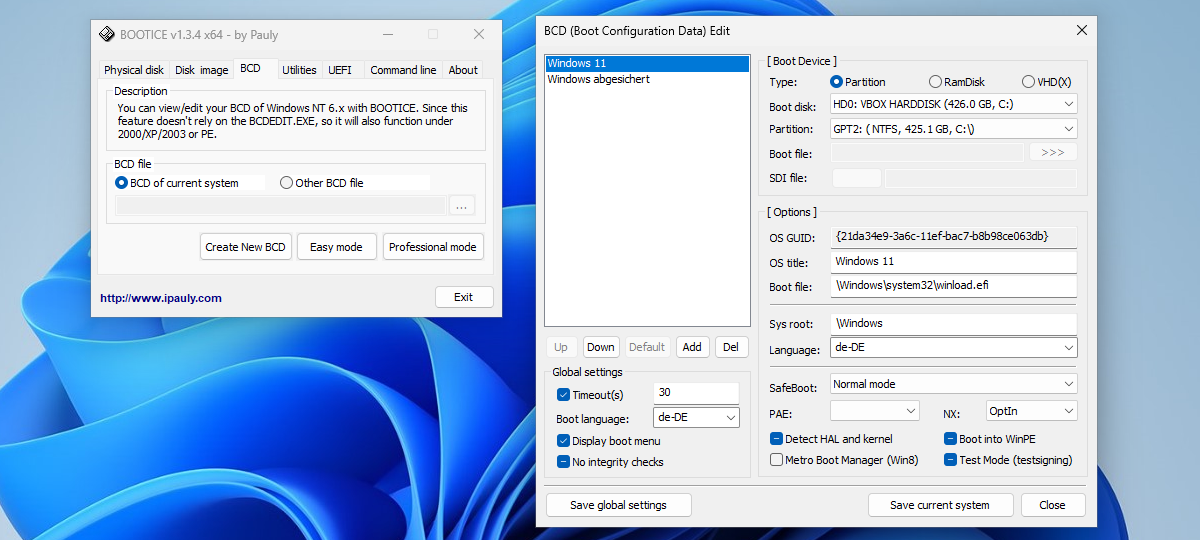 Boot-Konfiguration anpassen: Mit Bootice erstellen Sie neue Einträge für das Bootmenü oder passen die vorhandene Konfiguration an.
Utilizing a Rescue System
If automatic repair fails, create a bootable Windows installation USB drive using the Media Creation Tool or Rufus.
- Boot from the USB drive.
- For Windows 11 (24H2 and later): Select your language, keyboard layout, then choose Repair my PC > Troubleshoot > Startup Repair.
- For older Windows versions: Click Next > Repair your computer > Troubleshoot > Startup Repair.
Deactivating Auto-Restart via Rescue System
If using a rescue system, prevent automatic restart through the registry:
- Boot from the USB drive. At the setup screen, press Shift + F10 to open the command prompt.
- Type regedit and press Enter.
- In the registry editor, navigate to
HKEY_LOCAL_MACHINE. Select File > Load Hive. - Navigate to
[system drive]WindowsSystem32config, select SYSTEM, and enter Z as the key name. - Navigate to
HKEY_LOCAL_MACHINEZControlSet001ControlCrashControl. - Double-click AutoReboot, set the value to 0, and click OK.
- Go to
HKEY_LOCAL_MACHINEZand select File > Unload Hive. - Exit the registry editor and command prompt, then close the setup window.
Note: Bitlocker users need to unlock the system drive using manage-bde -unlock C: -recoverypassword [recovery key] in the command prompt.
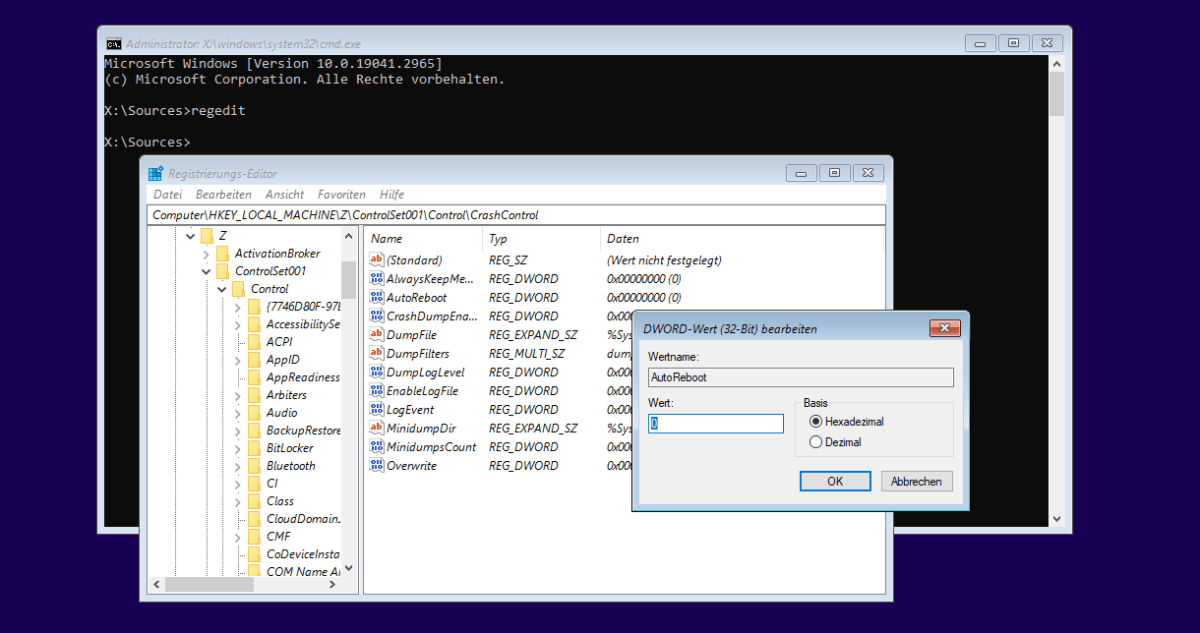 Option im Rettungssystem setzen: Enthält der Wert
Directly Launching the Repair System (WinRE)
Add WinRE to the boot menu using Bootice:
- Open Bootice and go to the BCD tab. Select Professional Mode. Locate the existing “Windows Recovery Environment” entry.
- Right-click the entry and select Duplicate this entry.
- Rename the new entry to “WinRE” (or similar).
- Switch back to Easy Mode and verify the “WinRE” entry’s settings. The partition should point to the recovery partition, the boot file to
RecoveryWindowREWinre.wim, and the SDI file to the corresponding recovery partition entry. Ensure the “Options” section points towindowssystem32winload.efi. Correct any discrepancies. - (Optional) Disable Metro Boot Manager for all entries to use the classic boot menu.
Troubleshooting Faulty Updates
Recent updates can be a source of BSODs. To troubleshoot:
- If Windows is booting: Go to Settings > Apps > Installed apps. Sort by installation date and uninstall recently installed programs, particularly those with system services or drivers.
- Pause Windows updates temporarily.
- Review update history. Search the web for known issues related to specific KB numbers.
- Uninstall suspected updates through Update history or Uninstall updates (Control Panel in Windows 10).
- If Windows isn’t booting: Boot from the installation media, select Repair your computer > Troubleshoot > Uninstall updates.
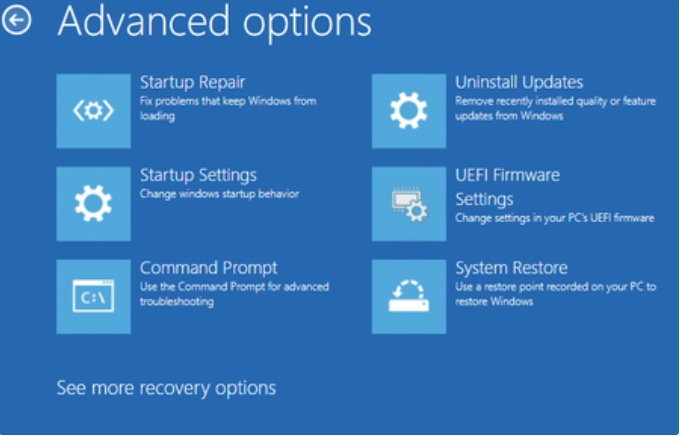 Windows Recovery
Utilizing System Restore
System Restore reverts Windows to a previous state. To use it:
- Press Win-R, type rstrui, and press Enter.
- Choose a recommended restore point or select another point.
- Review affected programs before proceeding.
Resolving Driver Errors
- If a specific driver is implicated, update it through Device Manager or the manufacturer’s website.
- Roll back to a previous driver version if a recent update caused the issue.
- If Windows isn’t booting, access the rescue system’s command prompt (Shift + F10), open Notepad, and navigate to
WindowsSystem32Drivers. Rename the problematic driver file (e.g., from “driver.sys” to “driver.sys.bak”).
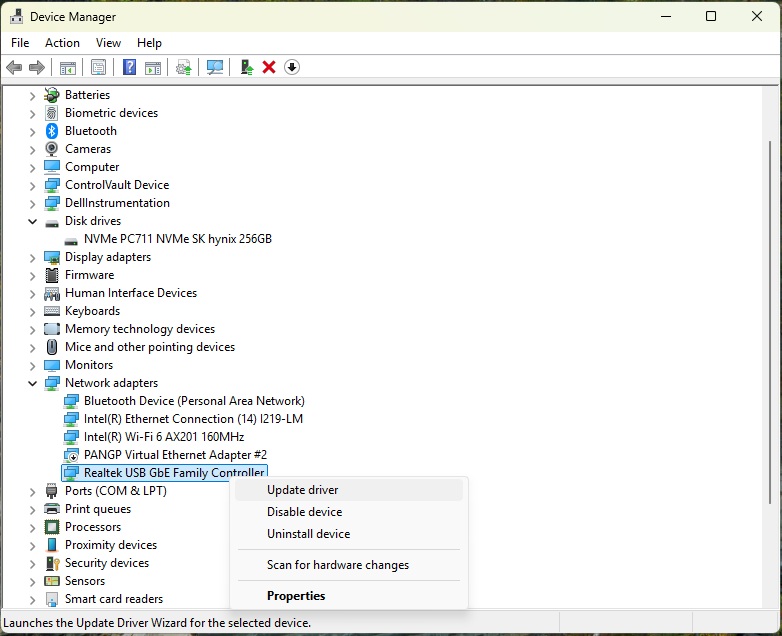 update driver
Addressing Unspecific Errors
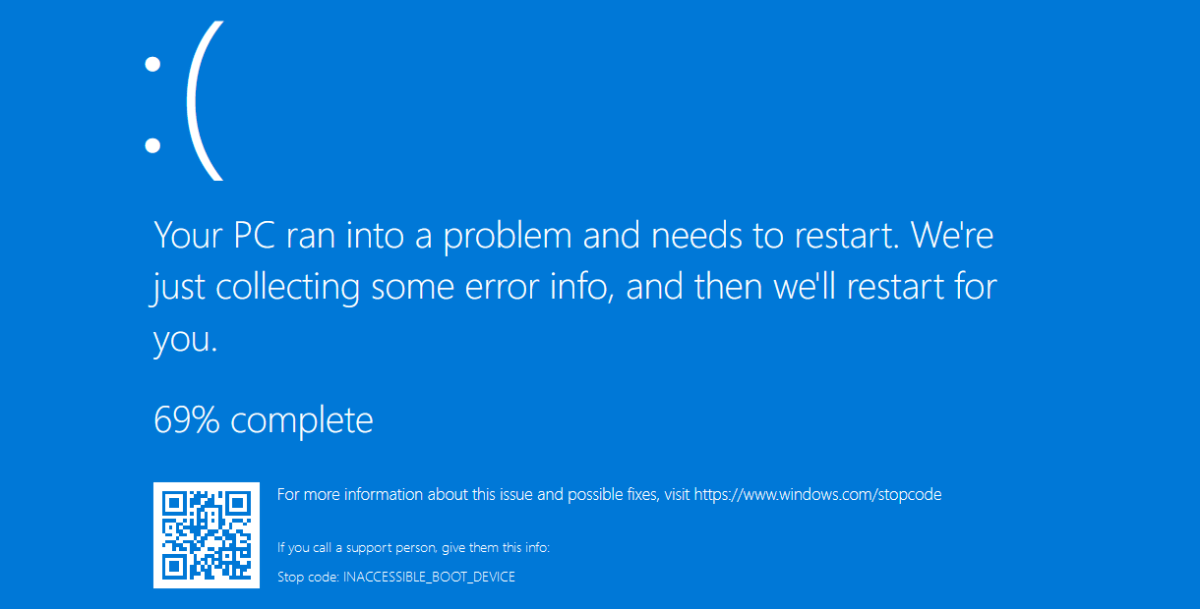
Some BSOD errors offer little specific information. “IRQL_NOT_LESS_OR_EQUAL” suggests a driver issue. “UNEXPECTED_KERNEL_MODE_TRAP” can indicate overheating. “DATA_BUS_ERROR” or “PAGE_FAULT_IN_NON_PAGED_AREA” might point to faulty RAM. “INACCESSIBLE_BOOT_DEVICE” signifies a boot issue, potentially due to a faulty drive or corrupted file system. Use a Linux live system to check drive accessibility. If accessible, use the sfc /scannow command in the rescue system’s command prompt to check system files. If sfc fails, try DISM /Image:[drive letter]: /Cleanup-Image /RestoreHealth.
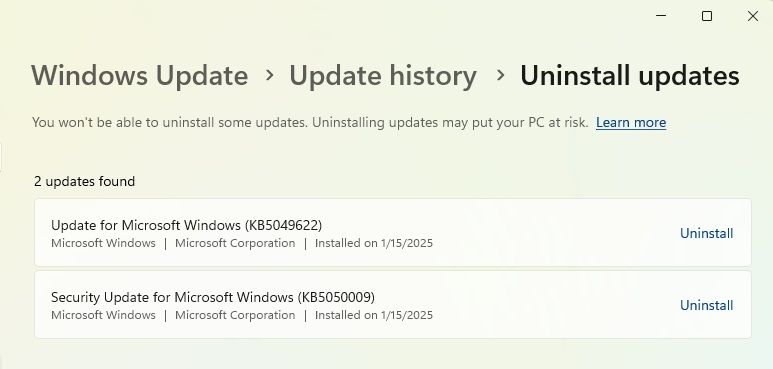 Uninstall update
Repairing Windows Startup Files
If Startup Repair fails, manually repair the boot environment:
- Open the command prompt in the rescue system.
- Type diskpart and press Enter.
- Use list disk and sel disk [number] to select the system drive.
- Use list vol to identify the EFI partition (FAT32, ~100MB).
- Assign a letter to the EFI partition (e.g.,
assign letter=b:). - Exit Diskpart (Esc).
- Execute the following commands:
cd /d b:EFIMicrosoftBoot
bootrec /fixboot
ren BCD BCD.bak
bcdboot C:Windows /l en-us /s b: /f UEFI
(Adjust the drive letter for your system if necessary)
 Reparatur im Rettungssystem: Vor Wiederherstellung der Bootumgebung weisen Sie der EFI-Partition (FAT32) einen Laufwerksbuchstaben zu.
Resetting Windows
As a last resort, reset or reinstall Windows. “Reset this PC” (in Settings) offers the option to keep personal files. Reinstalling Windows from the installation media provides a clean slate. Always back up your data before reinstalling.
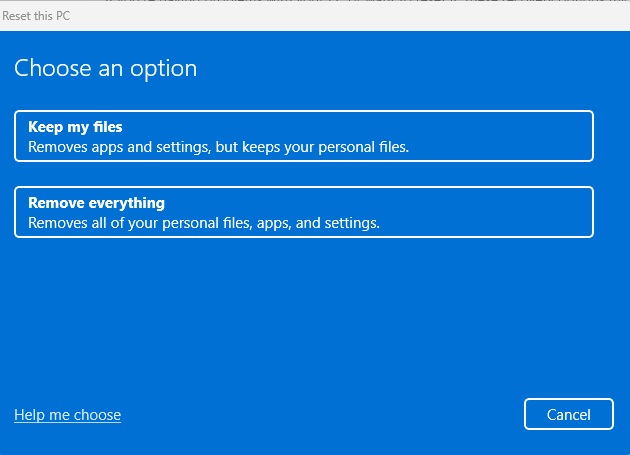 Reset PC
Error Analysis Tools
Utilize tools like WhoCrashed, WinDbg, and BlueScreenView to analyze “.dmp” files for more detailed error information. These tools can identify the offending driver or provide clues about the cause of the crash.


