PowerPoint remains a cornerstone for sharing information, but crafting compelling presentations requires a specific skillset. This guide provides a comprehensive walkthrough for creating a slideshow from scratch, perfect for beginners and those looking for a refresher. We’ll cover everything from setting up your presentation to adding slides and incorporating multimedia elements.
Setting Up Your PowerPoint Presentation
The first step is creating the presentation itself. Follow these steps to get started:
Step 1: Install and Launch PowerPoint. If you haven’t already, download and install PowerPoint (typically part of Microsoft 365) and open the application.
Step 2: Choose a Template or Start Fresh. PowerPoint offers a range of pre-designed templates and presentations to simplify the process. Select a relevant template from the home screen. For more choices, explore the “New” tab in the left-hand menu. If you prefer a blank canvas, choose “Blank presentation.”
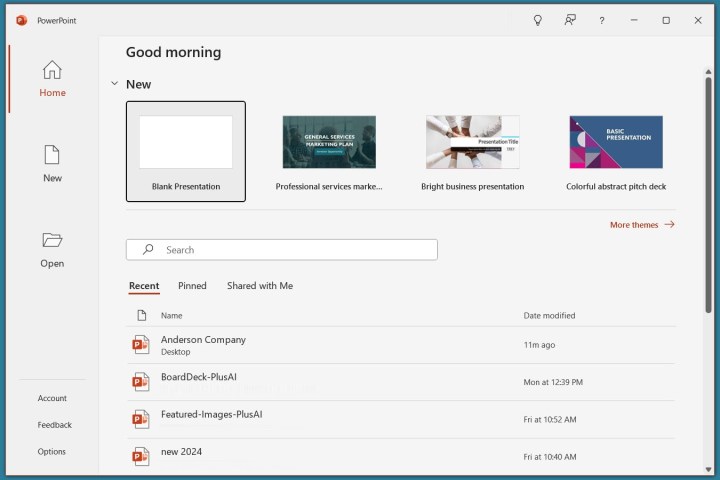 New presentation in PowerPoint.
Step 3: Save Your Presentation. It’s crucial to name and save your presentation early on. Select “File” > “Save” or “Save As,” provide a file name, choose a save location, and click “Save.” This prevents data loss and allows you to easily return to your work.
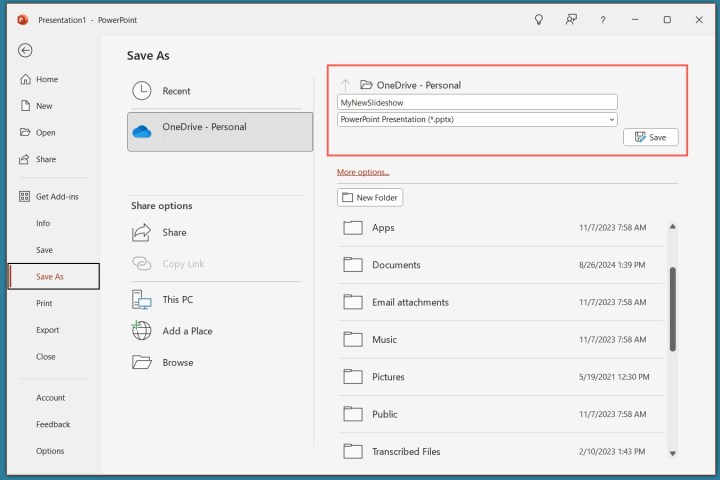 Name and save in PowerPoint.
Building Your First Slide
Now, let’s construct your initial slide:
Step 1: Add Title and Subtitle. Your first slide typically includes default text fields for a title and subtitle. Click within these fields to add your desired text. You can reposition and resize these elements by clicking and dragging. Use the white circles around the text boxes to resize and the rotational arrows near the corners to rotate. To remove these fields, select their border and press the “Delete” key.
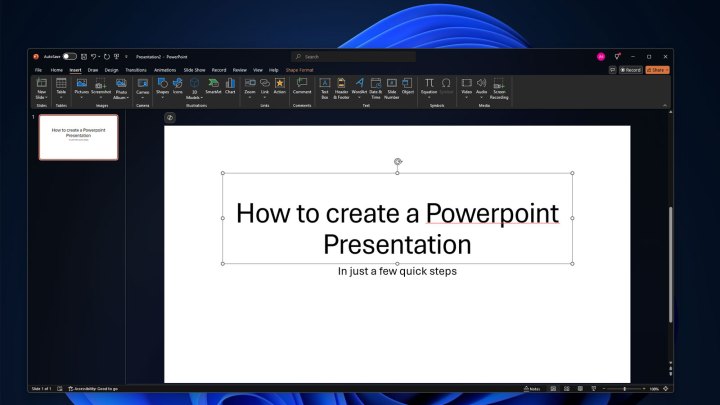 Creating a powerpoint first slide.
Step 2: Incorporate Additional Text. To add more text, go to the “Insert” tab and select “Text Box.” Click on the slide where you want the text box to appear and drag it to the desired size and shape. Type your text into the box. The contextual “Home” menu allows quick formatting adjustments. For more advanced formatting, use the “Format” tab to modify color, outlines, and text effects.
Step 3: Insert Images. To enrich your slide with visuals, select the “Insert” tab and then “Pictures.” You can choose images from your computer, stock photos, or online sources. You can also customize the background of your slides.
Step 4: Draw and Annotate. Use the “Draw” tab for freehand drawing or annotations. The “Design” tab allows you to modify the overall theme of your slideshow.
Adding More Slides
Expanding your presentation with multiple slides is easy:
Step 1: Insert New Slides. Navigate to the “Insert” tab and select “New Slide.” Choose the desired slide layout – blank, duplicate, themed, or pre-defined.
Step 2: Delete Slides. To remove unwanted slides, simply select the slide thumbnail in the left pane and press the “Delete” key.
Step 3: Finalize and Present. Before presenting, remember to add speaker notes. These are private notes visible only to you, helping you stay on track and deliver a smooth presentation.
Creating Engaging Presentations
For more in-depth guidance on maximizing the impact of your PowerPoint presentations, including advanced tips and tricks for design and delivery, explore our comprehensive PowerPoint tutorial and our guide on creating engaging slides.


