I’ve been there—tempted by expensive gaming microphones for crystal-clear team comms. But then I discovered the power of OBS Studio filters. The truth is, a budget-friendly mic can sound incredible with the right tweaks. This guide will show you how to transform your gaming audio without breaking the bank.
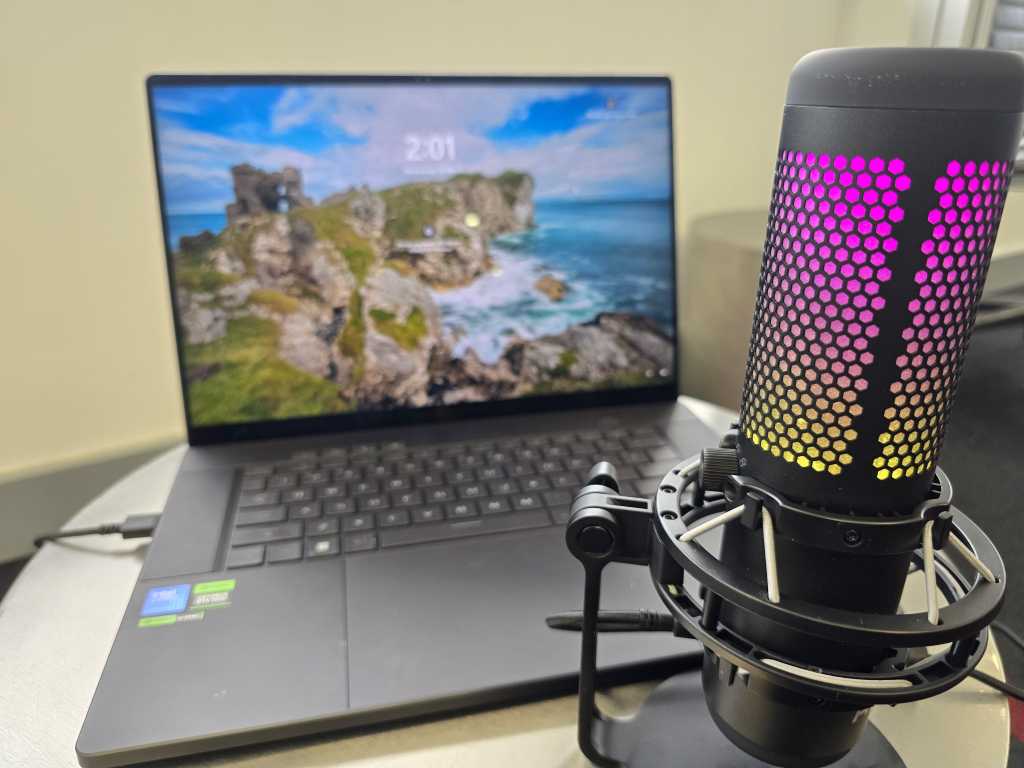
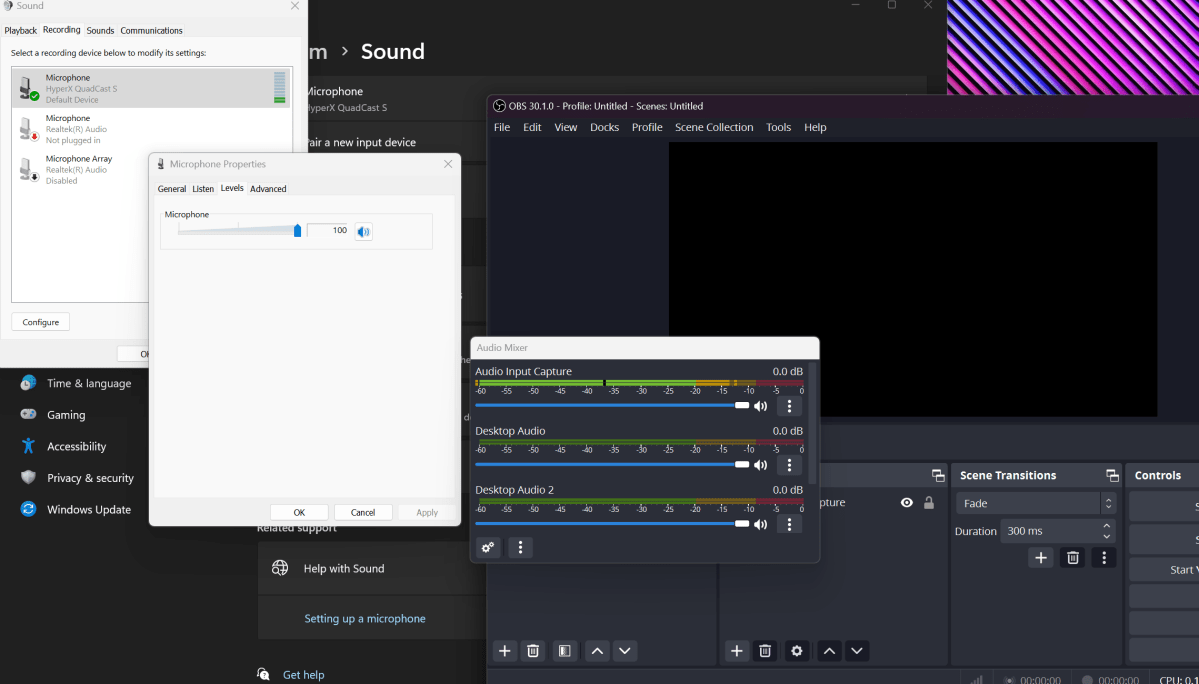 Image 1 Dominic Bayley / IDG
OBS Studio offers a standardized approach, bypassing microphone-specific quirks and ensuring consistent settings across platforms like Discord, Zoom, and in-game chats. I’ve used these filters on microphones ranging from the HyperX Quadcast S to the budget-friendly Razer Seiren Mini, achieving impressive results each time.
Optimizing Your Microphone with OBS Filters
This tutorial utilizes a HyperX Quadcast S as an example, but these steps are applicable to virtually any microphone.
Step 1: Gain Adjustment
Start by adjusting the microphone gain within Windows. Right-click the audio icon, navigate to Sound Settings > More Sound Settings > Recording, double-click Microphone, and select Levels. Adjust the gain until the OBS sound meter registers in the yellow range. Fine-tune the microphone’s physical volume control as needed.
Pro Tip: If a 100% gain in Windows is insufficient, add a Gain filter within OBS.
Step 2: Noise Suppression
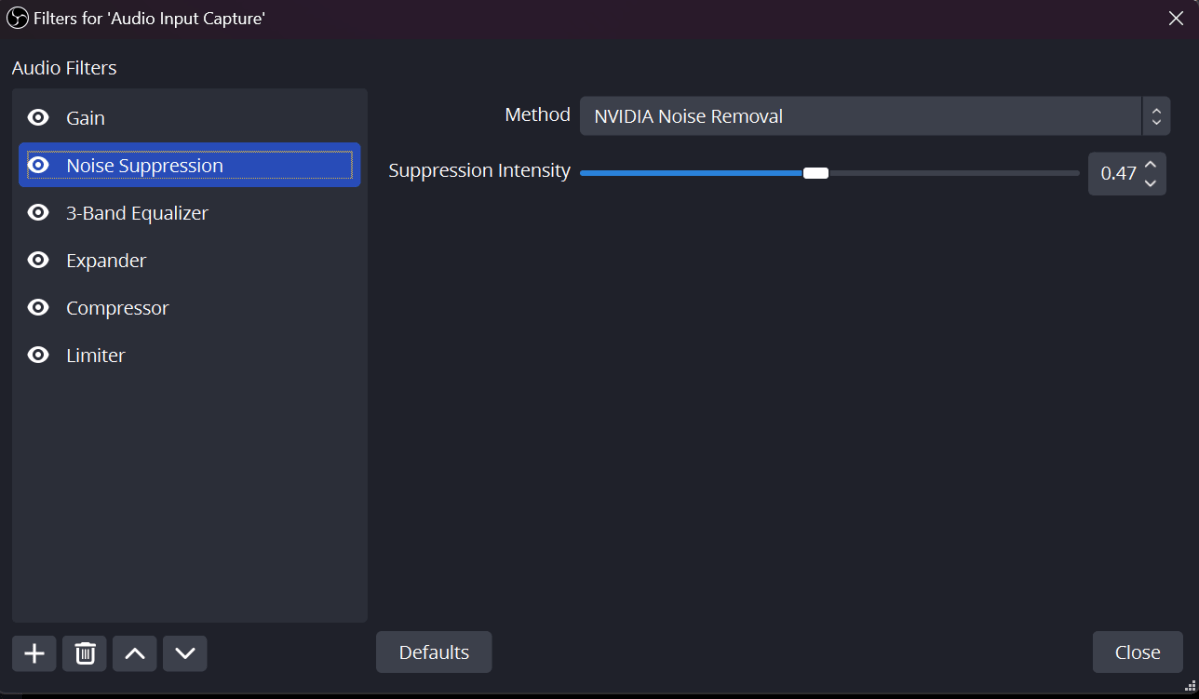
Enable audio monitoring in OBS by clicking the three vertical dots in the Audio Mixer, selecting Advanced Audio Properties > Audio Monitoring, and choosing Monitoring and Output for your microphone source. Add a Noise Suppression filter. If you have an Nvidia graphics card, Nvidia Noise Removal is recommended. Otherwise, experiment with the other available options. Adjust the suppression level until your voice is clear and background noise is minimized.
Pro Tip: Apply Noise Suppression before other filters to eliminate unwanted background sounds. Download an Nvidia Audio driver if the Nvidia Noise Suppression filter isn’t visible.
 Noise suppression Dominic Bayley / IDG
Step 3: 3-Band Equalizer
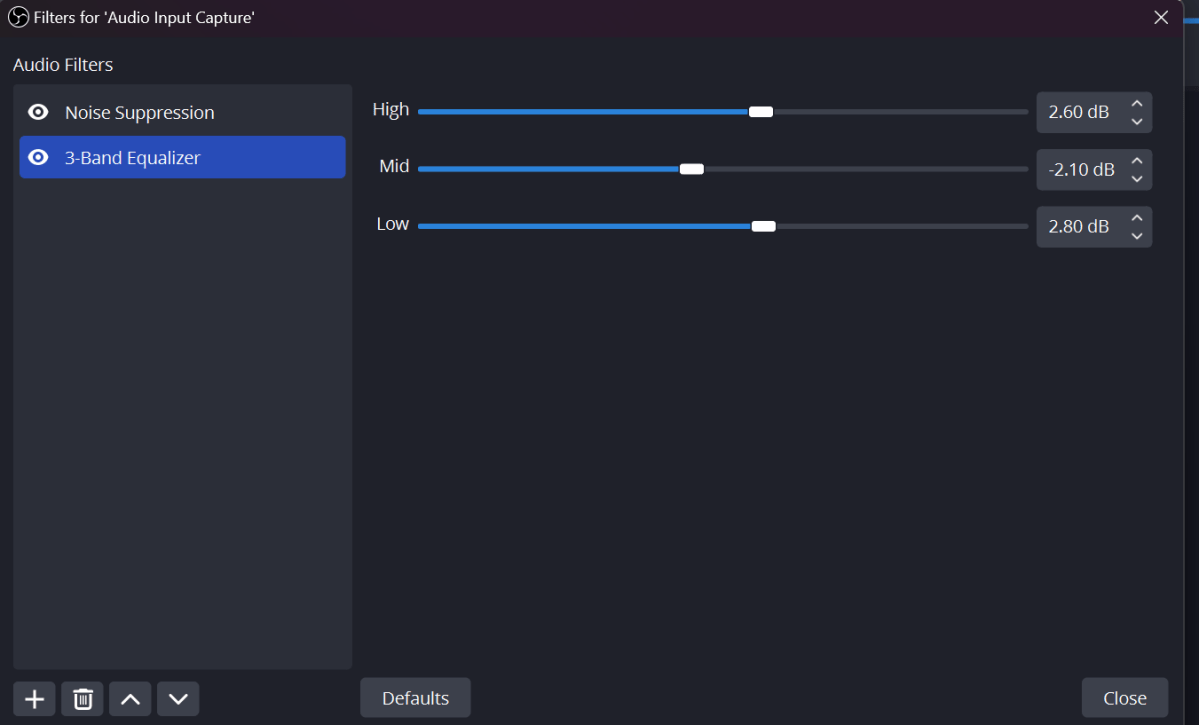
Add the 3-band equalizer filter. Slightly reduce the mids, and slightly increase the highs and lows to achieve a warmer, broadcast-quality sound.
Pro Tip: Tailor the equalizer settings to your voice. Avoid overemphasizing bass if your voice is already deep.
 Equalizer filter Dominic Bayley / IDG
Step 4: Expander
The Expander filter ensures audibility even when speaking softly. Set Ratio to 3, Release to 100, and Attack to 1ms. Move the Threshold slider fully left. Speak softly, gradually increasing Output Gain until the OBS meter registers in the yellow. Slowly increase Threshold until your voice becomes too quiet, then back off slightly.
Pro Tip: Adjust Threshold as needed for different audio types or programs.
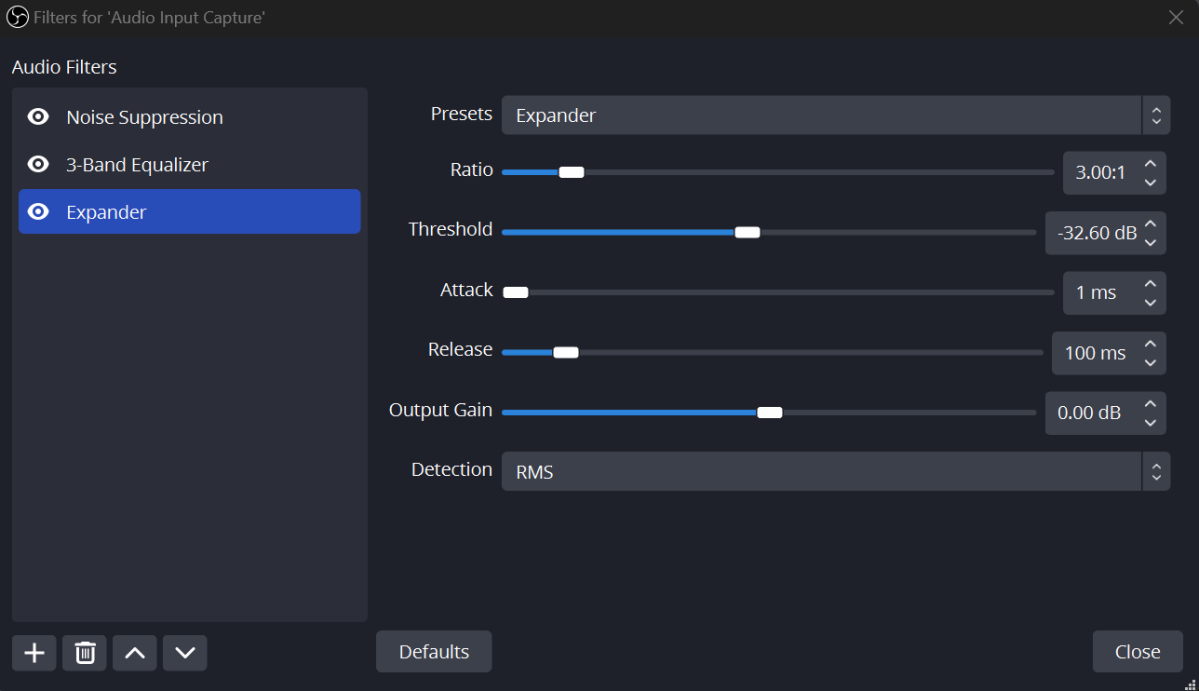 Expander Dominic Bayley / IDG
Step 5: Compressor
The Compressor maintains consistent volume. Set Ratio to 3, Threshold fully right, Attack to 1ms, and Release to 100. Speak loudly, gradually decreasing Threshold until your volume sits comfortably in the yellow range.
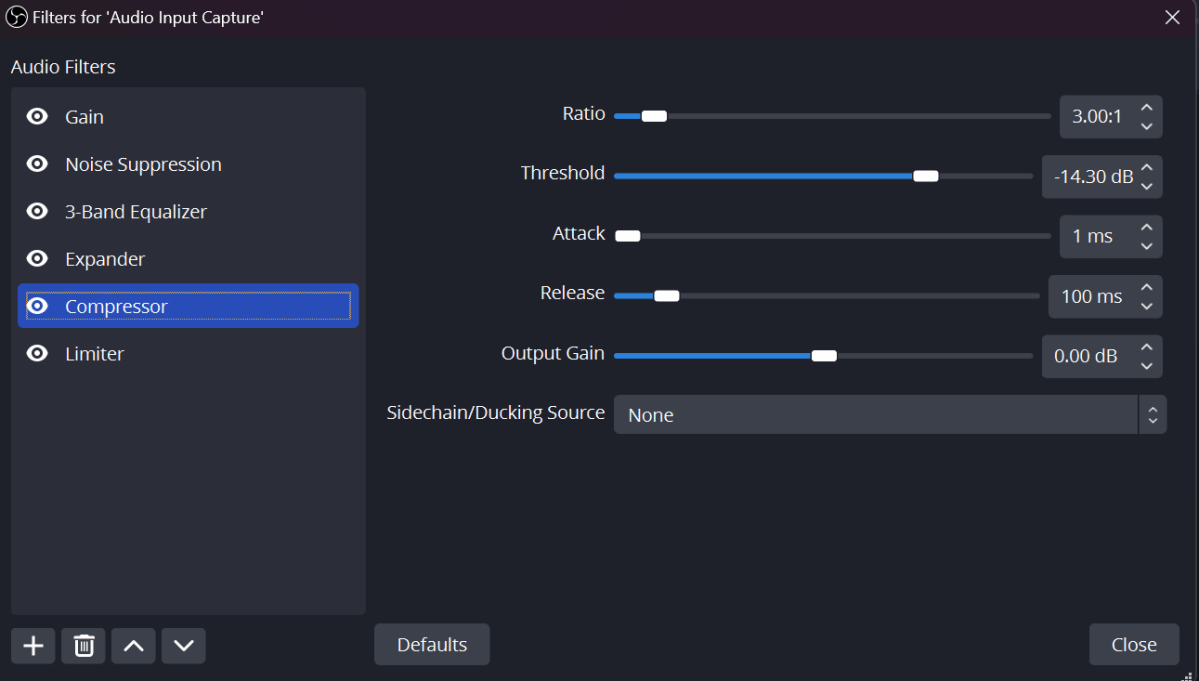 compressor Dominic Bayley / IDG
Step 6: Limiter
The Limiter prevents excessive volume. Set the Threshold to -0.1.
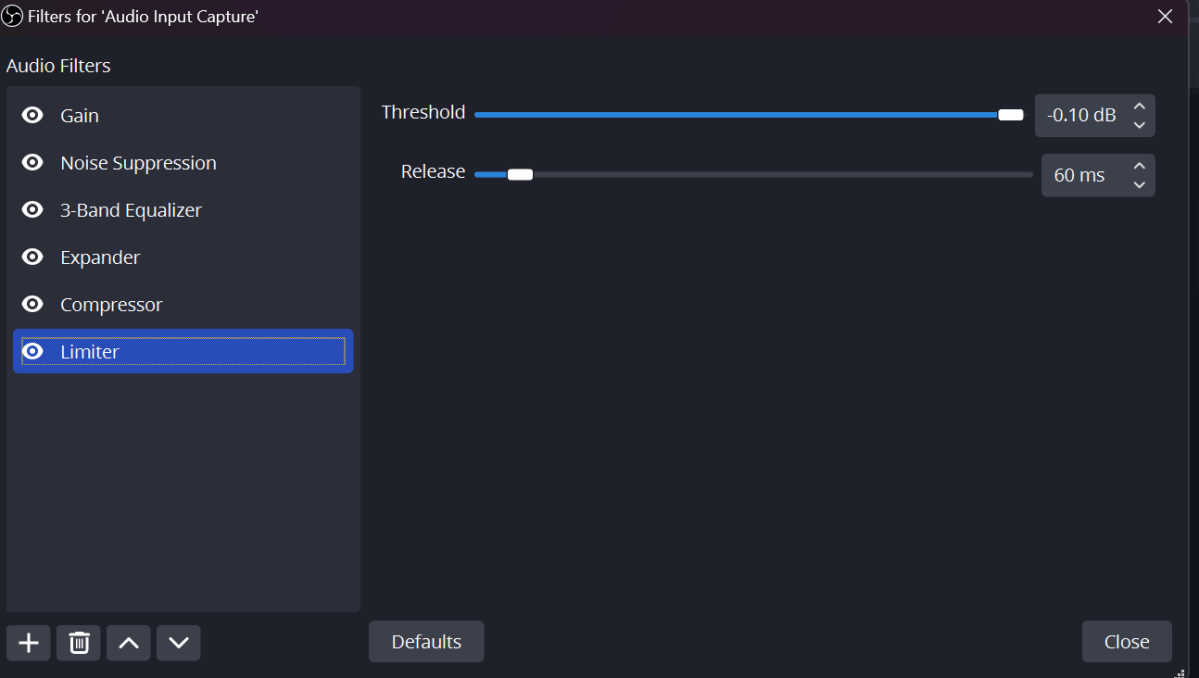 Limiter Dominic Bayley / IDG
Integrating with Other Platforms
Download and install VB-Audio Virtual Cable. In OBS Settings, change Monitoring Device to Cable Input (VB-Audio Virtual Cable). Select Cable Output (VB-Audio Virtual Cable) as the input device in programs like Discord (User Settings > Voice and Video > Input Device).
Conclusion
With these OBS Studio filters, even a budget microphone can deliver professional-quality audio. By fine-tuning these settings, you can achieve a warm, clear, and consistent sound for all your gaming communications. For microphone recommendations, check out our list of the Best USB Microphones for Streaming.


