Tired of chaotic files in your Windows 11 folders? The default single-level sorting in File Explorer can make finding specific files a nightmare. While sorting by type, date, or size is helpful, it’s often not enough. This article reveals a simple trick to add a second level of sorting, transforming your cluttered folders into organized havens.
 File Explorer
Implementing Two-Tiered Sorting
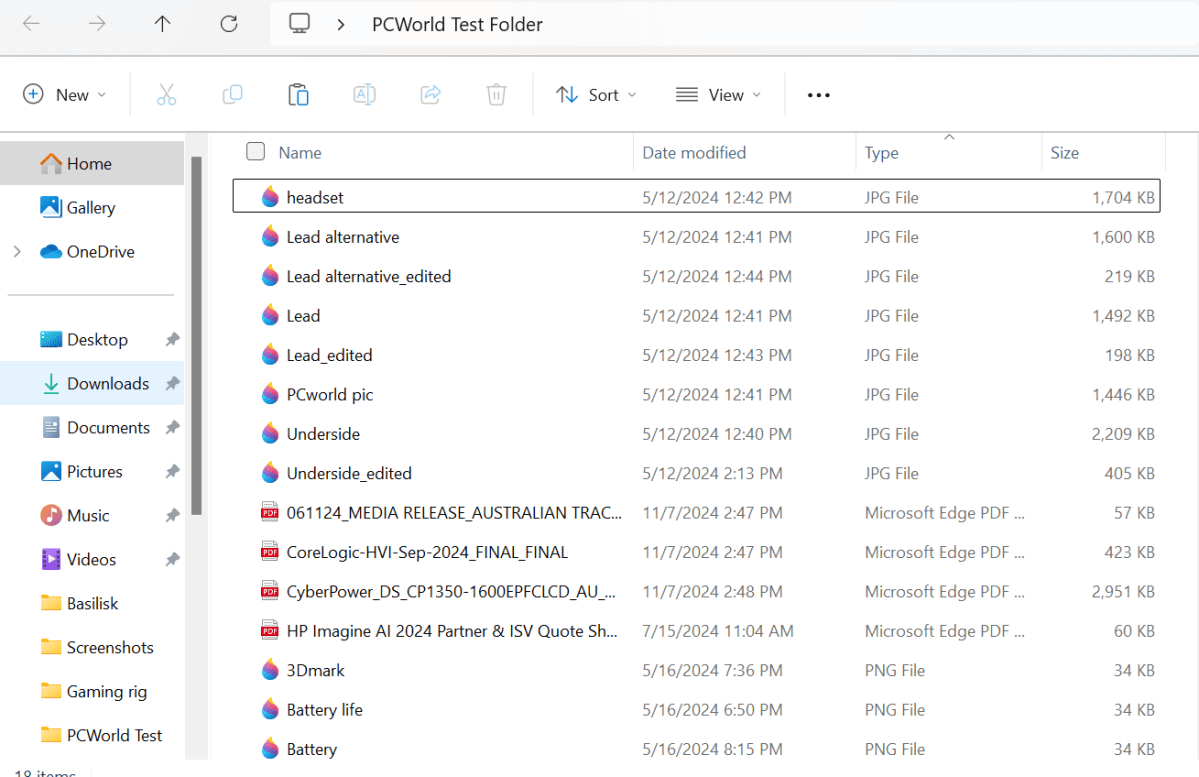
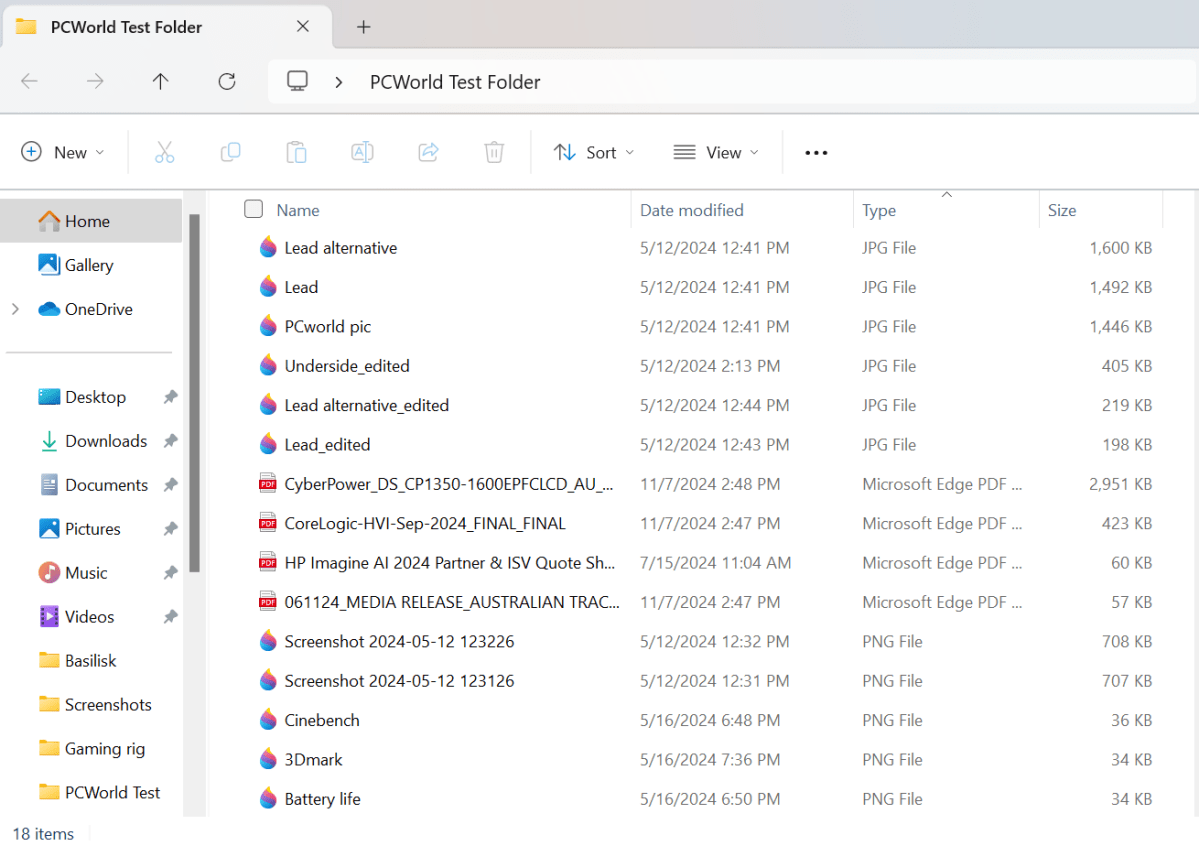
Adding a secondary sorting layer is remarkably easy. After applying your initial sort in File Explorer (e.g., by type), simply hold down the Shift key and click on the header of the second category you want to sort by (e.g., size).
To illustrate, consider a folder containing JPEGs, PNGs, and PDFs created at different times. First, click “Type” to sort by file type. Then, Shift-click “Size” to add size as the secondary sorting criterion.
 File Explorer tip
Benefits of Enhanced Sorting
This simple two-tiered approach significantly improves file organization. Files are first grouped by type, then within each type, they are ordered by size (or any other secondary criteria you choose). This makes locating specific files significantly faster and easier.
Customizing File Explorer for Advanced Sorting
The standard File Explorer categories might not always suit your specific needs. For more complex sorting scenarios, consider customizing File Explorer templates. This allows you to add personalized categories tailored to your workflow. You can either manually customize these templates following online tutorials or leverage third-party applications. WinSetView is one such application recommended by users for streamlining the customization process.
Conclusion
This simple Shift-click trick adds a powerful second level of sorting to Windows 11 File Explorer, transforming disorganized folders into easily navigable structures. For even more control, explore customizing File Explorer templates to create truly personalized sorting systems. This enhances productivity and simplifies file management.


