Video quality is paramount for effective home security. Clear, detailed footage is essential for identifying threats and protecting your property. Ring cameras offer a range of customizable video settings to optimize clarity and performance. This guide explores these key settings, explaining their function and how to configure them for optimal security.
Optimizing Video Clarity with HDR
High Dynamic Range (HDR) significantly enhances video quality by balancing contrast between light and dark areas. This reveals details that might otherwise be lost in shadows or overexposure. Imagine your camera facing a bright street: HDR ensures both the illuminated street and any darker areas are clearly visible.
Several Ring devices support HDR, including the Video Doorbell Pro 2 and Floodlight Cam Wired Pro. Check Ring’s official documentation for a comprehensive list of HDR-compatible devices. Enabling HDR can dramatically improve recordings, especially in challenging lighting conditions. However, in consistently well-lit environments, disabling HDR can conserve battery life without compromising video quality.
Enabling HDR:
- Open the Ring app.
- Select the desired device.
- Tap “Device Settings.”
- Choose “Video Settings.”
- Toggle HDR “On.”
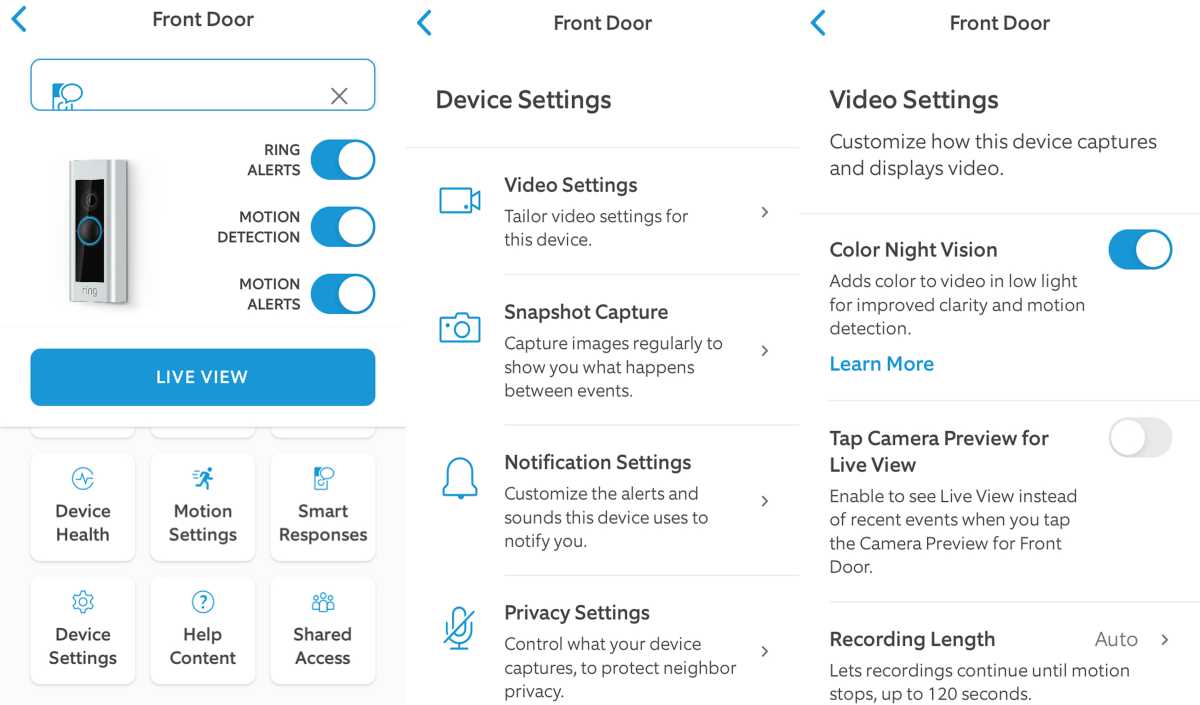 Ring Color Night VisionColor Night Vision helps identify crucial details like the color of a car or clothing. (Michael Ansaldo)
Utilizing Color Night Vision
Traditional night vision often lacks detail. Ring’s Color Night Vision captures full-color nighttime images using ambient light from streetlights, porch lights, or integrated spotlights. This enhanced clarity is crucial for identifying important details, such as vehicle colors or clothing.
Devices like the Spotlight Cam Pro and Video Doorbell Elite offer Color Night Vision. See Ring’s documentation for a complete list. While some external lighting is required, the detail improvement over standard night vision is significant.
Enabling Color Night Vision:
- Open the Ring app.
- Select your Ring camera.
- Tap “Device Settings.”
- Go to “Video Settings.”
- Toggle “Color Night Vision” “On.”
Understanding Standard Night Vision
While Color Night Vision offers enhanced detail, standard night vision remains a reliable option, using infrared light for black-and-white visibility even in complete darkness. Its key advantage is consistency, functioning effectively regardless of external lighting. It’s also less power-intensive, ideal for battery-powered devices.
Standard night vision is available on most Ring cameras, including older and budget-friendly models like the Stick Up Cam and Indoor Cam.
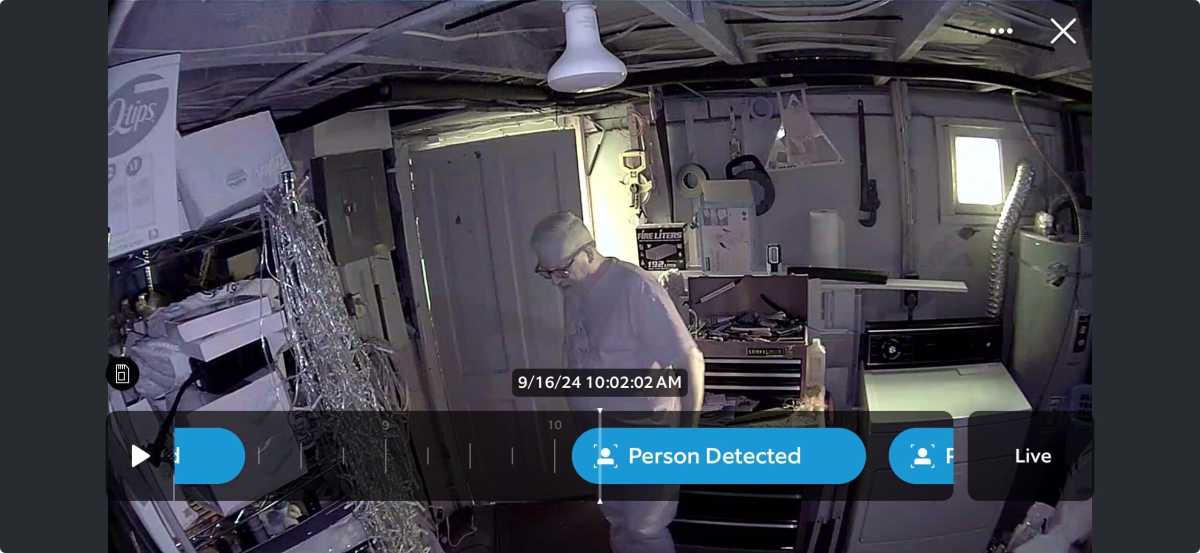 Ring night vision on Ring Pan Tilt Indoor Camera (Michael Brown)
Enabling Standard Night Vision:
Standard night vision is the default setting. On devices supporting Color Night Vision, disable Color Night Vision to revert to standard mode.
Instant Access with Live View
Rapid response is crucial in security situations. Ring’s Tap Camera Preview for Live View provides instant access to a live feed with a single tap. This is especially useful when responding to motion alerts.
Most newer Ring models feature this functionality, ensuring quick access to real-time monitoring.
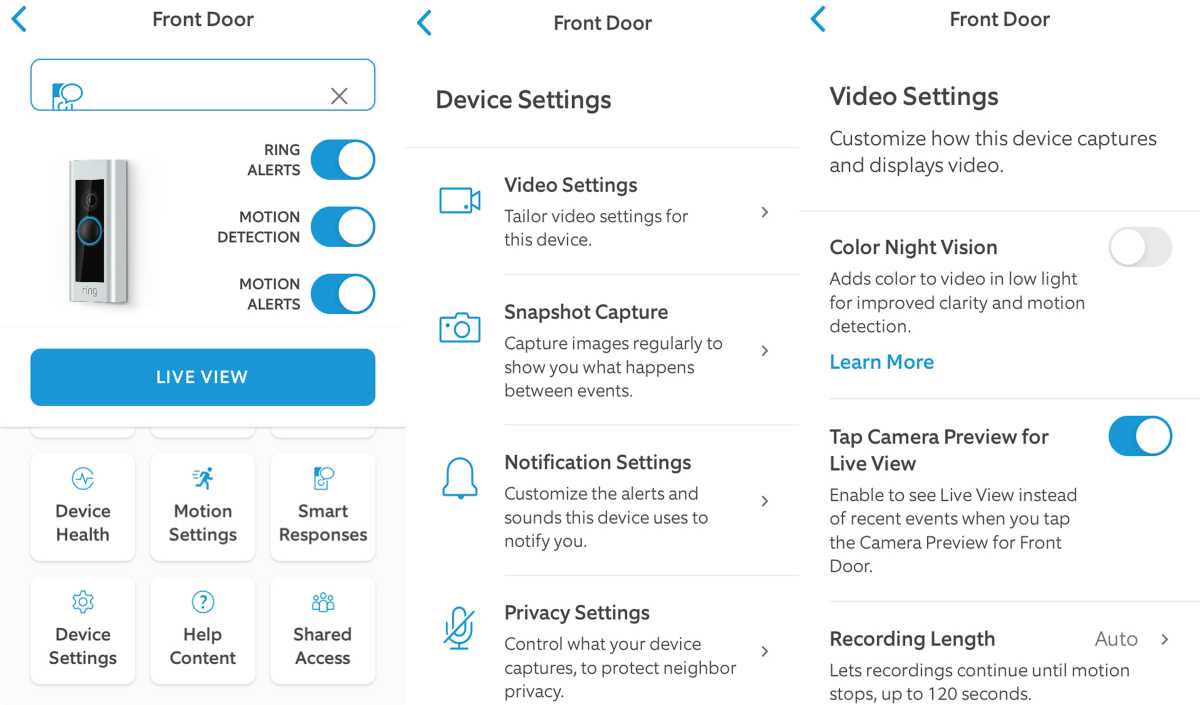 Ring Camera PreviewTap Camera Preview for Live View provides instant access to your camera’s live feed. (Michael Ansaldo)
Enabling Tap Camera Preview:
- Open the Ring app.
- Select your Ring camera.
- Tap “Device Settings.”
- Go to “Video Settings.”
- Toggle “Tap Camera Preview for Live View” “On.”
Capturing Crucial Moments with Pre-Roll
Traditional motion-activated recording often misses the moments leading up to an event. Pre-Roll captures a few seconds before motion is detected, providing valuable context. This helps understand the full sequence of events, from a delivery person approaching to an unexpected visitor.
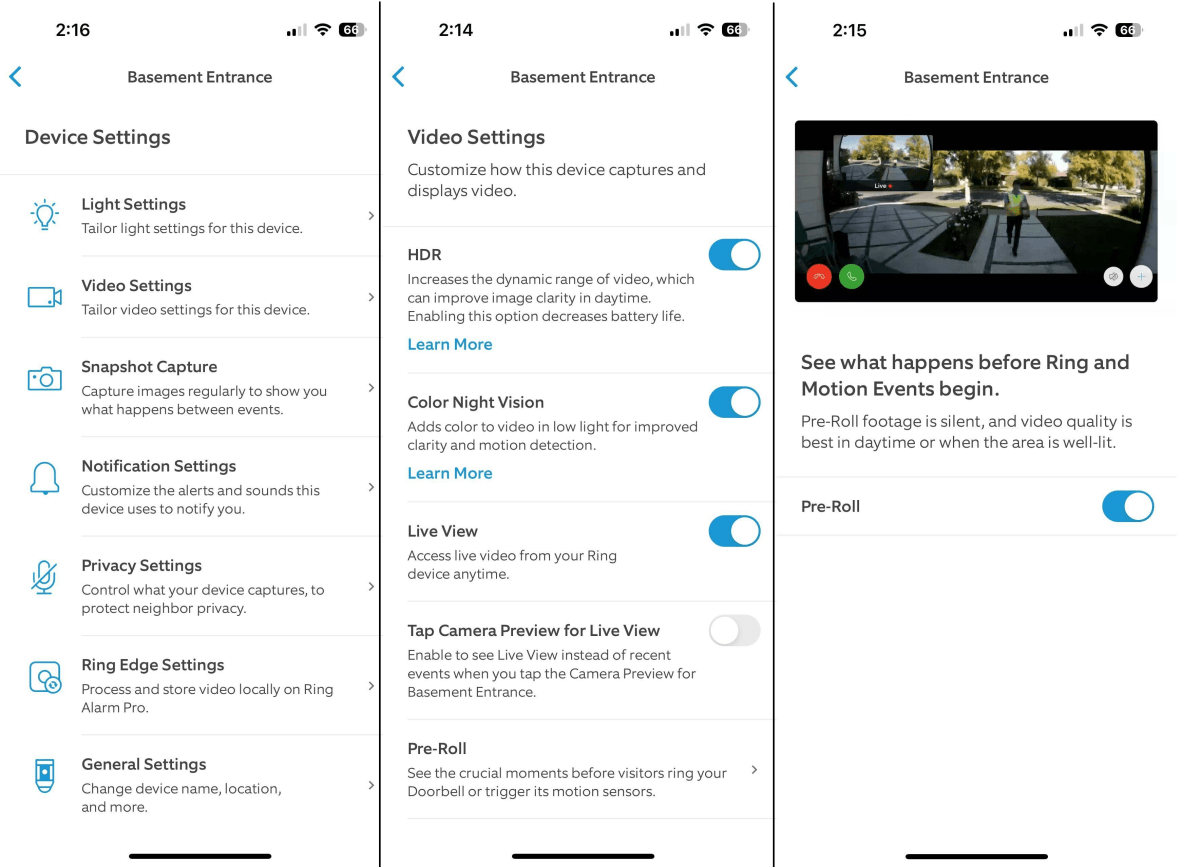 Ring security camera pre-roll features (Michael Brown)
Ring offers two types of Pre-Roll: standard and Advanced. Standard Pre-Roll captures four seconds of low-resolution, black-and-white, silent footage and doesn’t work in low light. Advanced Pre-Roll captures six seconds of high-resolution, full-color footage in all lighting conditions. Consult Ring’s documentation for device compatibility.
Enabling Pre-Roll:
- Open the Ring app.
- Select a Pre-Roll compatible device.
- Tap “Device Settings.”
- Go to “Video Settings.”
- Toggle “Pre-Roll” “On.”
Utilizing Picture-in-Picture Mode
Some Ring cameras offer picture-in-picture mode, displaying Pre-Roll or Bird’s Eye View (if supported) in a smaller, repositionable window overlaid on the main feed. Tapping the smaller window swaps the two video streams.
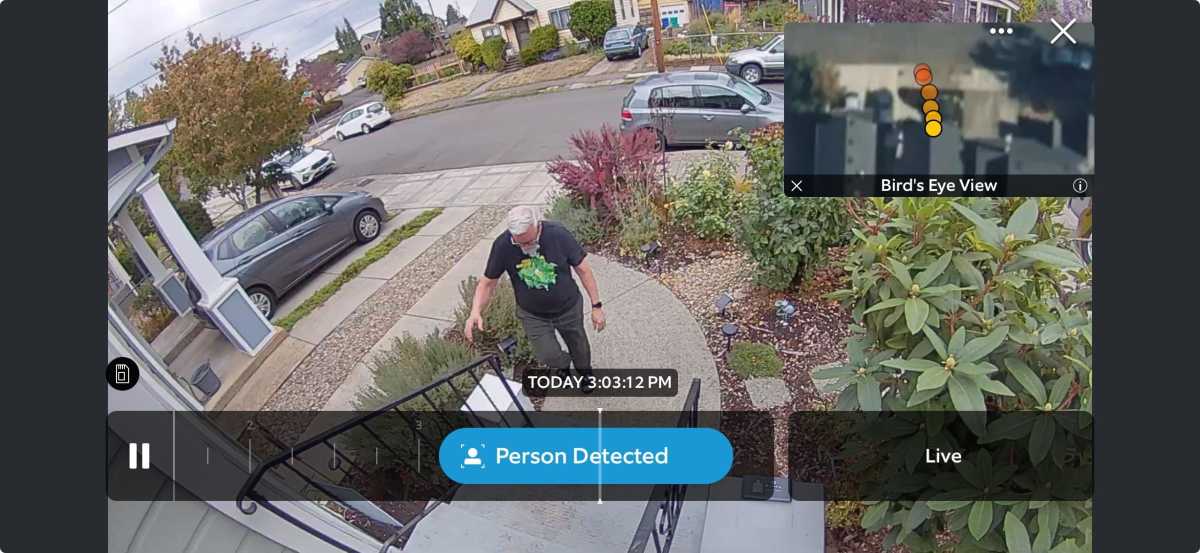 Ring picture-in-picture mode (Michael Brown)
Enabling Picture-in-Picture:
- Open the Ring app.
- Select a compatible device.
- Tap “Device Settings.”
- Tap “Video Settings.”
- Tap “Picture in Picture.”
- Toggle on and select either Bird’s Eye View or Pre-roll.
Customizing Recording Length
A Ring Protect subscription allows customizing recording length per motion event. This determines how long recording continues after motion detection, essential for capturing complete events.
Adjusting recording length is important for battery-powered devices. Longer recordings provide more context but consume more power. Wired devices are less affected by recording length due to continuous power.
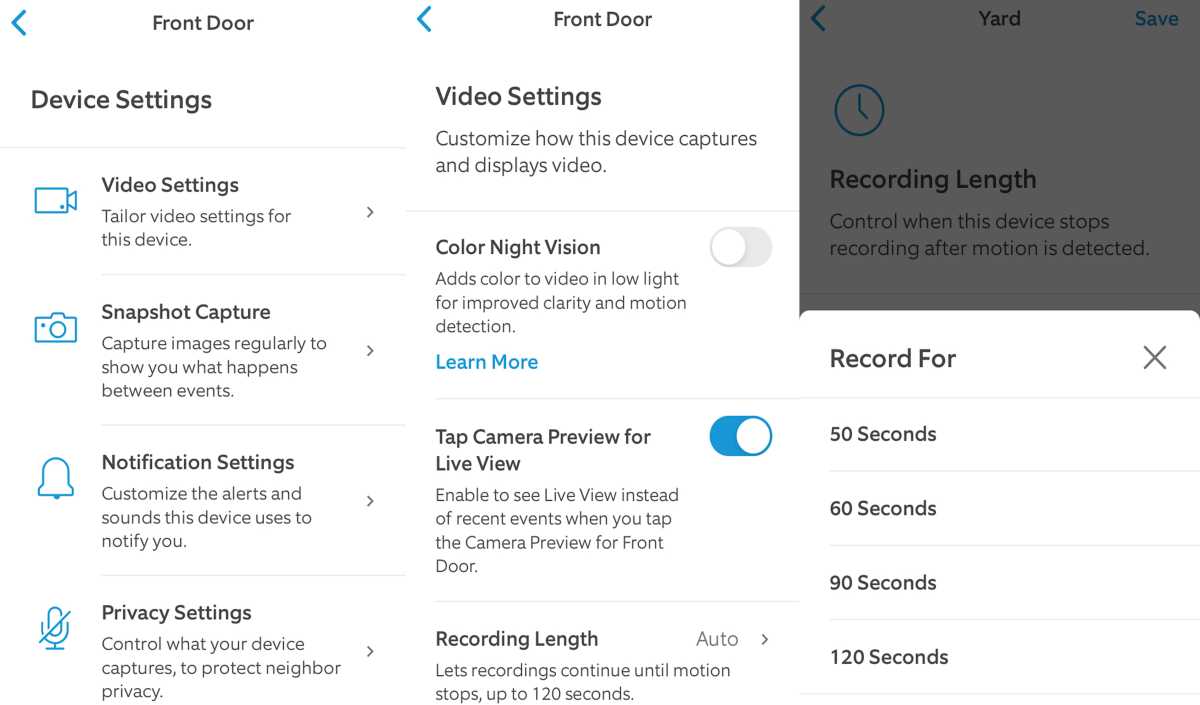 Ring App Recording LengthCustomize recording length to capture complete events. (Michael Ansaldo)
Consider the activity level in the monitored area. High-traffic areas might require shorter clips, while quieter zones may benefit from longer recordings. Also, consider storage capacity when adjusting recording length.
Adjusting Recording Length:
- Open the Ring app.
- Select the desired camera.
- Tap “Device Settings.”
- Choose “Video Settings.”
- Choose “Recording Length” and select the desired duration.
Conclusion
Ring’s video settings offer extensive customization for optimizing home security. By understanding and configuring these features, you can maximize your system’s effectiveness and ensure your home is well-protected. Experiment with these settings to find the optimal configuration for your specific needs.


