Open-source software thrives on both Linux and Windows. However, for proprietary programs, the Windows Subsystem for Linux (WSL) bridges the gap, allowing seamless execution of Linux applications directly within Windows. While WSL programs might run slightly slower than native Linux counterparts, Microsoft’s continuous improvements, especially through kernel updates, minimize this difference. Upgrading your WSL kernel can significantly boost performance, and this guide will show you how.
WSL2 Architecture and the Role of the Kernel
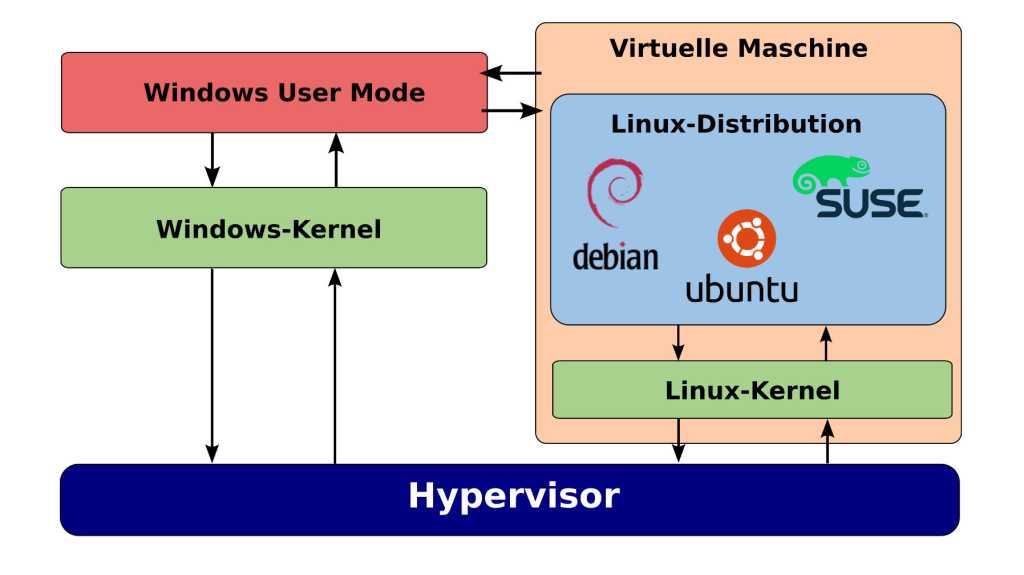
WSL2 leverages a hypervisor (Hyper-V), akin to Linux’s KVM/Qemu, to run the Linux kernel. This architecture facilitates communication between the Windows host and the Linux guest, managing resources like memory and CPU. Microsoft primarily develops the code responsible for this interaction. For Linux users, newer kernels typically bring enhanced hardware support and performance optimizations. While Microsoft regularly optimizes the Hyper-V component within the kernel, hardware drivers play a lesser role in WSL since the virtual hardware remains consistent. However, specific drivers, such as those for network block devices (nbd) used to mount virtual hard disks (VHD), are still crucial for certain applications.
Installing WSL and Verifying the Version
The Windows Terminal provides a unified interface for PowerShell, Command Prompt, and WSL. It’s included by default in Windows 11, while Windows 10 users can install it from the Microsoft Store.
To install WSL with Ubuntu 24.04 using PowerShell, execute:
wsl --install -d Ubuntu-24.04To view available distributions, use:
wsl --list --onlineRestart Windows after this step. Upon your next login, a Linux terminal will launch, prompting you for a Linux username and password. Update your Ubuntu system using:
sudo apt update && sudo apt upgradeAccess the Linux distribution from the Windows Terminal dropdown. Check your WSL version in PowerShell with:
wsl -l -vIf the Version column displays “1,” upgrade to WSL2 using:
wsl --set-default-version 2
wsl --set-default [Distribution]
Replace [Distribution] with the name of your distribution (e.g., Ubuntu-24.04).
Building a Custom Kernel for WSL2
Step 1: Install Prerequisites
Launch your Linux distribution in WSL and install necessary packages:
sudo apt install build-essential flex bison dwarves libssl-dev libelf-dev libncurses-dev gitStep 2: Download the Kernel Source
Create a working directory and clone the kernel source:
mkdir kernel
cd kernel
git clone --depth=1 -b linux-msft-wsl-6.6.y https://github.com/microsoft/WSL2-Linux-Kernel.git
cd WSL2-Linux-Kernel
Adjust the branch name (e.g., linux-msft-wsl-6.7.y) if a newer version is available.
Step 3: Configure the Kernel
Customize the kernel name:
scripts/config --file Microsoft/config-wsl --set-str LOCALVERSION "-custom-microsoft-standard-WSL2"For further customization, use the configuration editor:
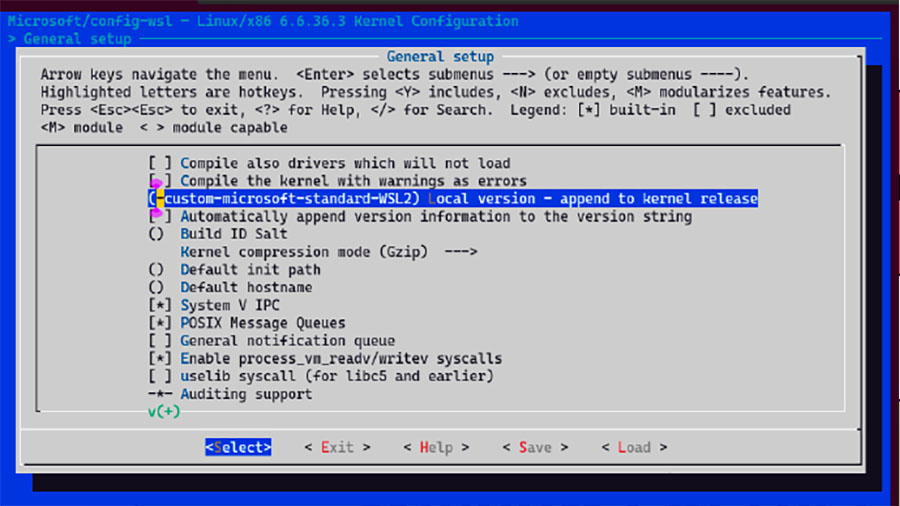
make menuconfig KCONFIG_CONFIG=Microsoft/config-wsl Configuring the WSL kernel: The kernel configuration can be edited via “menuconfig”. The entry for “Local version” helps to differentiate between kernel versions.
Step 4: Compile and Install
Compile the kernel:
echo 'yes' | make -j $(nproc) KCONFIG_CONFIG=Microsoft/config-wslInstall the modules:
sudo make KCONFIG_CONFIG=Microsoft/config-wsl modules_installStep 5: Copy the Kernel
Navigate to your Linux distribution’s file system within Windows Explorer (usually under \wsl$<distribution name>). Copy the vmlinux file from your Linux home directory to your Windows user profile’s WSL folder (C:Users[username]WSL).
Step 6: Configure WSL to Use the Custom Kernel
Create a .wslconfig file in your Windows user profile directory and add the following:
[wsl2]
kernel=C:Users[username]WSLvmlinux
Replace [username] with your Windows username.
Shutdown all WSL instances:
wsl --shutdownRelaunch your Linux distribution. Verify the new kernel is active using:
uname -aThis custom kernel can now enhance your WSL2 experience. Remember to rebuild and reinstall your kernel whenever you update your WSL distribution to ensure compatibility and leverage the latest optimizations.


