Managing contacts efficiently is crucial, and many rely on Google Contacts for accessibility across devices. While Google Contacts syncs seamlessly with Android, transferring them to Microsoft Excel requires a manual export and import process. This guide provides a streamlined approach to export your Google Contacts and effectively import them into Excel.
Exporting Your Contacts from Google
Begin by logging into your Google account and navigating to the Contacts page. Hovering your mouse over individual contacts reveals a checkbox for selection. Select the contacts you wish to export to Excel. If you need all contacts, you can skip this step as Google will export the entire list by default.
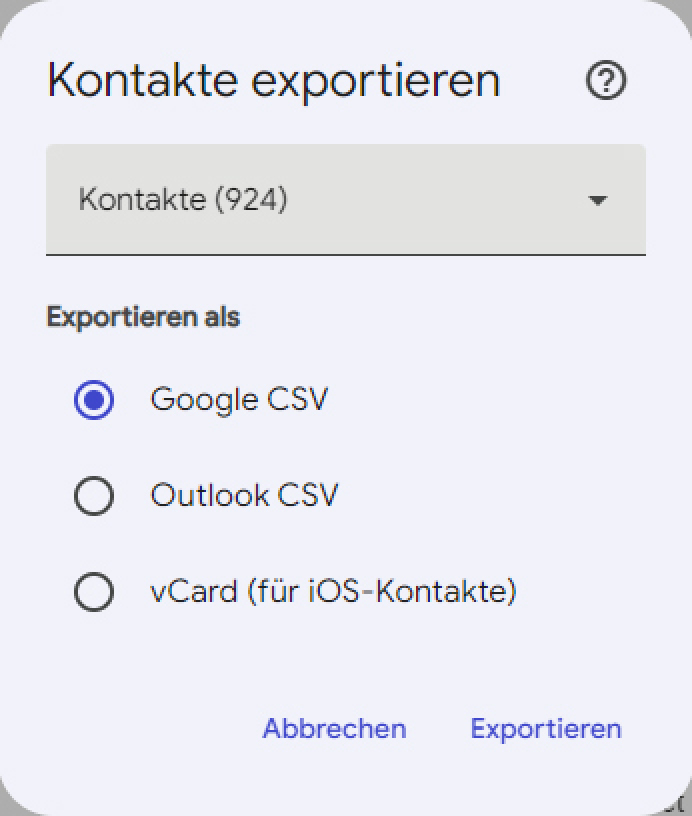
Locate the “Export” icon, the second from the right at the top of the list, resembling a small container with an upward arrow. Clicking this icon opens a dialogue box presenting three export format options: Google CSV, Outlook CSV, and vCard.
Retain the default “Google CSV” selection and click “Export.” Your browser will download a file named “contacts.csv” to your designated download folder.
 Exporting Google ContactsGoogle offers three formats for exporting saved contacts.
While double-clicking the “contacts.csv” file opens it directly in Excel, this method requires manual data allocation within the spreadsheet. A more efficient method exists for importing your contacts into Excel.
Importing Contacts into Excel
Open a new Excel workbook and go to the “Data” tab. On the far left, within the “Get & Transform Data” section, select “From Text/CSV.”
Navigate to the downloaded “contacts.csv” file, typically located in the “C:Users[username]Downloads” folder. Double-click the file.
Excel will display a preview of the contact data. Click “Load” to import the data into your Excel workbook. Remove unnecessary columns by right-clicking on the corresponding column letter at the top and selecting “Delete.”
The column headers will appear in English, reflecting Google’s internal data storage format. Edit the column titles by clicking on them and modifying the text in the formula bar. Finally, save the Excel file in XLSX format by going to “File > Save As.”
Conclusion
Exporting and importing Google Contacts to Excel offers a practical solution for utilizing your contacts within Microsoft Office applications. By following this step-by-step guide, you can efficiently transfer and manage your contact information between these platforms, ensuring data accessibility and organization.


