After updating to Windows 11 24H2, some users are encountering network connectivity problems, seemingly due to issues with the Dynamic Host Control Protocol (DHCP). DHCP automatically assigns IP addresses to devices on a network, but this process can malfunction after the 24H2 update. This guide provides several troubleshooting tips to restore your internet connection. If these solutions don’t work, consider reverting to a previous Windows version.
Renew Your IP Address
One of the quickest fixes to try is renewing your IP address. While the chances of success are low, it’s a simple procedure worth attempting.
- Open an administrator command prompt. Right-click the Start menu and select “Terminal (Admin)”.
- Enter the following commands:
ipconfig /release
ipconfig /renew
This releases your current IP address and requests a new one from the DHCP server.
 Renewing IP Address in Windows 11
Configure Static DNS Servers
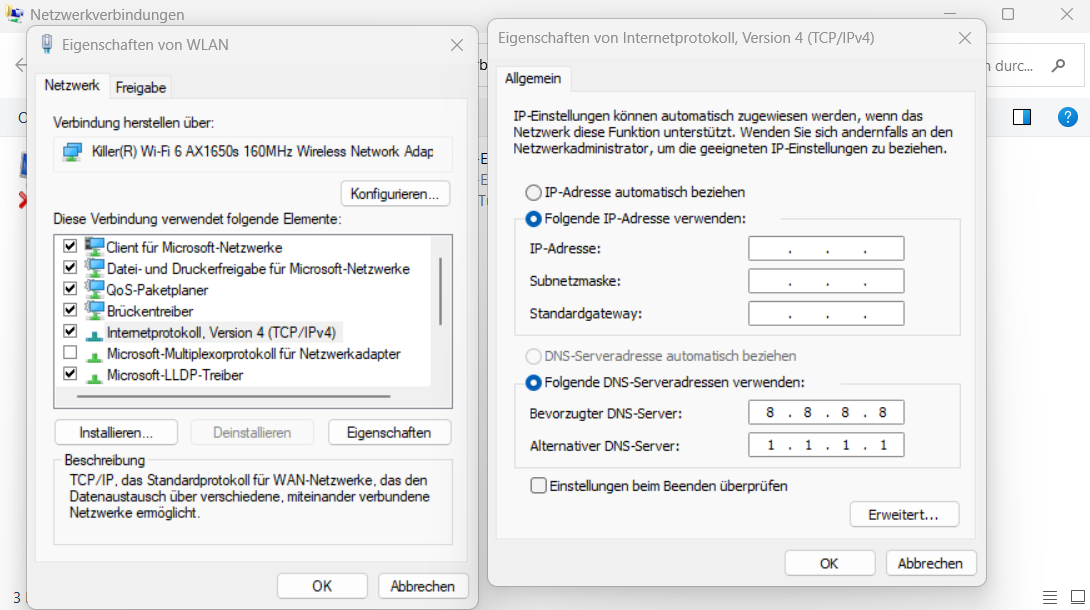
If renewing your IP doesn’t work, manually setting DNS servers might resolve the issue.
- Open the Start menu and search for “View network connections”.
- Right-click your network connection and select “Properties”.
- Double-click “Internet Protocol Version 4 (TCP/IPv4)”.
- Select “Use the following DNS server addresses”.
- Enter
8.8.8.8(Google Public DNS) as the Preferred DNS server and1.1.1.1(Cloudflare DNS) as the Alternate DNS server. - Click “OK” and test your internet connection. Restart your computer if the issue persists.
Set a Static IP Address
If static DNS doesn’t solve the problem, try assigning a static IP address.
- Access the same “Internet Protocol Version 4 (TCP/IPv4)” properties window as in the previous step.
- Select “Use the following IP address”.
- Enter a unique IP address within your network’s subnet range, the subnet mask, and the default gateway address. You can find this information using the
ipconfigcommand in Terminal or by checking the network settings of other devices on your network.
Reset Network Settings
A more drastic approach is resetting your network settings. This can often resolve complex network issues.
- Open Settings (Windows key + I).
- Go to “Network & internet” > “Advanced network settings”.
- Scroll down and click “Network reset”.
- Follow the on-screen instructions. Windows will reinstall network adapters and reset network components.
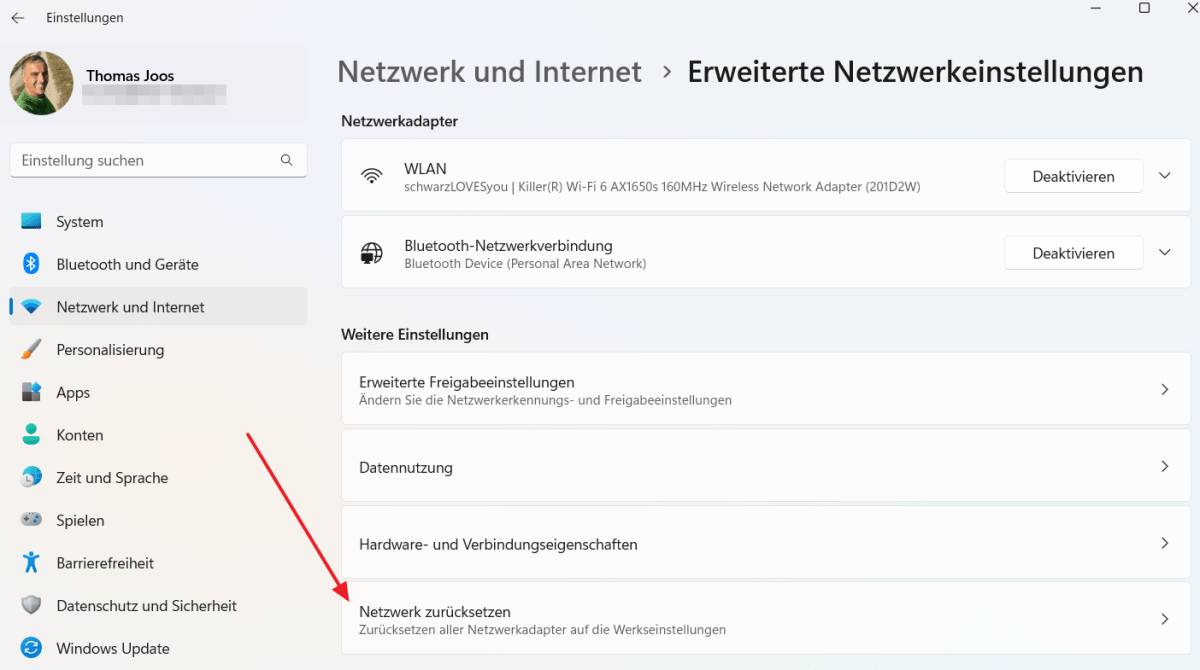 Resetting Network Settings in Windows 11
Reinstall Network Adapter Driver
A corrupted or outdated network adapter driver could also be the culprit.
- Open the Start menu and search for “devmgmt.msc” (Device Manager).
- Expand “Network adapters”.
- Right-click your network adapter and select “Update driver”.
- Choose “Browse my computer for drivers”.
- Select “Let me pick from a list of available drivers on my computer”.
- Choose a different driver from the list and click “Next” to install it. Consider trying older drivers if the latest one doesn’t work.
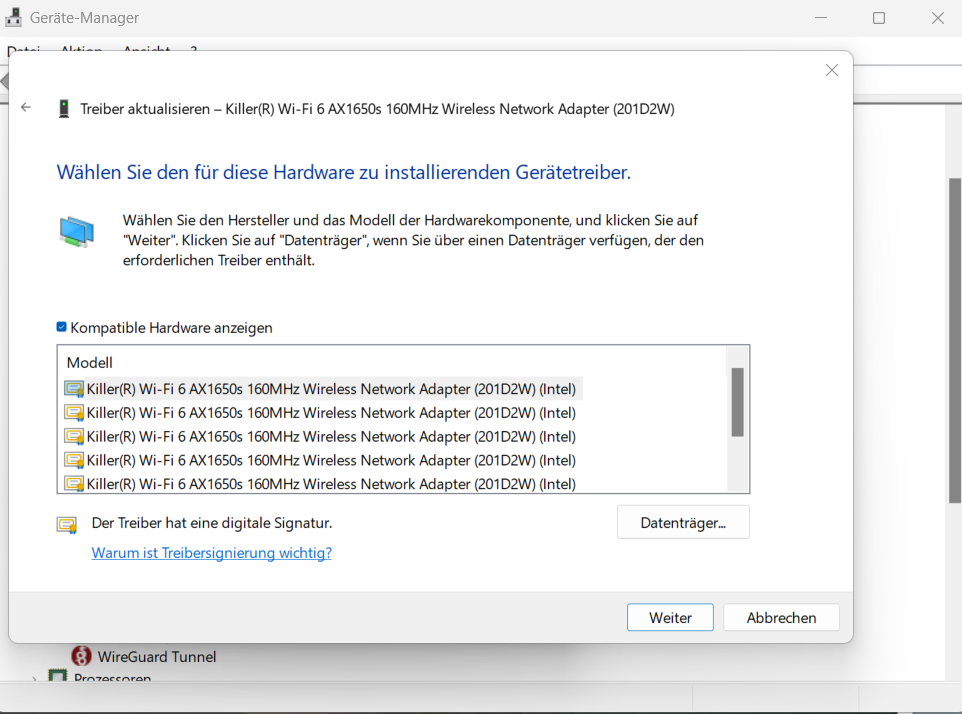 Updating Network Adapter Driver in Windows 11
If none of these solutions work, you may need to consider more advanced troubleshooting or reverting to a previous Windows version.


