Selling or disposing of an old computer, hard drive, or SSD? Simply deleting files isn’t enough. Hidden data remnants can expose your browsing history, financial information, emails, and even saved passwords. This guide provides comprehensive steps to securely erase your data from various storage devices.
Erasing Data on Solid State Drives (SSDs)
SSDs handle data deletion differently than traditional hard drives. While data recovery is difficult on SSDs due to the TRIM function, following these steps ensures complete data sanitization.
Deleting Data Partitions on an SSD
First, delete any existing data partitions (D:, E:, F:, etc.). Use Windows Disk Management:
- Right-click the Start icon and select “Disk Management.”
- Right-click the target partition and select “Format.”
- Uncheck “Perform quick format” to ensure data is overwritten.
- Click “OK.”
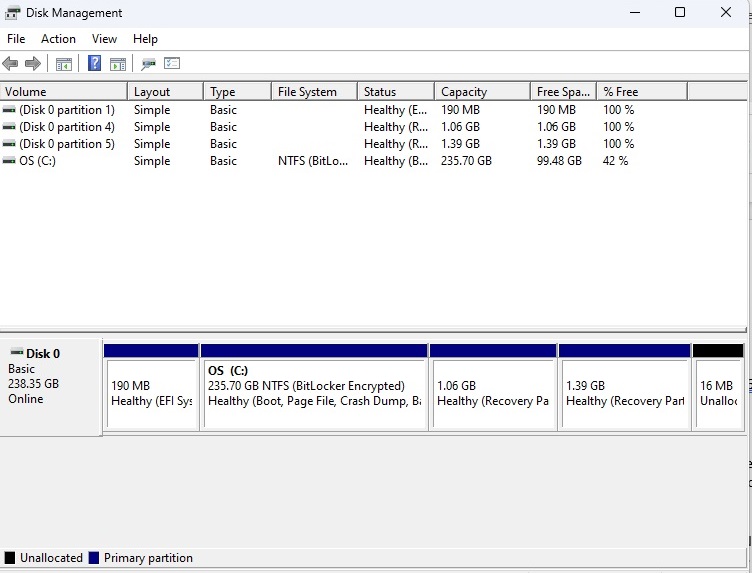 Windows Disk Management
Deleting the System Partition (C: Drive)
Deleting the system partition requires a bootable Windows installation medium (USB or DVD):
- Create a bootable USB drive using the Media Creation Tool from Microsoft’s website (at least 8GB capacity required).
- Boot your computer from the USB drive.
- Follow the on-screen prompts until you reach the installation type screen.
- Choose “Custom: Install Windows only (advanced).”
- Select the system partition (usually C:) and click “Delete.”
- You can now cancel the installation process. The SSD will be wiped.
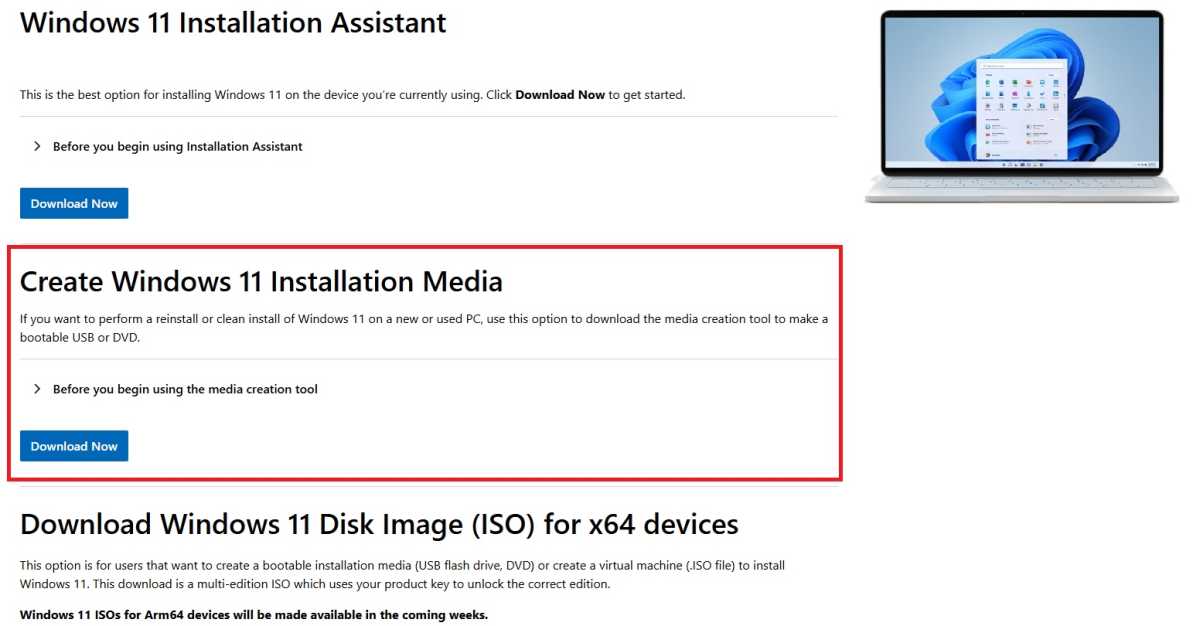 Media Creation Tool
Physically Destroying an SSD
For absolute data security, physically destroying the SSD is an option. Drilling a hole through the drive or hammering a nail through it renders the data unrecoverable. Exercise caution to avoid injury.
Permanently Erasing Data from Hard Disk Drives (HDDs)
HDDs require different methods for secure erasure as they don’t have the TRIM function. Data can be recovered even after formatting unless overwritten.
Erasing Data Partitions on an HDD
Use a secure erase tool like Ascomp Secure Eraser:
- Select “Securely erase hard drive/partition.”
- Choose the target drive.
- Select an overwrite method (Low or Normal is sufficient).
- Click “Start deletion.”
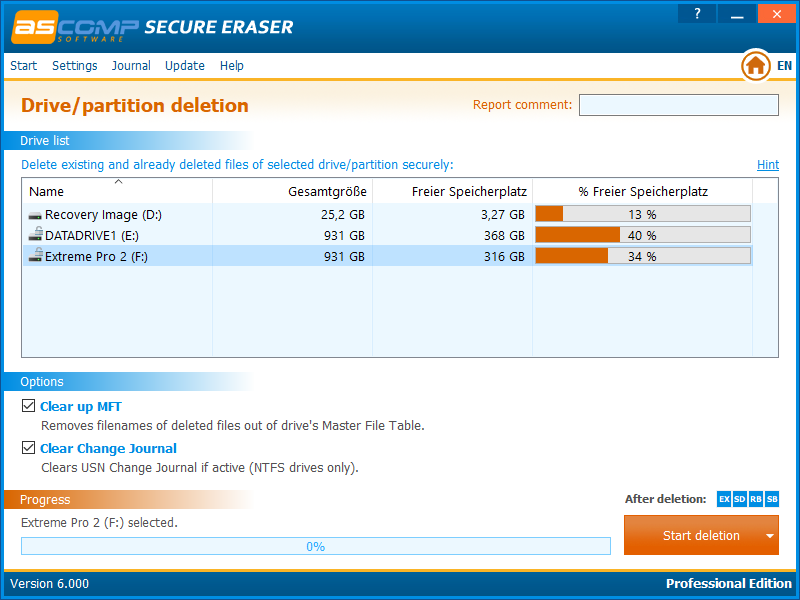 Ascomp Secure Eraser
Erasing the System Partition on an HDD
Use a bootable tool like Darik’s Boot and Nuke (DBAN):
- Download the DBAN ISO file.
- Create a bootable USB drive using Rufus and the DBAN ISO.
- Boot from the USB drive.
- Use the
autonukecommand to automatically erase all data.
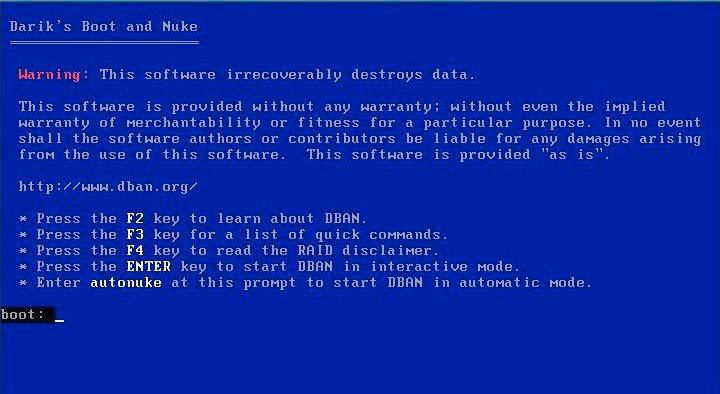 Darik's Boot and Nuke
Securely Erasing USB Drives
USB drives also lack the TRIM command and require overwriting for secure erasure. Use a tool like Disk Wipe:
- Select the USB drive.
- Choose the desired file system (usually NTFS).
- Select an overwrite method (One Pass Zeros or One Pass Random is sufficient).
- Type “erase all” in the confirmation field and click “Finish.”
Erasing Data on NAS Devices
Consult your NAS manufacturer’s documentation for secure erase procedures. Synology and Qnap devices offer built-in secure erase functions within their operating systems. Alternatively, you can remove the drives from the NAS, connect them to a PC, and use the methods described above for HDDs or SSDs.
Conclusion
Securely erasing data is crucial before selling or disposing of storage devices. Choose the appropriate method based on your device type and security needs to protect your sensitive information.


