Maintaining updated graphics drivers is essential for optimal performance and stability, regardless of whether you have a cutting-edge or older Nvidia graphics card. This comprehensive guide details how to update and uninstall Nvidia Game Ready drivers efficiently, transforming a potentially cumbersome task into a quick and easy process.
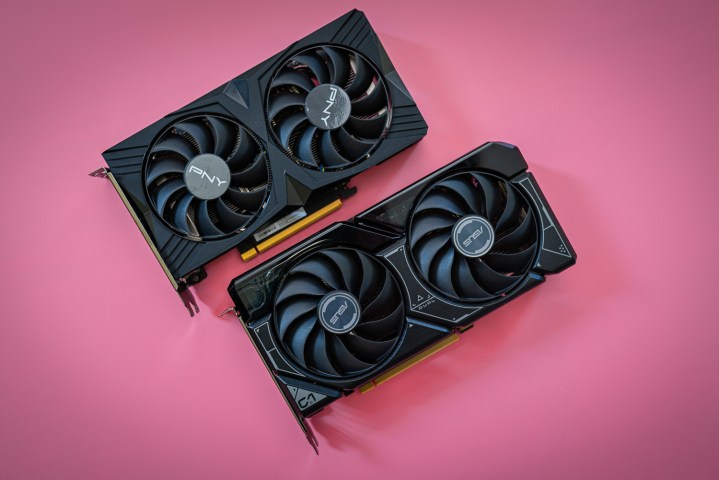 Two RTX 4060 graphics cards side by side.
Updating Drivers with GeForce Experience
Nvidia GeForce Experience simplifies driver updates, game optimization, and gameplay recording. Note that driver rollback isn’t supported through this method.
Step 1: Installation
Download and install Nvidia GeForce Experience from the official Nvidia website. Create an account and launch the tool, which should automatically detect your GPU.
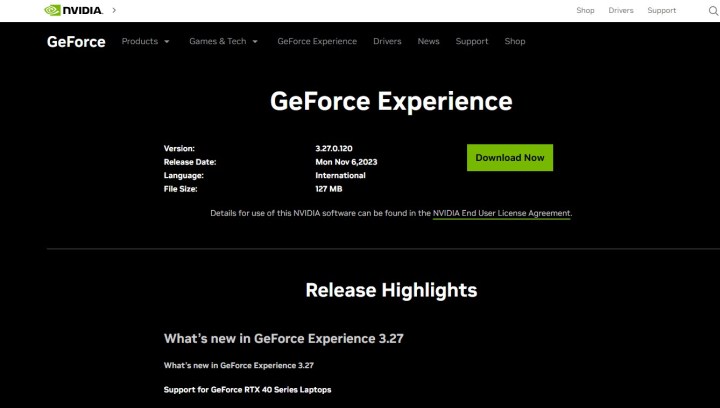 Nvidia GeForce Experience website screenshot.
Step 2: Checking for Updates
Navigate to the “Drivers” tab. Click “Check for updates” to find compatible drivers. Ensure “Game Ready Driver” is selected (recommended for non-professional users) and click “Download.”
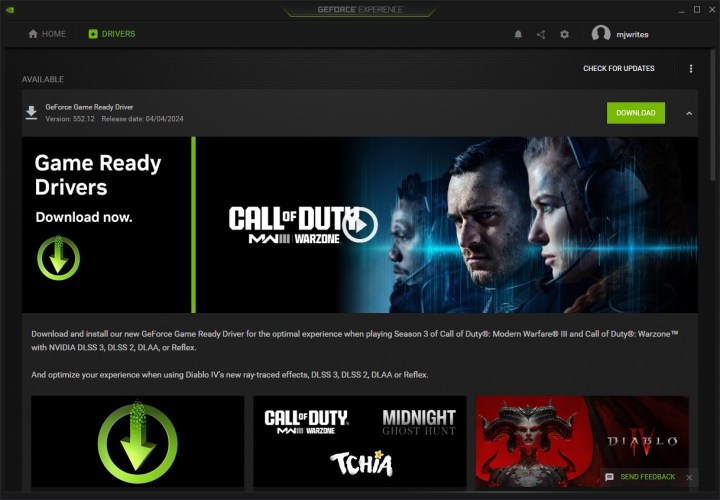 Nvidia GeForce Experience driver update screen.
Step 3: Installation Options
Choose between “Express Installation” (recommended) or “Custom Installation” for more granular control. “Custom Installation” allows selecting specific components and performing a clean installation (removing existing profiles and settings). Temporary screen flickering during installation is normal.
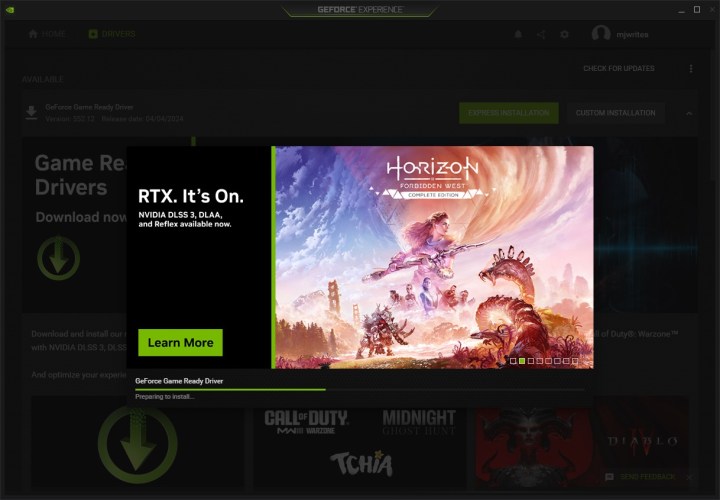 GeForce Experience driver installation options.
Manual Driver Update
For those preferring a manual approach, this method requires knowing your specific GPU model.
Step 1: Accessing Nvidia’s Website
Visit the official Nvidia driver download page.
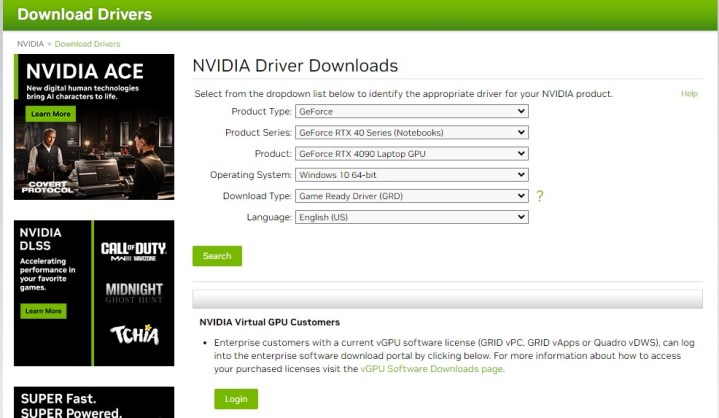 Nvidia Driver Download website screenshot.
Step 2: Selecting Driver Details
Choose the appropriate options from the dropdown menus:
- Product Type: GeForce
- Product Series: Your GPU generation and system type (desktop/laptop)
- Product: Your specific GPU model
- Operating System: Your Windows version
- Download Type: Game Ready Driver (GRD)
Step 3: Installing the Driver
Download the driver file and run the installer. Choose the installation location and select between “Express Installation” (recommended) or “Custom Installation.” “Custom Installation” offers component selection and clean installation options. Screen flickering during installation is normal.
Uninstalling Drivers: Add or Remove Programs
This method removes both the driver and associated software.
Step 1: Accessing Add or Remove Programs
Search for “Add or remove programs” in the Windows search bar or navigate through Settings > Apps > Installed apps.
Step 2: Locating the Driver
Search for “Nvidia” within the “Add or remove programs” section.
Step 3: Uninstalling
Find “Nvidia Graphics Driver,” click the three horizontal dots, and select “Uninstall.” Follow the prompts and reboot your PC. A clean driver install is recommended afterwards to restore full functionality.
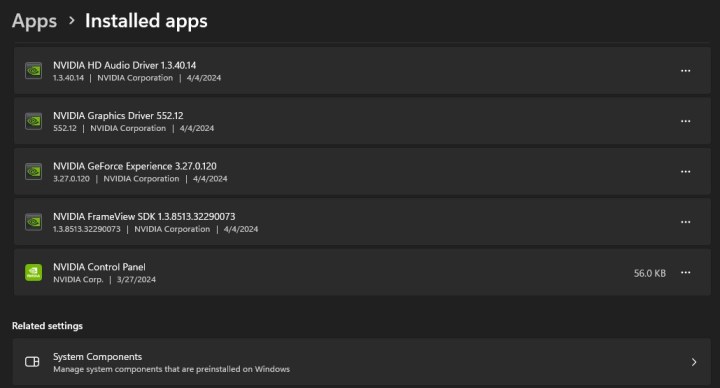 Add or remove programs utility in Windows.
Uninstalling Drivers: Device Manager
Device Manager offers a simple uninstallation method, although potentially less thorough.
Step 1: Opening Device Manager
Right-click the Start button and select “Device Manager,” or search for it in the Windows search bar.
Step 2: Finding Your GPU
Expand “Display adapters,” right-click your Nvidia GPU, and select “Properties.”
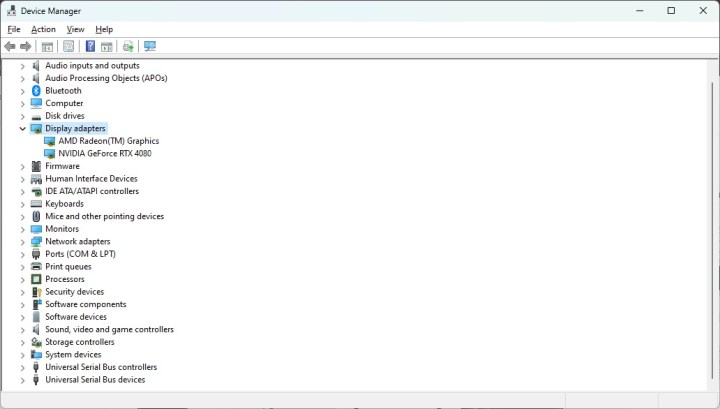 Device Manager in Windows 11.
Step 3: Uninstalling
Click “Uninstall Device.” Check the box to delete driver software and confirm. Reboot your PC. Reinstalling the driver afterwards is essential for proper functionality.
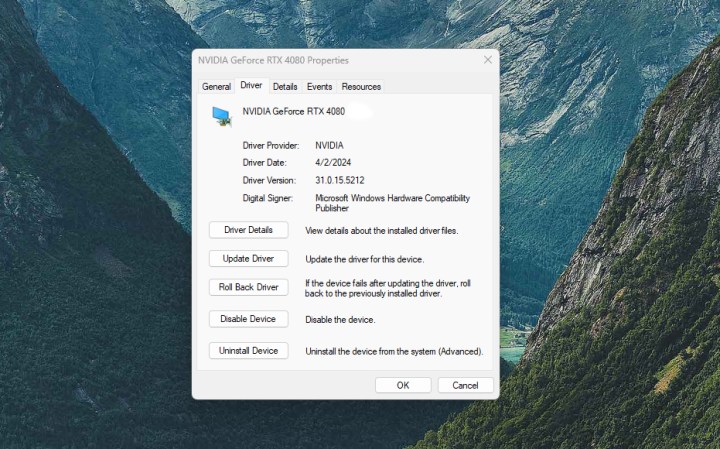 Uninstalling GPU drivers in Windows.
Uninstalling Drivers: Display Driver Uninstaller (DDU)
Display Driver Uninstaller (DDU) thoroughly removes all driver traces, particularly useful when switching GPU vendors.
Step 1: Downloading DDU
Download Display Driver Uninstaller from the official website and extract the files.
Step 2: Booting into Safe Mode
Boot your PC into Safe Mode (recommended).
Step 3: Running DDU
Run the DDU application from the extracted folder. No configuration changes are typically necessary.
Step 4: Selecting Your GPU Vendor
Choose “Nvidia” from the dropdown menu.
Step 5: Cleaning and Restarting
Select “Clean and restart.” DDU will uninstall the driver, and your PC will restart. Reinstall the Nvidia driver afterwards.
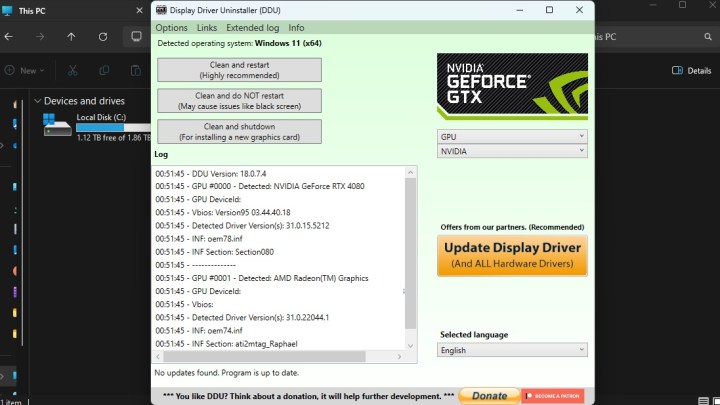 Display Driver Uninstaller main screen.


