Even with the rapid advancements in Wi-Fi technology, including the upcoming Wi-Fi 7, a wired Ethernet connection still reigns supreme in terms of speed and reliability. Ethernet cables offer a consistent, high-bandwidth connection, largely immune to the interference that can plague wireless networks. And their usefulness extends beyond PCs, laptops, and NAS drives; they can significantly enhance your wireless devices, too. For example, using Ethernet backhaul with a compatible mesh Wi-Fi system allows for greater distances between nodes, improving overall coverage.
While simply laying pre-made Ethernet cables across your floors might seem like a quick solution, it creates an unsightly trip hazard. A much cleaner and safer approach is to run solid-core Ethernet cable from a reel and connect it to wall-mounted faceplates. These faceplates, like the cable itself, are categorized by performance levels (Cat5e, Cat6, etc.). Opting for at least Cat6 is recommended for future-proofing your network.
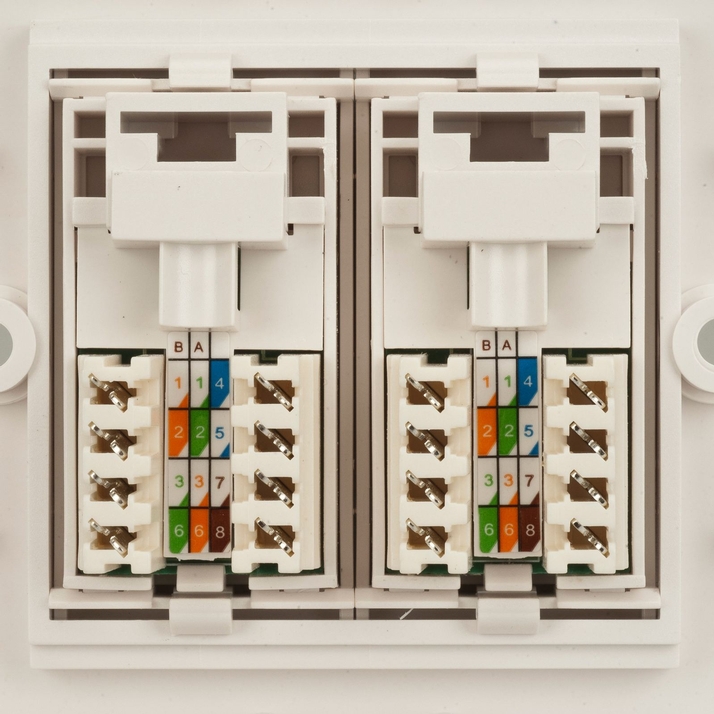 Installing an Ethernet wall socket
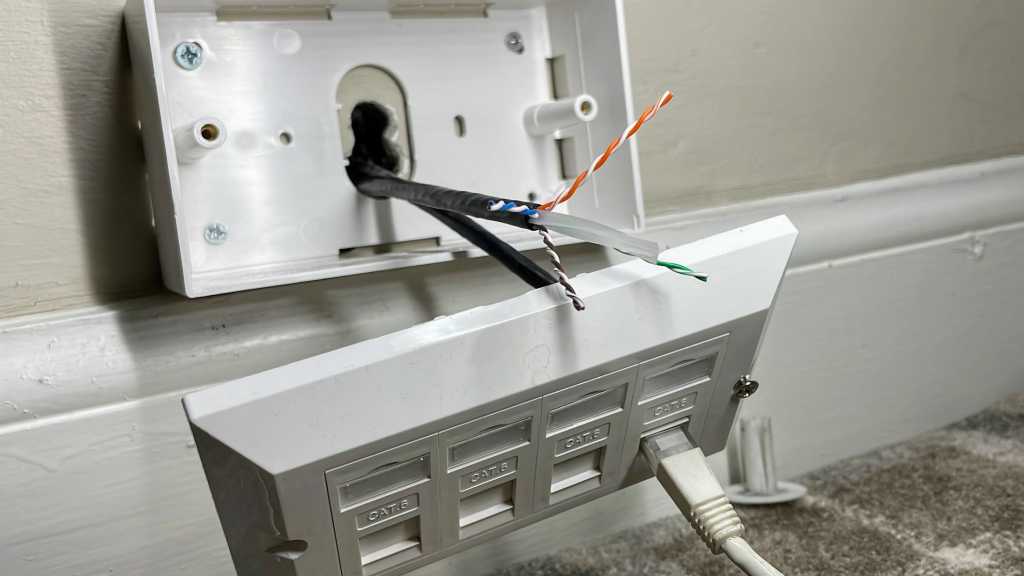
You’ll also need a pattress box to secure the faceplate to the wall. These boxes, identical to those used for electrical sockets, are available in various depths for either flush or surface mounting, depending on your wall’s structure. The image above illustrates a four-port Cat6 faceplate mounted on a surface-mount, two-gang pattress box.
Understanding Wiring Standards: T568A and T568B
Wiring an RJ45 wall socket might seem confusing due to the two existing wiring standards: T568A and T568B. Your Ethernet connector likely displays diagrams for both or perhaps only the pin numbers. Both T568A and T568B are “straight through” configurations, meaning the wires connect to corresponding pins at both ends. However, T568B is generally preferred due to its superior noise protection and signal isolation. The crucial point is to maintain consistency: use the same standard at both ends of the cable.
Tools for the Job: Punch-Down Tool
Connecting the Ethernet cable to the faceplate requires a punch-down tool. This tool efficiently pushes the wires onto the terminals at the back of the socket. While a small flat-blade screwdriver might work in a pinch, a punch-down tool is the recommended and safer option. The tool eliminates the need to strip the wires beforehand; the terminals are designed to pierce the wire coating and make a solid connection.
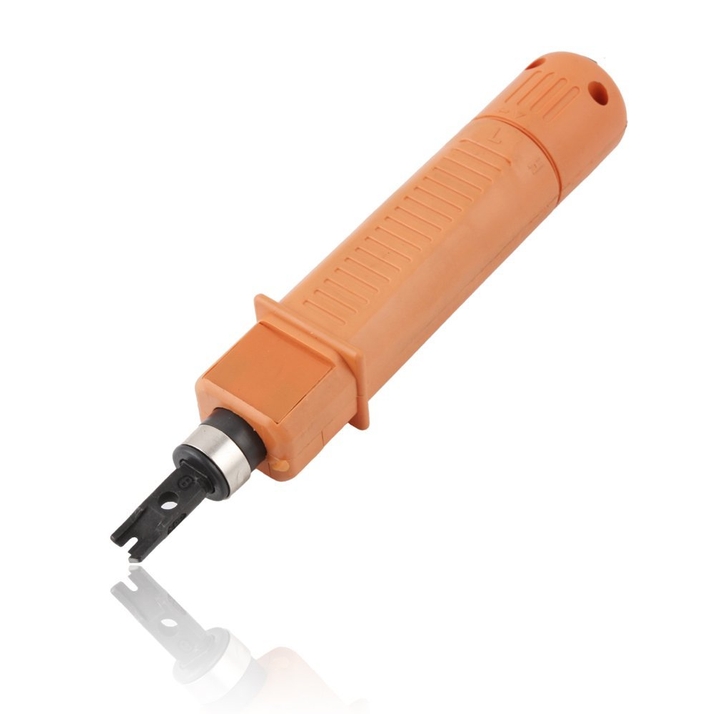 Using a punch-down tool
Punch-down tools are available individually at low cost. If you lack an RJ45 crimp tool for terminating standard Ethernet cables, consider purchasing a complete kit containing everything, including a cable tester for verifying your connections. Comprehensive kits can be found for under $30 on Amazon and other retailers. For numerous installations, investing in a higher-end punch-down tool with an integrated wire cutter will enhance efficiency.
Wiring Guide: T568B Configuration
The table below details the T568B wiring configuration, which we recommend for optimal performance:
| Pin | T568A Wire Color | T568B Wire Color |
|---|---|---|
| 1 | white/green stripe | white/orange stripe |
| 2 | green solid | orange solid |
| 3 | white/orange stripe | white/green stripe |
| 4 | blue solid | blue solid |
| 5 | white/blue stripe | white/blue stripe |
| 6 | orange solid | green solid |
| 7 | white/brown stripe | white/brown stripe |
| 8 | brown solid | brown solid |
Wiring an RJ45 Wall Socket: Step-by-Step
- Route the Ethernet cable to the socket through the pattress box.
- Strip about 30-40mm of the outer cable sheath using a stripping tool (often included in RJ45 crimping kits).
- Untwist the four wire pairs and remove the separating plastic X.
- Arrange the wires over the corresponding terminals on the socket, with excess wire facing outwards.
- Use the punch-down tool to secure each wire to its terminal.
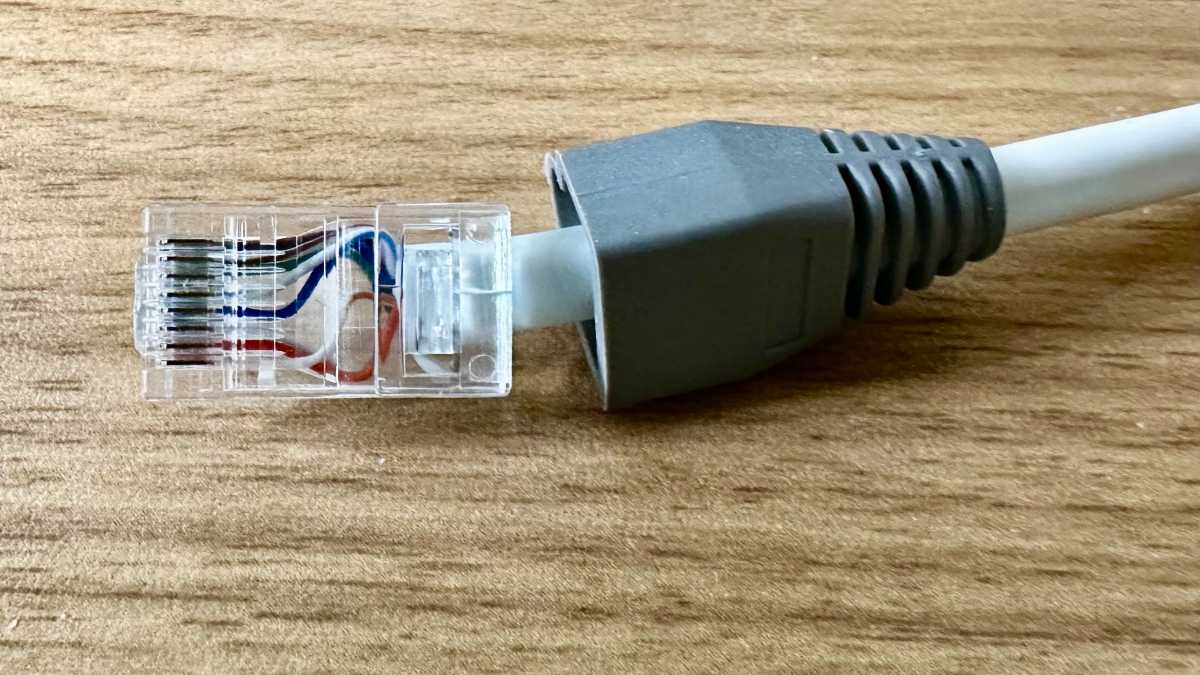 Wiring an RJ45 connector
Wiring an RJ45 Connector for Patch Cables
The table above also applies to wiring an RJ45 connector for a patch cable. Viewing the connector from underneath, with the release tab facing away, Pin 1 is at the bottom, and Pin 8 is at the top. When creating patch cables, remember to slide the rubber boot onto the cable before crimping the connector.
Conclusion: Enjoy a Faster, More Reliable Network
By following these steps, you can easily wire your own Ethernet wall sockets, creating a robust and reliable network infrastructure. This offers significant advantages over relying solely on Wi-Fi, particularly for bandwidth-intensive applications. While pre-made Ethernet cables are readily available, understanding how to wire your own provides flexibility and control over your network setup.


