Creating compelling presentations is crucial in today’s world. If you’re new to Microsoft PowerPoint, this guide will equip you with the essential features and tools to build impactful slideshows. We’ll walk you through creating a presentation from scratch, adding slides and elements, and finally, presenting your masterpiece. This beginner-friendly tutorial covers the basics for a terrific start with PowerPoint for Microsoft 365 on Windows. While other versions may have slight variations, the core options remain consistent.
Creating Your First Slideshow
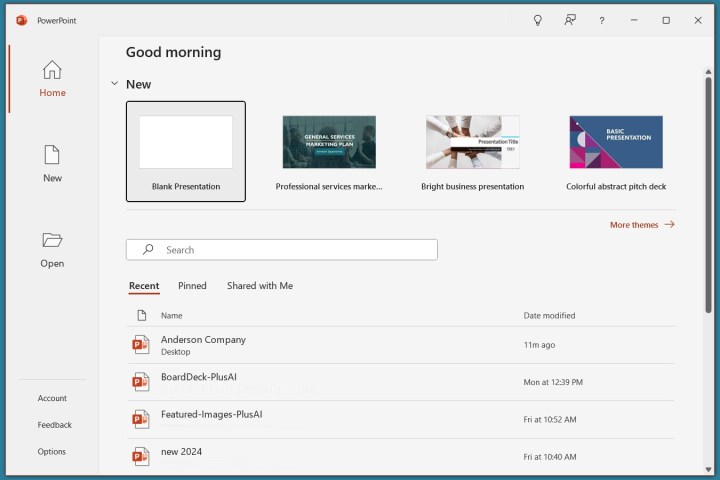
Upon opening PowerPoint, you can start with a blank presentation or use a pre-designed template. You can even convert a PDF to PowerPoint format. For this tutorial, we’ll select a Blank slideshow to explore the fundamental elements.
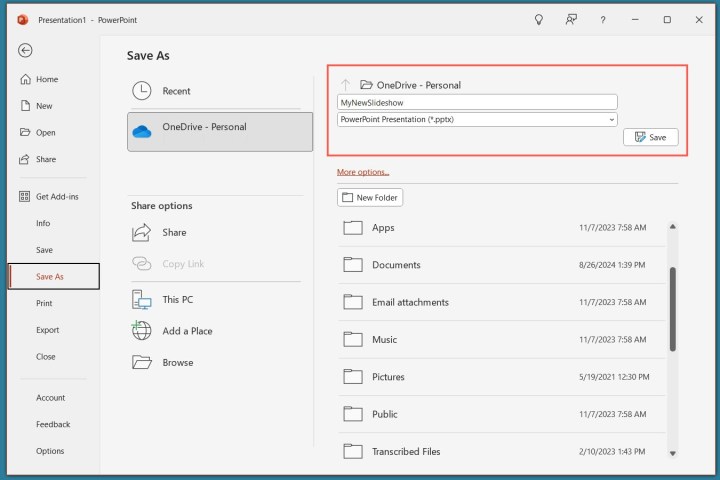
Name and save your presentation by navigating to File > Save or Save As. Enter the desired file name, choose a location, and click Save. Remember to save your work regularly using the Save button in the Quick Access Toolbar.
Adding Slides
A blank presentation begins with a title slide containing text boxes for the title and subtitle. Simply click within these boxes to add your text. While title slides are essential for introducing presentations, you’ll also need to add more slides for your content.
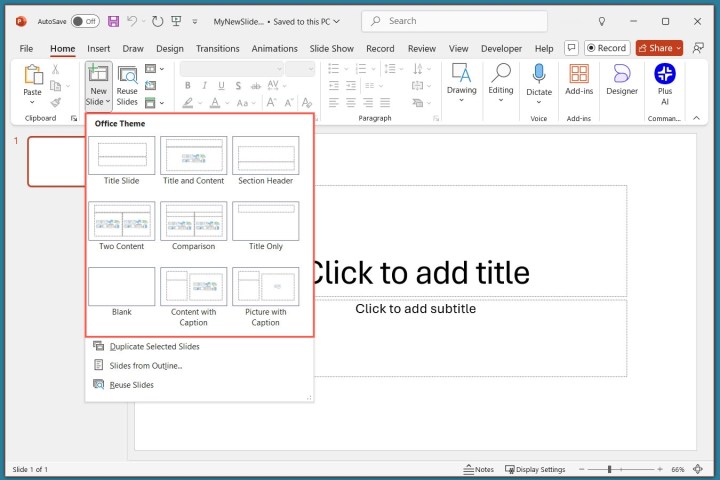
Navigate to the Home or Insert tab and click the New Slide menu. Choose a slide layout from the available options, including placeholders for text, lists, and images.
Once a new slide appears, click inside the placeholders to add your content.
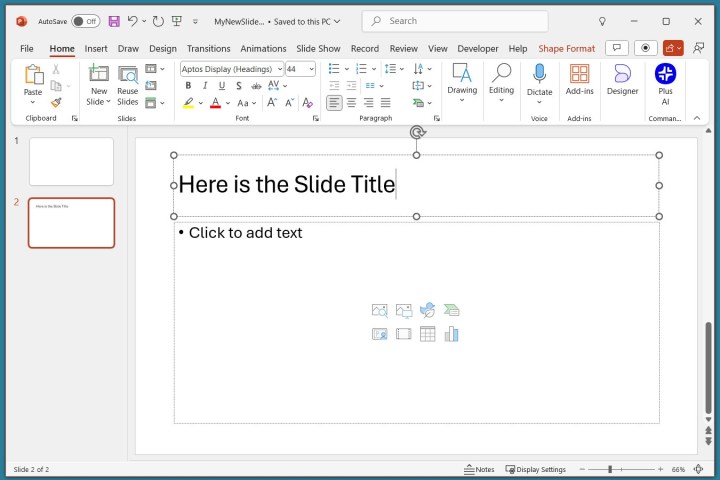
Repeat this process to insert as many slides as needed.
Inserting Slide Elements
Beyond placeholders, you can insert various elements to enhance your slides.
Adding Text Boxes
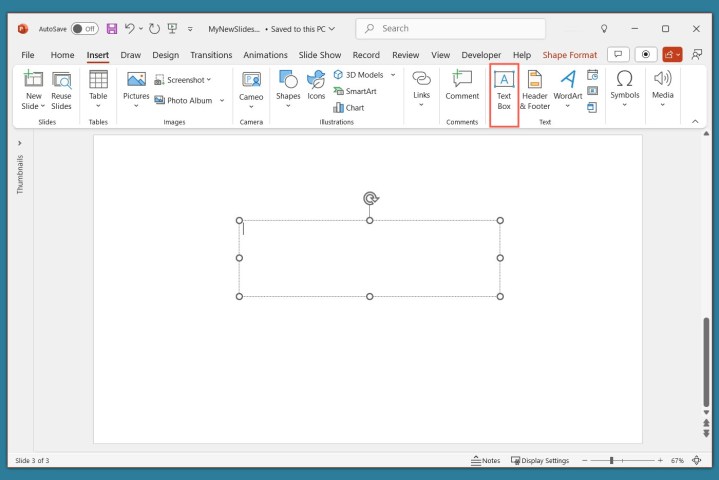
Text boxes offer flexibility in adding and formatting text. Go to the Insert tab and select Text Box. Draw a text box or simply click on the slide to start typing.
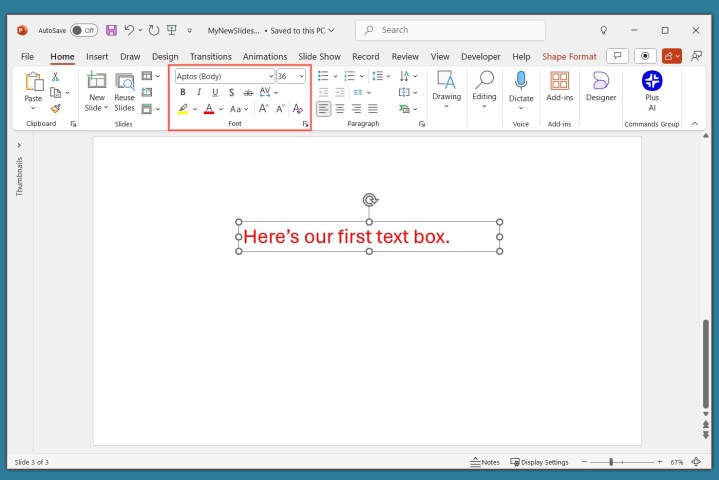
Format the text by selecting it and going to the Home tab. Use the Font section to adjust the style, size, color, and emphasis. A floating toolbar near the selected text provides quick access to formatting options.
Incorporating Visuals: Images, Shapes, and Icons
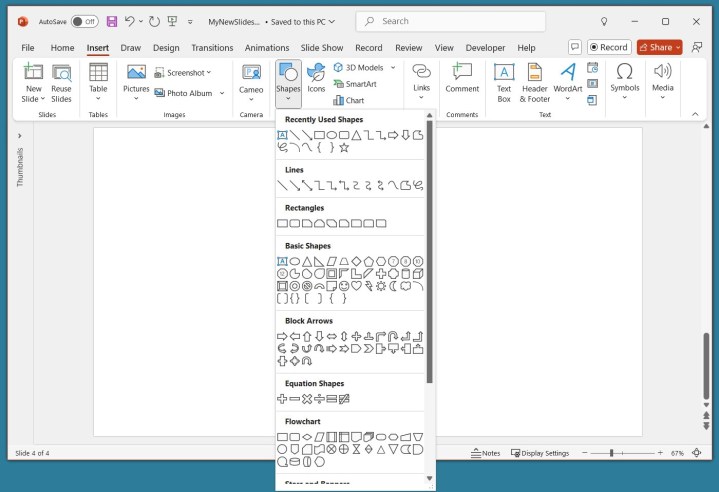
Visuals make your slideshow more engaging. Use the Insert tab to add pictures, shapes, or icons.
- Pictures: Insert images from your device, stock images, or online sources.
- Shapes: Choose from a variety of shapes and draw them directly onto the slide.
- Icons: Search for icons by keyword or browse categories.
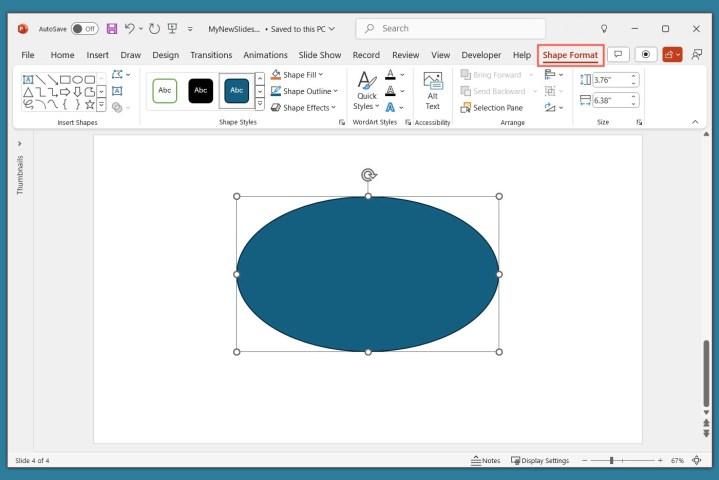
Format inserted objects using the corresponding format tabs (e.g., Picture Format, Shape Format, Graphics Format). Adjust colors, borders, alignment, rotation, and size.
Adding Audio and Video
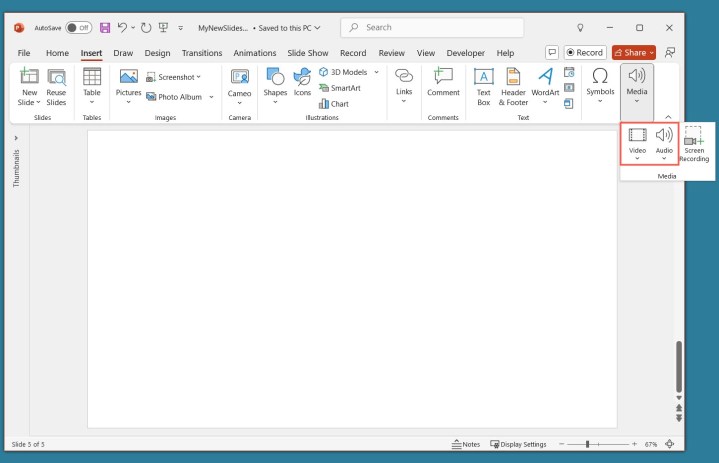
Enhance your presentation with audio and video clips. Use the Insert tab to add audio files, music, or videos.
- Audio: Add audio files from your device or record audio directly within PowerPoint.
- Video: Embed videos from your device, stock videos, or online sources.
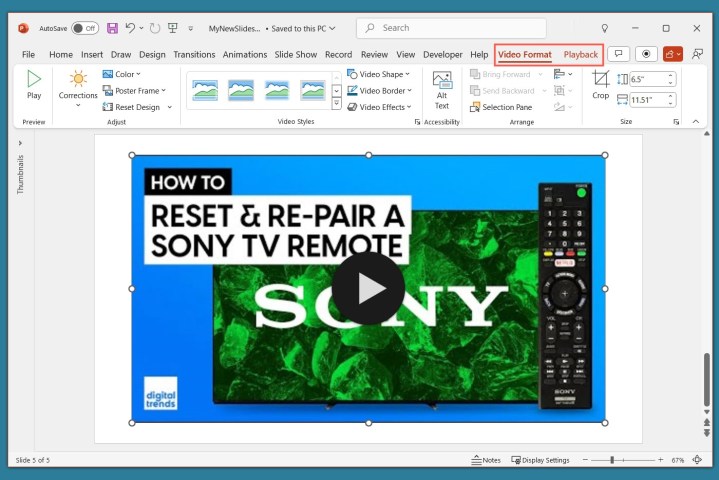
Format audio and video files using the Audio Format or Video Format tabs, and control playback using the Playback tab. You can set fade effects, loop playback, and play media in the background.
Utilizing Different Views
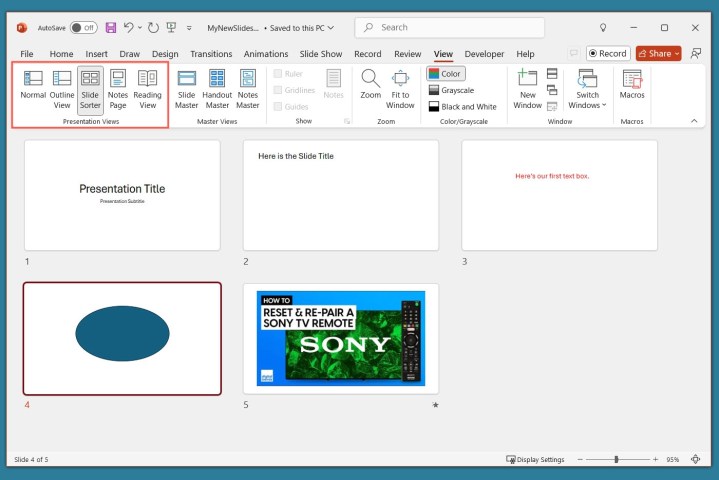
PowerPoint offers various views to facilitate different tasks, such as viewing slides in a grid, working with notes, or outlining your presentation.
The View tab provides the following presentation views:
- Normal: For creating and editing slides.
- Outline View: For working with a textual outline of your presentation.
- Slide Sorter: For viewing all slides in a grid format.
- Notes Page: For viewing and printing slides with speaker notes.
- Reading View: For previewing the slideshow without entering full-screen mode.
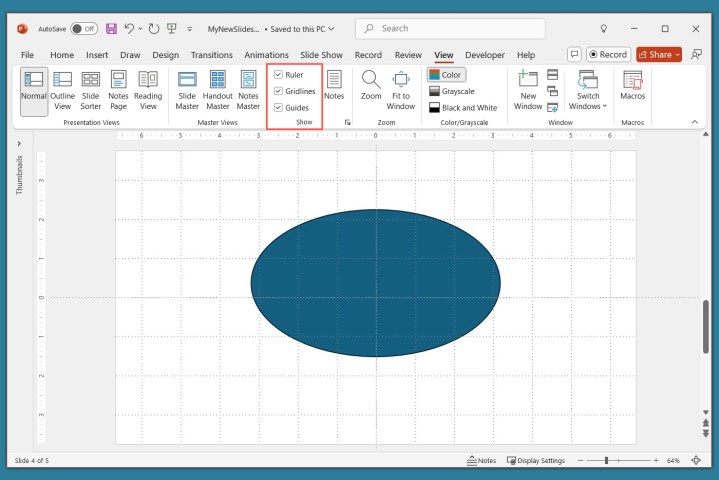
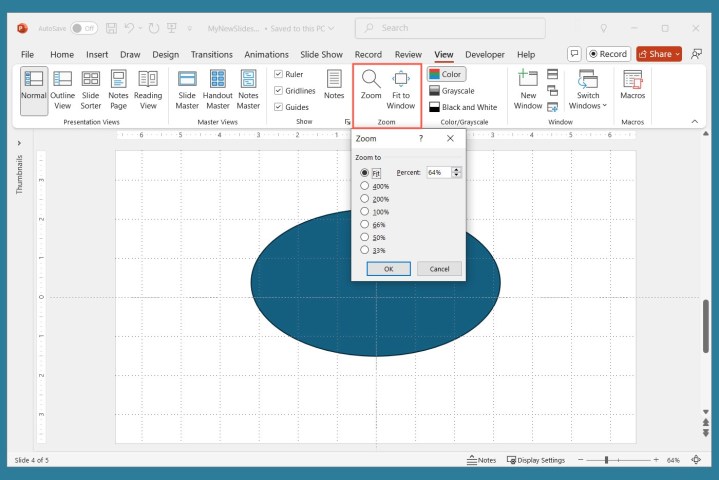
Use the Show section in the View tab to display rulers, gridlines, and guides for precise element alignment. The Zoom options allow you to adjust the view magnification.
Adding Speaker Notes
Speaker notes are like personal cues for your presentation. Add notes to each slide visible only to you during the presentation.
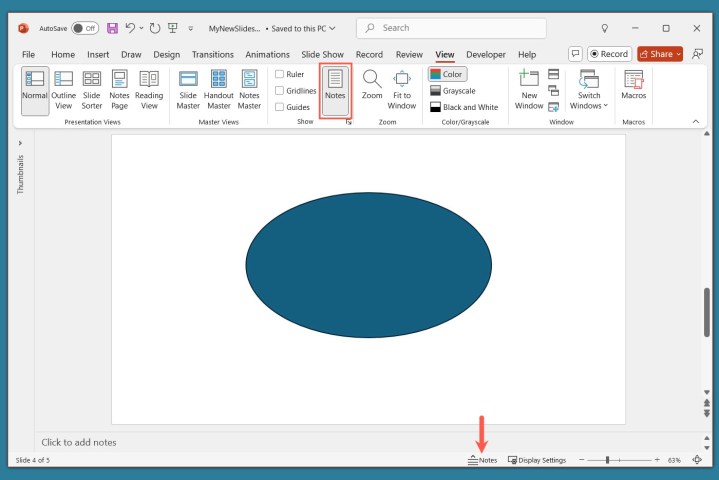
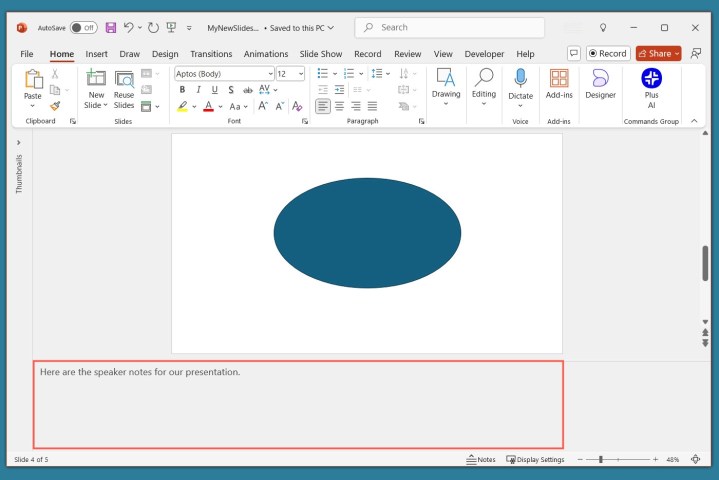
Click Notes in the Status Bar or navigate to View > Notes. Add your notes in the section below the slide.
Starting and Ending Your Presentation
When ready, start your presentation from the Slide Show tab.
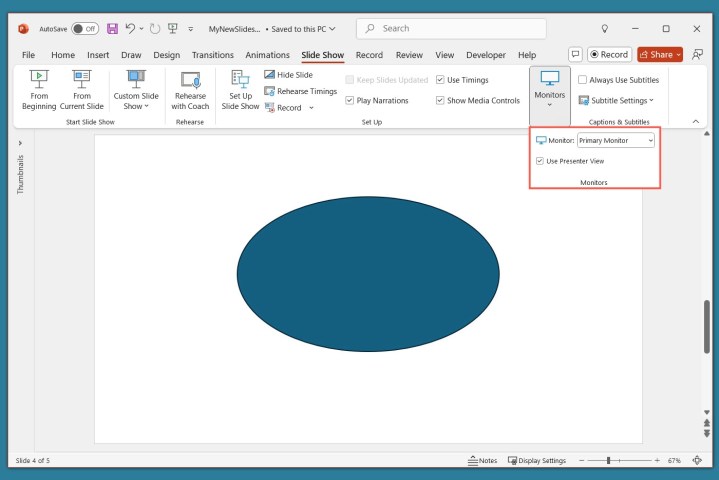
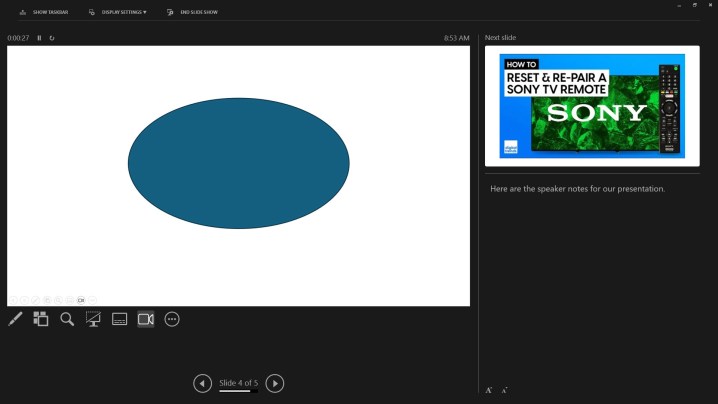
For speaker notes and presentation controls, enable Use Presenter View in the Monitors section. Select the desired monitors for the slideshow and presenter view.
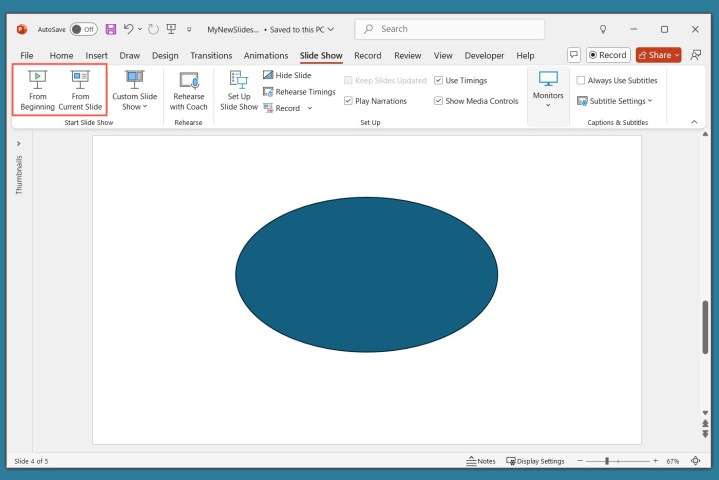
Click From Beginning or From Current Slide to start the presentation.
The Presenter View window displays the current slide, controls, the next slide, and your speaker notes. If using a single monitor, controls appear at the bottom left of the slides.

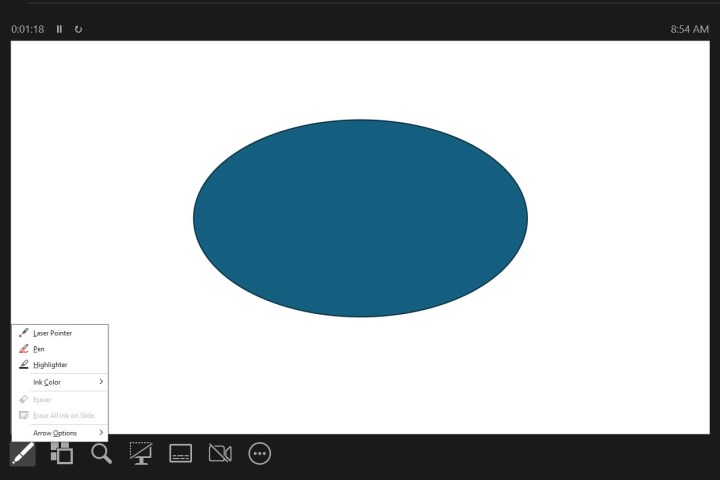
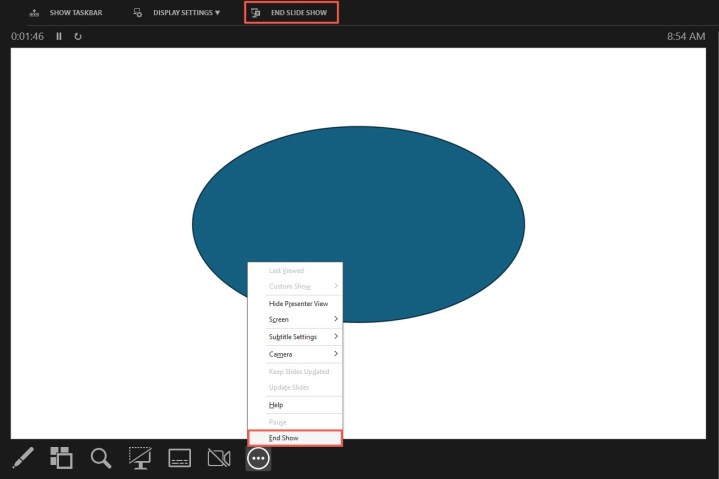
Exit presentation mode by pressing Esc, clicking End Slide Show, or selecting End Show from the three-dot menu.
This guide provides a foundation for creating and presenting with PowerPoint. Explore additional resources like Speaker Coach and best practices for crafting compelling slides to further enhance your skills. If you prefer Google Slides, converting PowerPoint presentations is a straightforward process.


