Adding page numbers is a crucial step in organizing lengthy Word documents, especially if you plan to print them. Imagine the chaos of dropped pages scattered out of order! This guide provides comprehensive instructions on how to add, format, and customize page numbers in Microsoft Word, ensuring your documents maintain a professional and organized structure.
Adding page numbers to a Word document not only provides organization but also enhances readability and navigation, especially for longer documents. This feature is essential for academic papers, reports, and any document requiring clear page referencing. Let’s explore the different ways to add and customize page numbers in Microsoft Word.
Adding Page Numbers to Your Document
Page numbers can be placed in the header (top), footer (bottom), margins, or even at the current cursor position. You can also customize the style and appearance of the page numbers themselves.
Step 1: Navigate to the Insert tab in the top ribbon.
Step 2: Click the Page Number button and choose the desired location for your page numbers. The Top of Page and Bottom of Page options are the most common choices. Page Margins places the numbers in the side margins, and Current Position inserts the number at the cursor’s location.
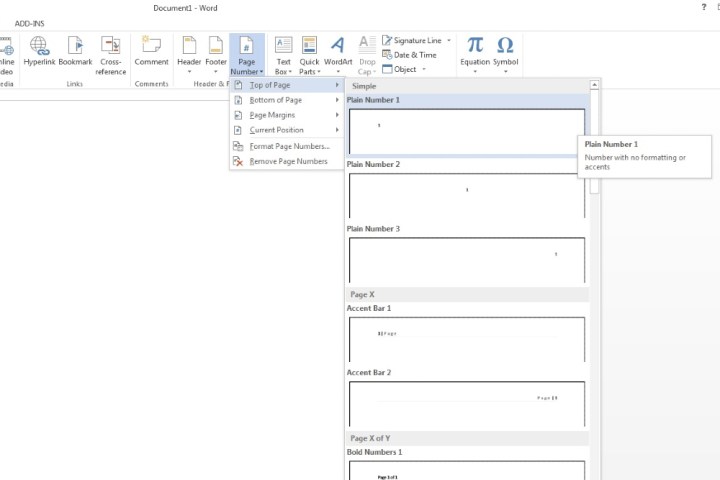 The Page Number menu in Microsoft Word.Image used with permission by copyright holder
Step 3: After selecting the location, choose a preferred numbering style from the available options. Click the Close Header and Footer button or double-click anywhere in the document’s body to finalize the placement.
Word will automatically add page numbers to every page of your document.
Customizing Page Number Formats and Appearance
Word offers extensive customization options for page numbers.
Step 1: To format page numbers, go to the Insert tab and click the Page Number button. Select Format Page Numbers to access options for number format, chapter numbering, and page numbering styles.
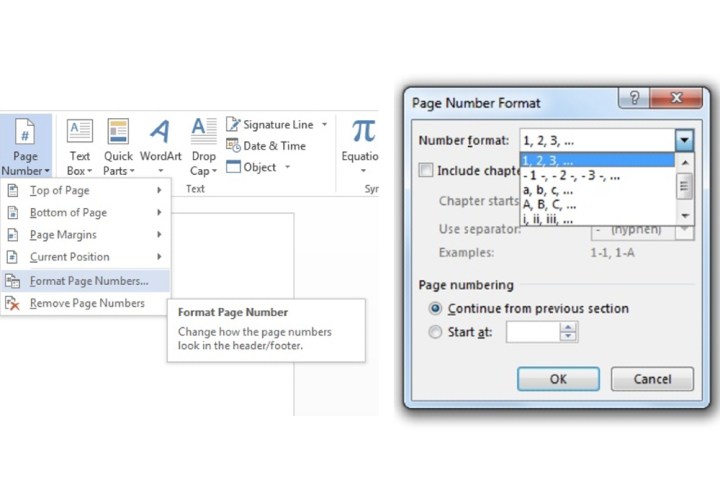 The Format Page Numbers location and associated options on Microsoft Word.Image used with permission by copyright holder
Step 2: To change the appearance of page numbers, double-click the page number. This will open the header or footer for editing. Highlight the page number and use the Home tab to modify the font, style, size, color, and positioning.
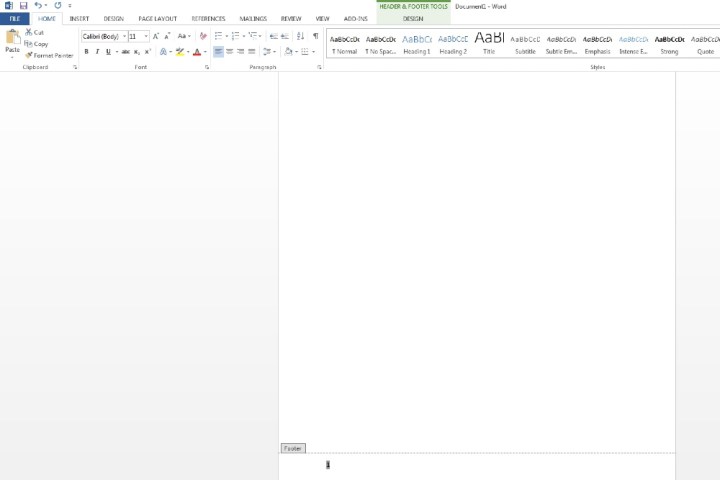 The options to customize the appearance of page numbers in Microsoft Word.Image used with permission by copyright holder
Step 3: To remove page numbers, navigate to Insert > Page Number and select Remove Page Numbers.
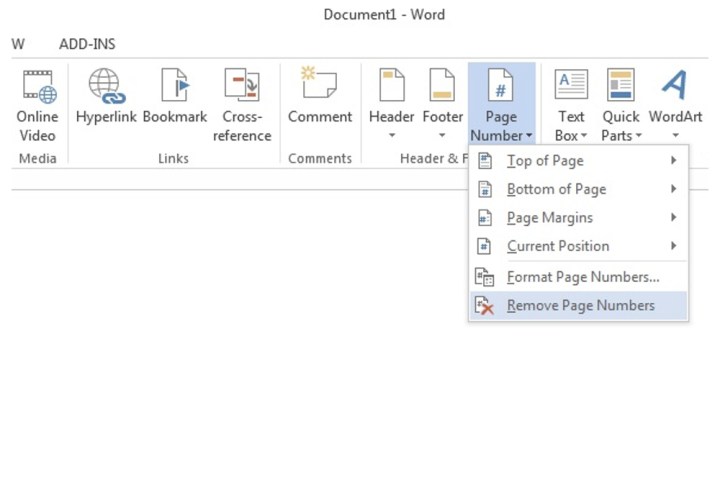 The Remove Page Number tab used for removing a page number for a Microsoft Word document.Image used with permission by copyright holder
Starting Page Numbers from a Specific Page
There are scenarios where you might want to start numbering from a page other than the first, for instance, after a cover page or index.
Starting from Page Two
Step 1: Double-click the header or footer area on the first page or go to Insert > Header or Footer > Edit Header or Edit Footer. In the Design tab under Header & Footer Tools, check the Different First Page box. Click Close Header and Footer.
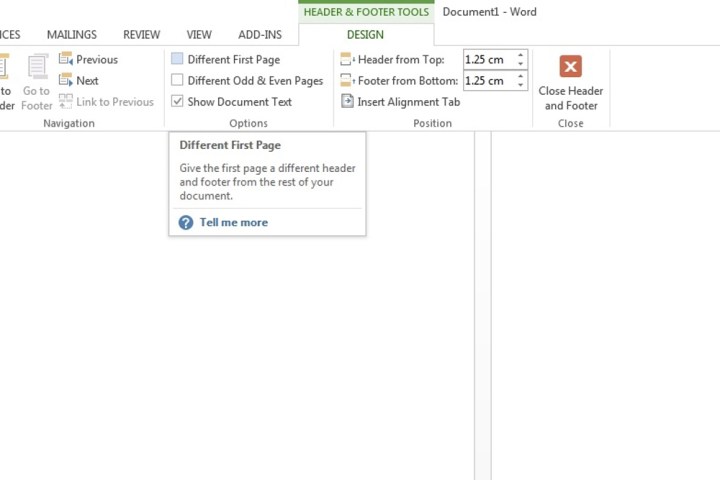 The Different First Page box in Microsoft Word.Image used with permission by copyright holder
Step 2: Go to the second page, then Insert > Page Number > Format Page Numbers. Set the Start at value to 0. Click OK.
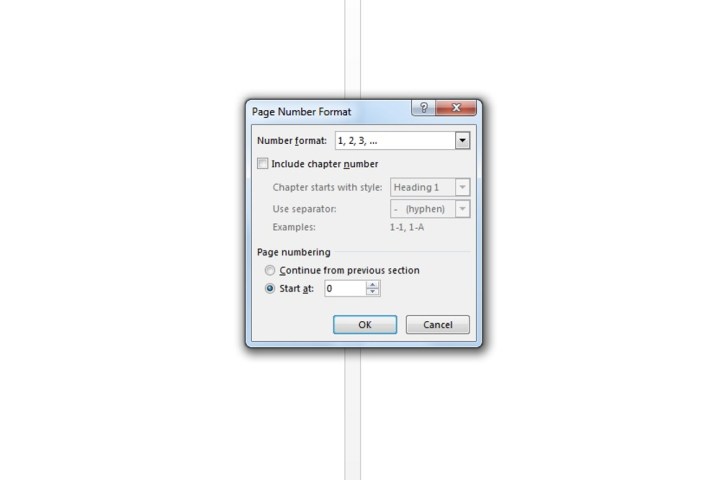 Setting the Start at box value to 0 so the page number commences on the second page in Microsoft Word.Image used with permission by copyright holder
Step 3: Still in the Insert tab, click Page Number and choose your desired location and style.
Starting from Any Other Page
Step 1: To start numbering from page four, for example, click anywhere on page three. Go to Layout > Breaks > Next Page.
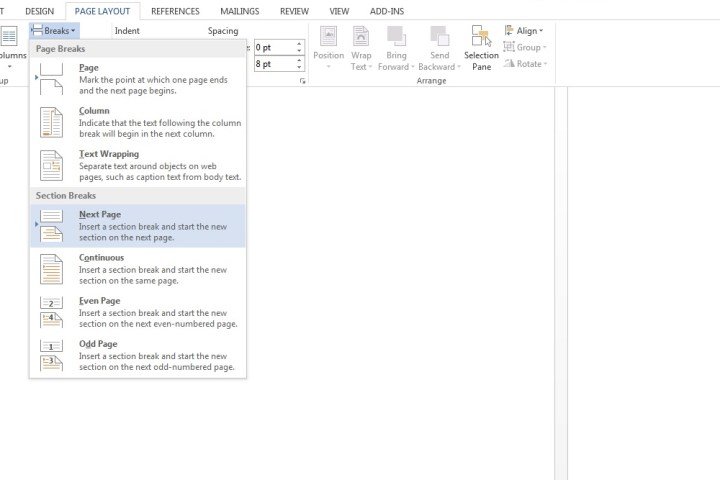 The Next Page box located within Breaks on Microsoft Word.Image used with permission by copyright holder
Step 2: Go to page four (where numbering should start), then Insert > Page Number and choose the location.
Step 3: The page number will be highlighted. Click the Link to Previous button to deselect it.
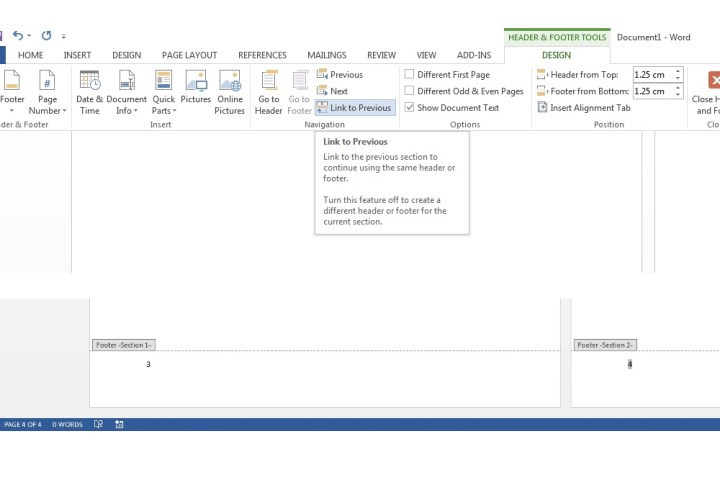 The Link to Previous box in Microsoft Word.Image used with permission by copyright holder
Step 4: Go to Insert > Page Number > Format Page Numbers. Under Page Numbering, ensure Start at is set to 1. Click OK.
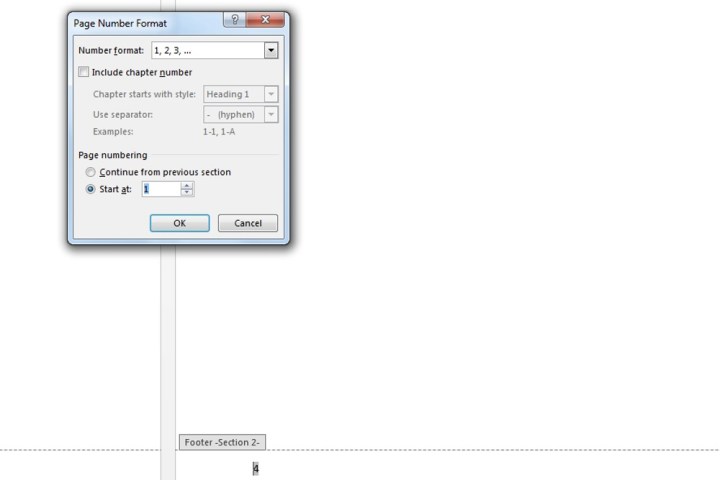 The Start at box within Page Number Format in Microsoft Word.Image used with permission by copyright holder
Step 5: In the footer of page three, highlight and delete the existing page number. Previous page numbers will be automatically removed.
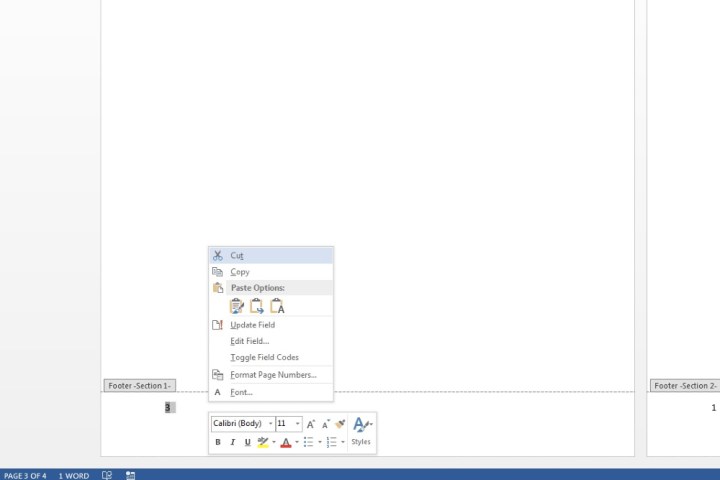 Deleting a page number from the footer in Microsoft Word.Image used with permission by copyright holder
Removing Page Numbers from a Specific Page
To remove a page number from a specific page, select the page, navigate to Insert > Page Number, and select Remove Page Numbers. If the option is grayed out, double-click the header or footer to activate it.
Displaying Total Page Count
To show both the current page and the total number of pages (e.g., “Page X of Y”), select Insert > Page Numbers and choose a style under the “Page X of Y” subheading.
Conclusion
Managing page numbers in Word is simple and versatile. You can customize their placement, style, and starting point, ensuring your documents are organized and professional. Even without visible page numbers, the table of contents functionality remains effective. Word automatically updates page numbers if you delete or add pages, maintaining consistent document structure. Remember, page numbers are a simple yet powerful tool for enhancing your documents’ clarity and professionalism.


