Taking screenshots is a daily task for many, whether capturing vital information or memorable gaming moments. While the process is generally straightforward, Windows 11 offers advanced screen capture tools that go beyond basic functionality. This guide explores these powerful features, allowing you to take smarter screenshots and even record your screen activity.
Utilizing the Snipping Tool
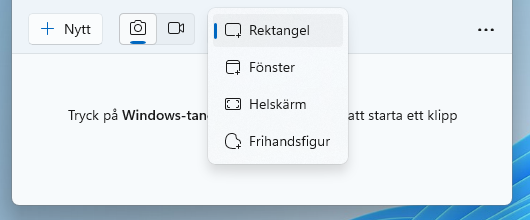
The Snipping Tool is your central hub for screen captures in Windows 11. Launch the app and click the camera icon. The dropdown menu on the third icon reveals four capture modes:
- Rectangular Snip: Drag your mouse to select a specific rectangular area.
- Window Snip: Capture the entire active window.
- Full-screen Snip: Capture the entire screen.
- Free-form Snip: Draw a freehand shape to capture a custom area.
After selecting your desired mode, click “New” or press Ctrl+N to capture the screenshot. For timed captures, use the clock icon to set a delay of 3 to 10 seconds.
Editing Your Captures
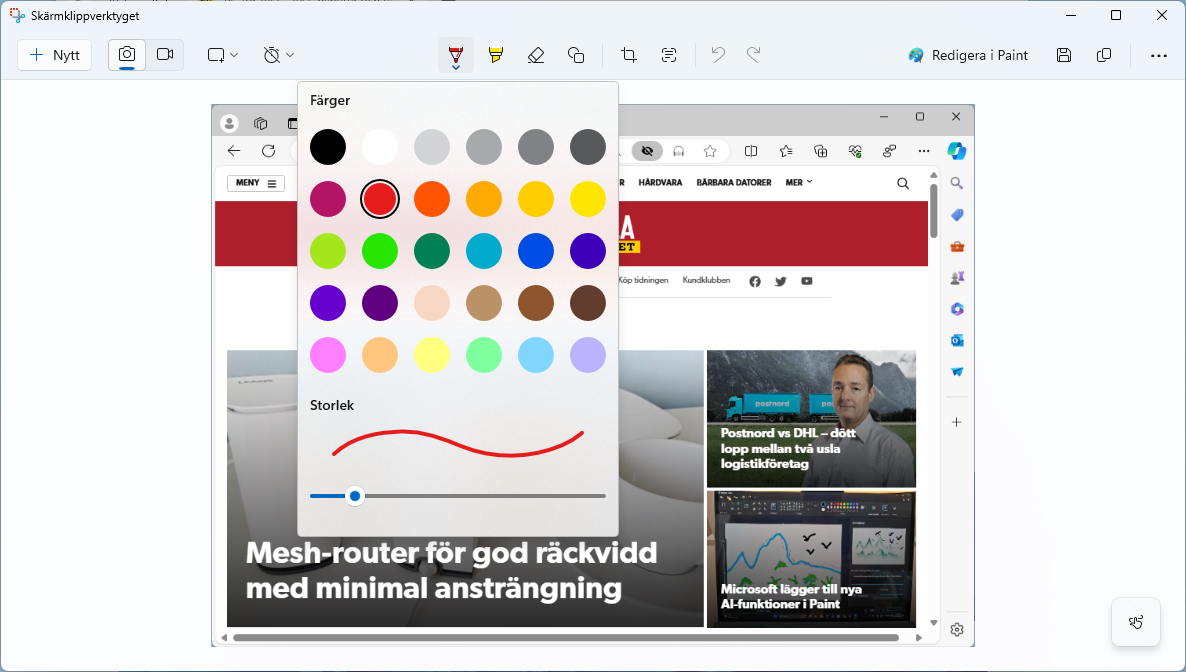
Once captured, the screenshot appears in the Snipping Tool. You can paste it directly into other applications using Ctrl+V or edit it within the tool using the available pens and eraser. The Snipping Tool also allows basic editing, saving, copying, emailing, and printing directly from the interface. For more advanced editing, use image editing software like Paint.
Extracting Text from Screenshots
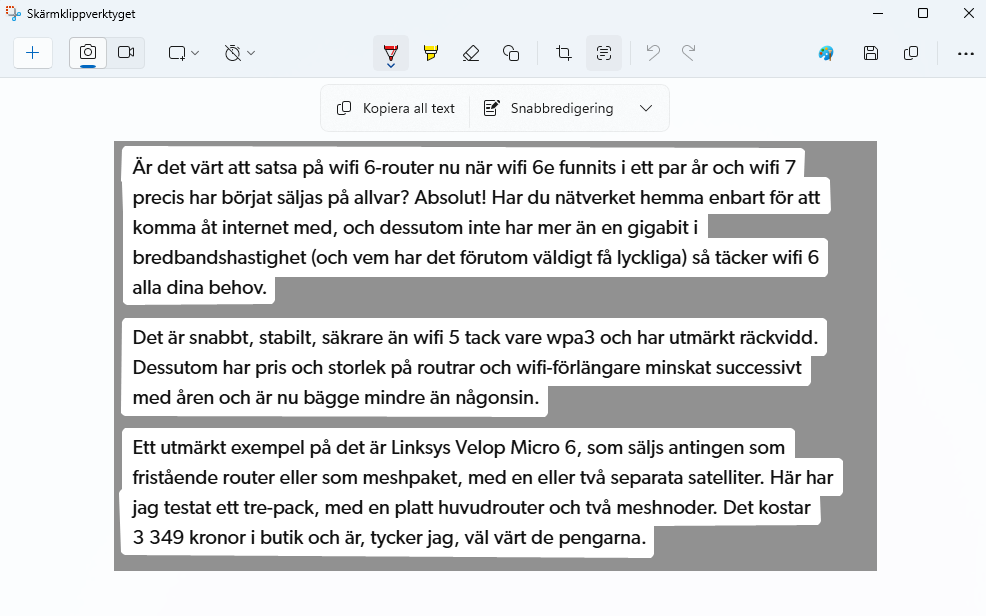
The Snipping Tool integrates OCR (Optical Character Recognition) functionality, allowing you to extract text from your screenshots. Open the editing mode and click “Text Actions”. The tool converts the image text into editable text. You can then “Copy all text” or select specific text with your mouse and right-click to copy.
Screen Recording
The Snipping Tool now offers screen recording capabilities. Click the video camera icon and then “New”. Draw a boundary around the area you wish to record. A menu will appear, allowing you to choose whether to include audio. Click “Start” to begin recording. Once finished, the recording will be displayed, ready for saving or editing in Clipchamp, Windows 11’s built-in video editor.
Quick Capture Shortcuts
For faster screen captures, use the keyboard shortcut Windows+Shift+S. This opens a streamlined menu for immediate capture without opening the full Snipping Tool application.
Customizing the Print Screen Key
Traditionally, the Print Screen (PrintScr) key captured the entire screen. In Windows 11, you can configure it to launch the Snipping Tool instead. Open the Snipping Tool, click the three dots, select “Preferences,” then “Tools” and “Keyboard.” Toggle the “Use PrintScrn to start screen capture” option.
Instant Full-Screen Captures
For quick full-screen captures, press Windows+PrintScrn. The screenshot will automatically save to the “Screenshots” folder within your “Pictures” directory.
Adjusting Snipping Tool Settings
The Snipping Tool provides a dedicated settings menu. Access it by clicking the three dots within the app and selecting “Preferences.” Customize options like automatic saving and adding borders to your screenshots.
In conclusion, Windows 11’s Snipping Tool offers a comprehensive suite of features for capturing and managing screenshots and screen recordings. Mastering these tools will significantly enhance your productivity and streamline your workflow.


