The default Windows 11 Start Menu might not resonate with everyone’s preferences. Fortunately, Microsoft offers a plethora of customization options, allowing you to tailor this essential feature to your liking. This guide will walk you through the various ways you can personalize your Windows 11 Start Menu, from simple tweaks to more advanced adjustments.
Personalizing Recently Added Apps, Opened Items, and Folders
The “Recommended” section in the Windows 11 Start Menu displays recently added apps and opened items. This area provides a convenient starting point for customization.
Step 1: Open Windows 11 settings by pressing the Windows Key + I. Select Personalization from the sidebar.
Step 2: Click Start. To hide recently accessed files, toggle the Off switch. This creates empty space in the Start Menu, which you can fill by enabling Show recently added apps and Show most used apps.
Step 3: Further personalize your Start Menu by choosing which folders appear next to the Power button. Locate the Folders option and toggle the switches for the desired items.
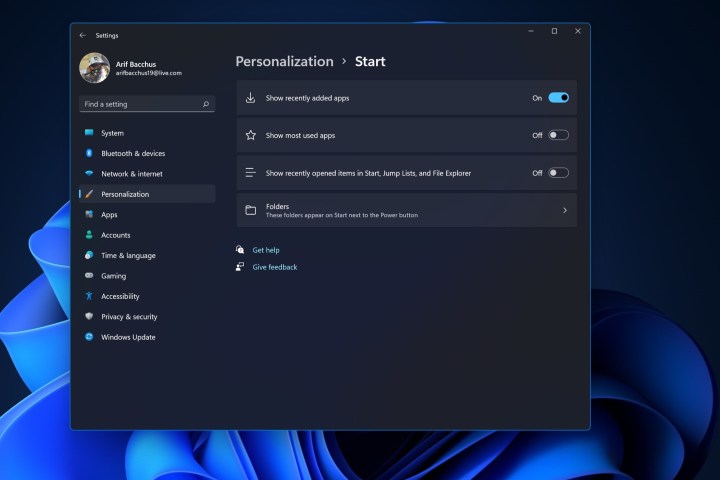 The Personalize settings for the Windows Start Menu.
Managing Apps on the Start Menu
Similar to previous Windows versions, you can remove or pin apps to the Start Menu in Windows 11.
Step 1: Right-click on an app you want to remove and select Unpin from Start. This only removes the app’s shortcut from the Start Menu, not the application itself.
Step 2: To pin an app, click All Apps, right-click on the desired app, and choose Pin to Start.
Step 3: Reorder pinned apps by clicking, holding, and dragging them to your preferred locations.
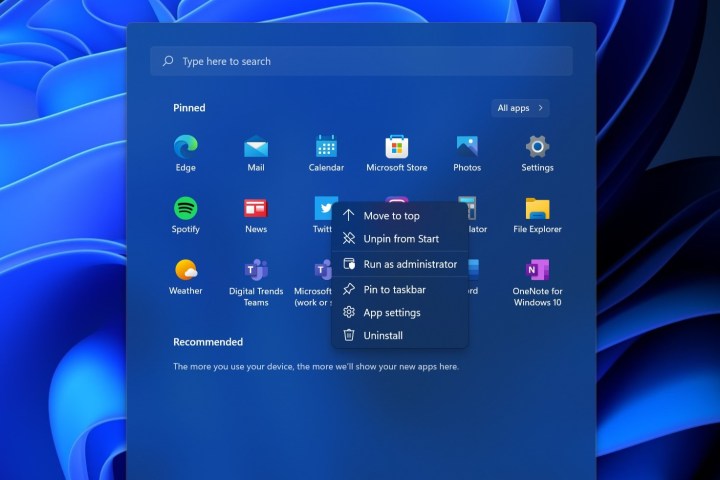 The app settings pop-up in Windows 11.
Relocating the Start Menu
Windows 11’s centrally located Start Menu is a departure from previous versions. If you prefer the traditional left-aligned position, you can easily change it back.
Step 1: Access Windows 11 settings (Windows Key + I) and select Personalization. Click on Taskbar behaviors.
Step 2: Under Taskbar alignment, choose Left to reposition the Start Menu.
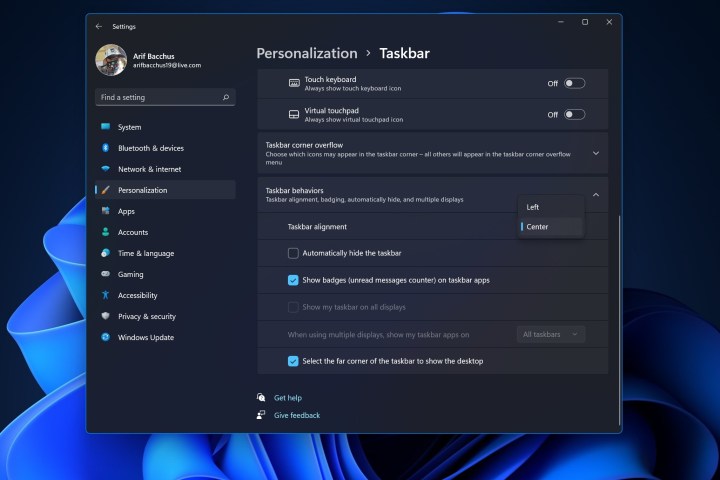 The Personalization dashboard for the Windows 11 Taskbar.
Customizing the Start Menu Color
The Start Menu’s color can be customized to match your aesthetic preferences. Keep in mind that this also affects the Taskbar and window colors.
Step 1: Open Windows 11 settings (Windows Key + I) and navigate to Personalization > Colors.
Step 2: Set the theme to Custom. Choose Dark for the default Windows mode and your preferred option for the default app mode.
Step 3: Select your desired Accent color. Use the View color button to create a custom color if needed. Ensure both Show accent color on Start and taskbar and Show accent color on title bars and windows borders are toggled On.
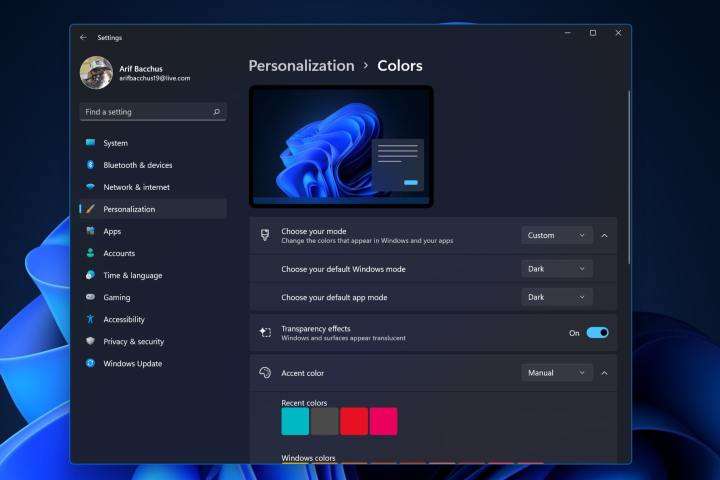 The Colors Personalization screen in Windows 11.
Exploring Advanced Customization with Start11
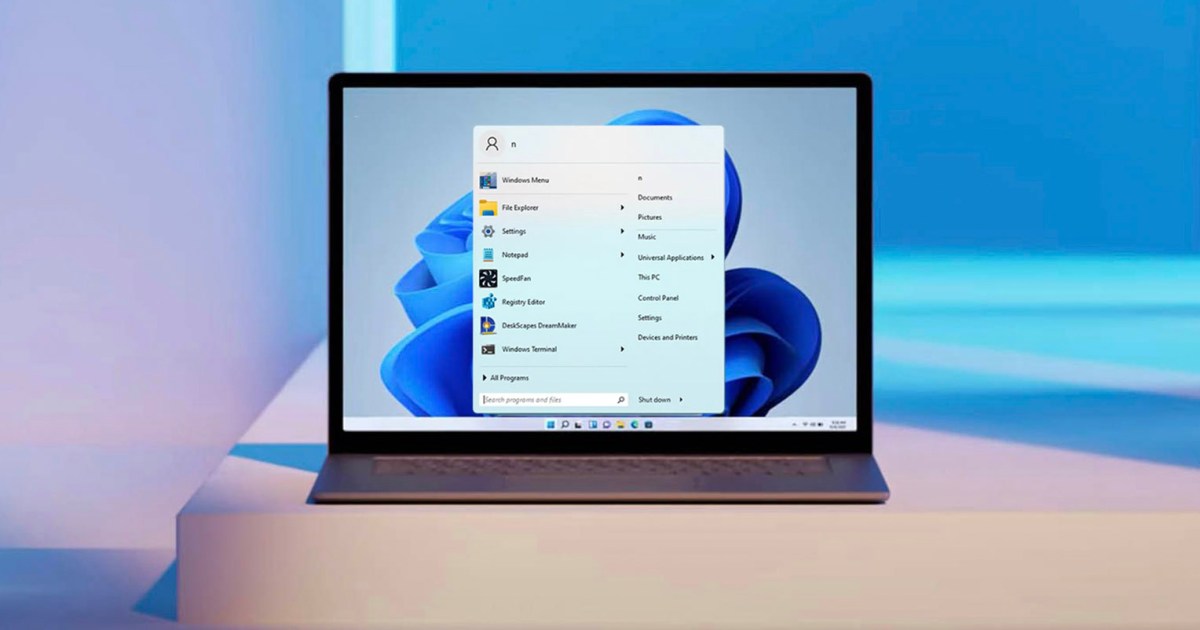
For more extensive customization, third-party applications like Stardock’s Start11 offer additional options. Start11 allows you to move the Start Menu to the top of the screen or even revert to the classic Windows 10 style. While it’s a paid software ($6), it provides a high degree of control for those seeking ultimate personalization.
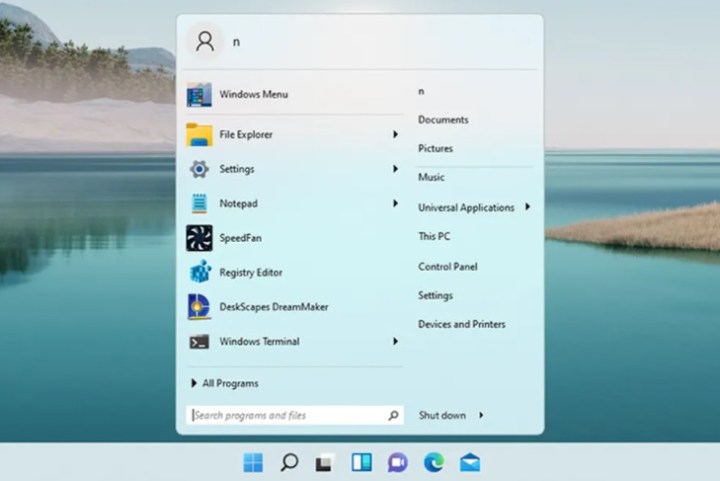 Start11 includes an old style of the Windows Start menu.
Conclusion
Windows 11 offers a range of customization options to personalize the Start Menu, from adjusting the display of recent items to changing its color and location. By following this guide, you can transform your Start Menu into a truly personalized and efficient gateway to your applications and files. Whether you prefer subtle adjustments or a complete overhaul, Windows 11 empowers you to create a Start Menu that perfectly suits your workflow and preferences.


