Microsoft Excel, a powerful spreadsheet software, offers extensive features for data management, analysis, and formatting. Mastering the basics, like adding a column, is crucial for maximizing its potential. This guide provides a step-by-step walkthrough on how to insert columns in Excel, covering both full spreadsheet insertions and partial column additions.
Adding a column in Excel is a quick and easy process that can greatly enhance your spreadsheet organization and data analysis capabilities. Whether you need to add a column to an entire spreadsheet or just a portion of it, Excel provides simple methods to accomplish this task. By following the steps outlined in this guide, you can effectively insert new columns, organize your data, and perform calculations with ease.
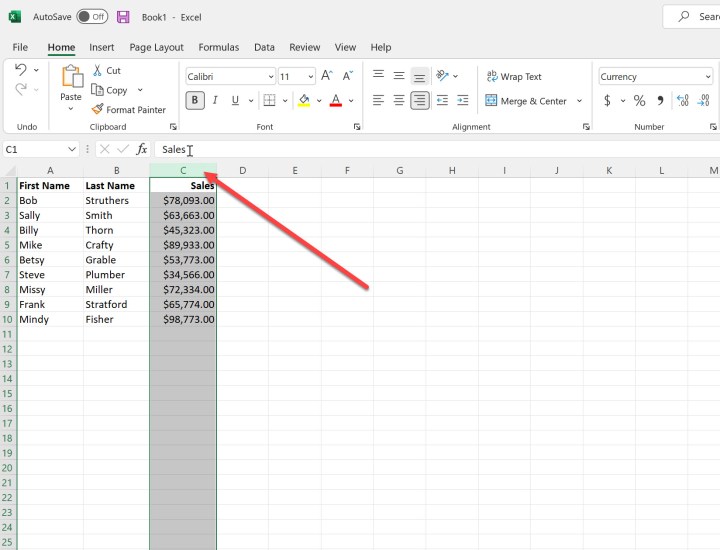 alt text: Selecting an entire column in Microsoft Excel.
Inserting a Column Across the Entire Spreadsheet
When you need a new column spanning the entire length of your spreadsheet, follow these simple steps:
Step 1: Column Selection
Click the letter at the top of the column immediately to the right of where you want the new column. This highlights the entire column.
Step 2: Insert Column
Right-click on the highlighted column header and select “Insert” from the context menu. Excel will insert a new blank column to the left of the selected column.
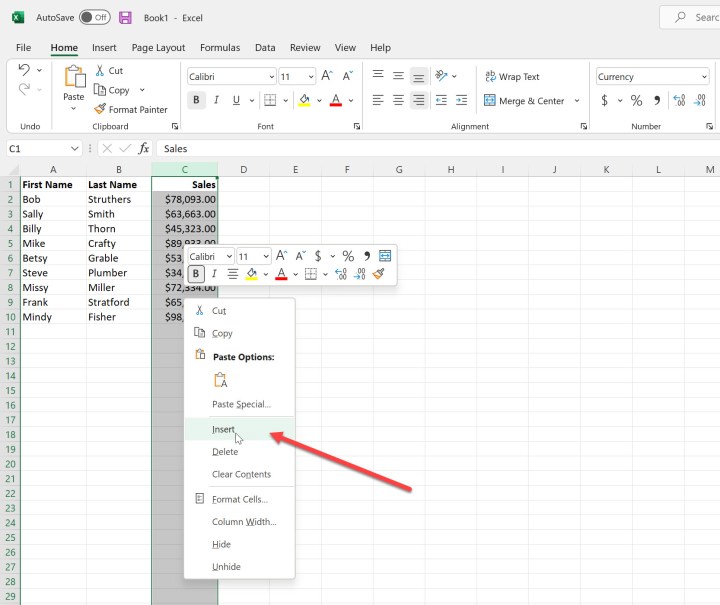 alt text: Choosing insert column from menu in Microsoft Excel.
Step 3: Data Entry
You can now enter data or formulas into the newly created column. This action affects the entire spreadsheet, so use it when you need a column across all rows.
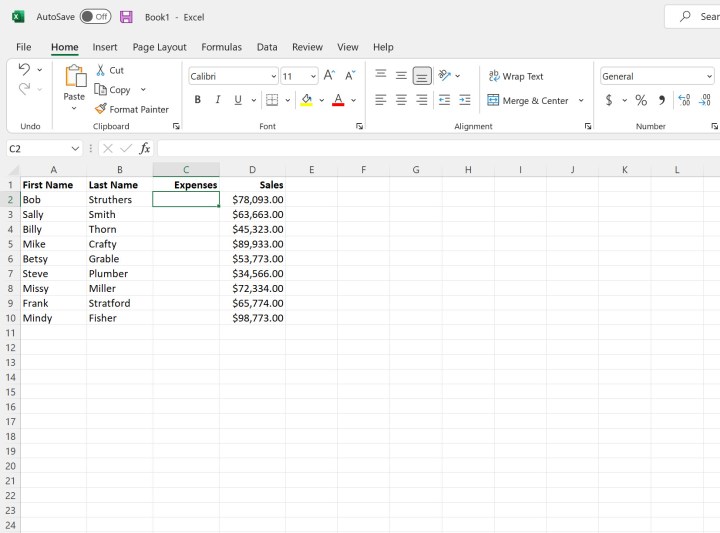 alt text: New column inserted in Microsoft Excel, labeled "Expenses" between "Last Name" and "Sales".
Adding a Column to a Specific Section
Sometimes, you only need to add a column to a particular portion of your spreadsheet. Here’s how:
Step 1: Cell Selection
Highlight the cells directly to the right of where you want to insert the new partial column.
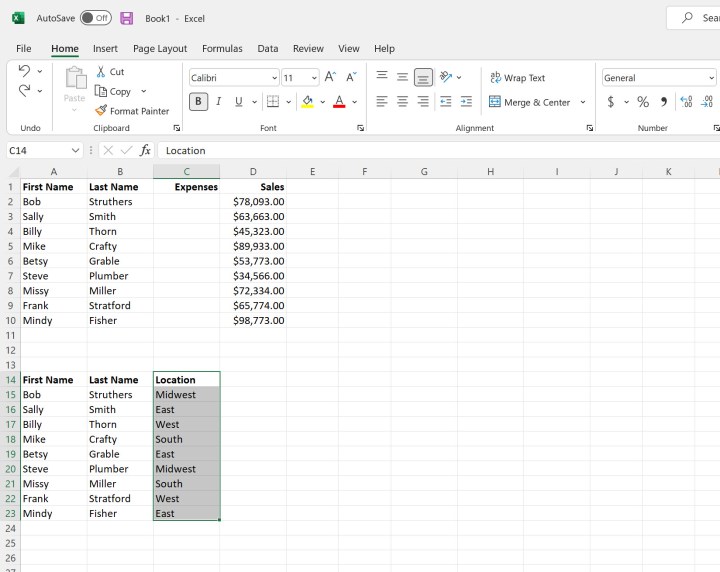 alt text: Selecting part of a column to add in Microsoft Excel.
Step 2: Inserting the Column
Right-click on the selected cells and choose “Insert” from the menu.
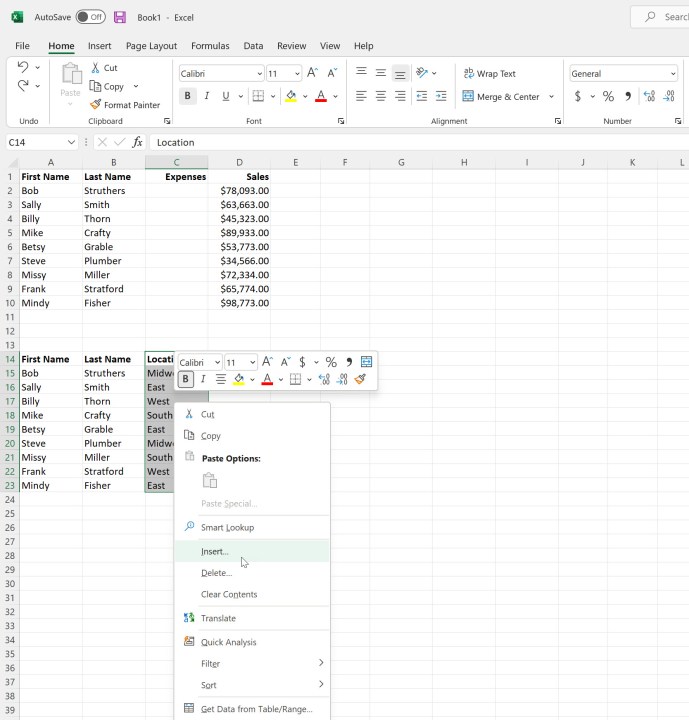 alt text: Right-clicking selected cells in Excel and choosing "Insert" from the context menu.
Step 3: Choosing the Insertion Method
A dialog box will appear offering four choices: “Shift cells right,” “Shift cells down,” “Entire row,” and “Entire column.” Select “Shift cells right” to insert a partial column.
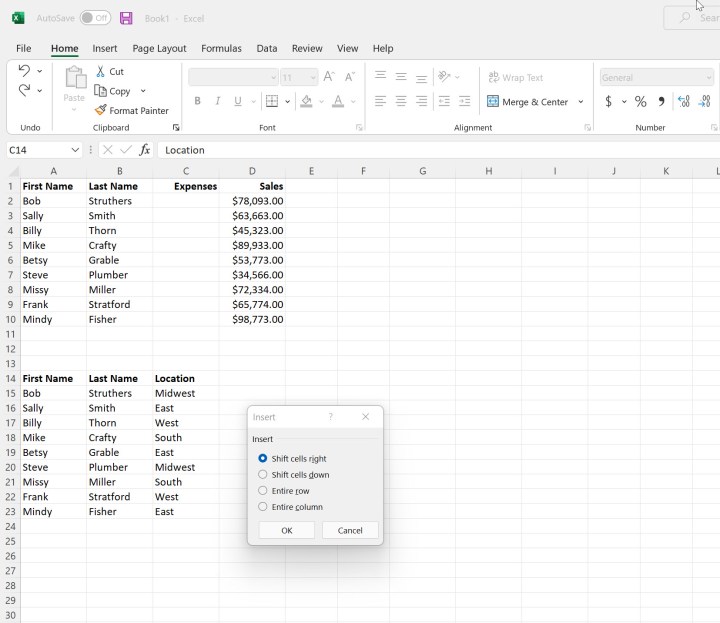 alt text: Inserting partial column options in Microsoft Excel.
Step 4: Using the New Column
The selected cells will shift to the right, creating a new blank column within the chosen section. You can now populate this column with data without affecting other areas of your spreadsheet.
 alt text: Partial column inserted in Microsoft Excel.
Conclusion
Inserting columns in Excel is fundamental for effective spreadsheet management. Whether you’re adding a full column or just a partial one, the process is straightforward and enhances data organization. By mastering this technique, you gain greater control over your spreadsheet structure and can perform more complex analyses efficiently. For more helpful Excel tips, explore our guides on merging and unmerging cells and creating drop-down lists.


