Accidentally deleting crucial files is a common Windows mishap. Fortunately, Windows 11 offers various built-in recovery methods, from the familiar Recycle Bin to the powerful Windows File Recovery utility. This guide will walk you through recovering lost and deleted files in Windows 11. We’ll also explore some top-tier free data recovery software options for added recovery capabilities.
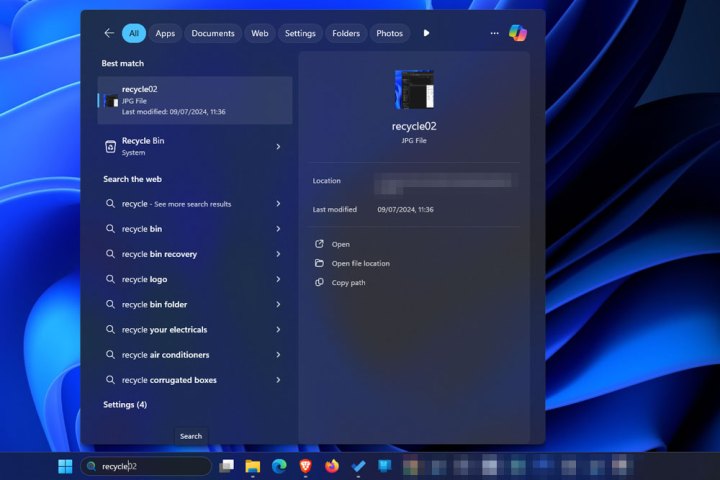
 Finding the recycle bin in Windows 11.Accessing the Recycle Bin in Windows 11 is the first step in recovering recently deleted files.
Restoring Files from the Recycle Bin
The Recycle Bin is your first line of defense against accidental file deletion. Files deleted in Windows 11 are typically moved to the Recycle Bin, allowing for easy restoration. Files exceeding the Recycle Bin’s size limit are permanently deleted, bypassing the Recycle Bin.
-
Accessing the Recycle Bin: Double-click the Recycle Bin icon on your desktop or search for “Recycle Bin” in the Windows search bar.
-
Locating the File: Browse the Recycle Bin’s contents. Use the sorting options (Name, Original Location, Date Deleted, etc.) to quickly find your file.
-
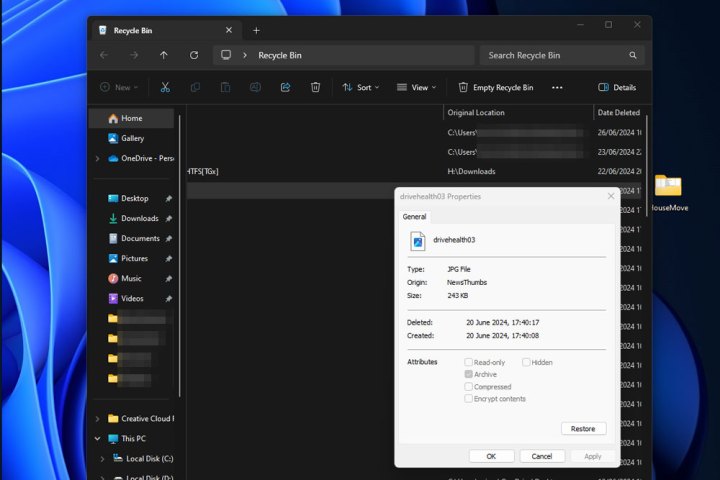
Restoring the File: Right-click the desired file and select “Restore.” Alternatively, double-click the file and click the “Restore” button.
 Restoring a file in Windows 11.Restoring a file from the Recycle Bin in Windows 11 is a simple right-click action.
Utilizing Windows File Recovery
For files deleted from the Recycle Bin or permanently deleted, Windows File Recovery provides a more advanced recovery solution. This free command-line utility from Microsoft can recover files from various storage devices.
-
Installation: Open the Microsoft Store, search for “Windows File Recovery,” and click “Get” to download and install.
-
Launching the Utility: Open the app and grant administrator permissions if prompted.
-
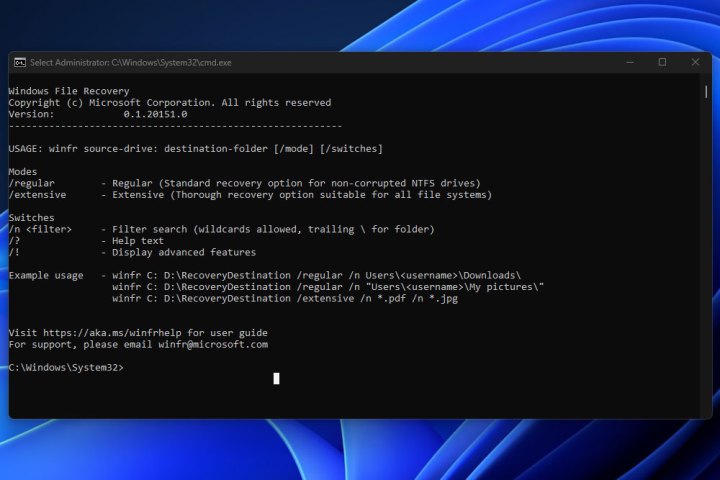
Understanding the Command Structure: Windows File Recovery utilizes a command-line interface. The basic command structure is:
winfr source-drive: destination-drive: [/mode] [/switches]. -
Example Usage: To recover the “Documents” folder from the C: drive to the E: drive, use the following command:
winfr C: E: /regular /n \Users\Username\Documents\. -
Recovering Specific File Types: Use wildcards to recover files of a specific type. For example:
winfr C: E: /regular /n *.pdf /n *.docxrecovers all deleted PDF and DOCX files from C: to E:.
 Windows file recovery.The Windows File Recovery utility provides a command-line interface for advanced file recovery.
Exploring Free File Recovery Software
While the built-in Windows tools offer robust recovery options, third-party software can provide enhanced features and functionalities. Numerous free data recovery tools are available, offering various recovery algorithms and user interfaces. Researching these options can be beneficial for complex data recovery scenarios.
Conclusion
Recovering deleted files in Windows 11 is achievable through several methods. Start with the Recycle Bin for recently deleted files. For more complex scenarios, leverage the Windows File Recovery utility or explore third-party free file recovery software. Remember to act quickly as deleted data can be overwritten, reducing the chances of successful recovery. For more detailed information on Windows File Recovery, consult the Microsoft support site.


